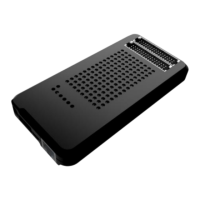
19
▪ Interface FlashRunner LAN 2.0 Next Generation with your test/programming
equipment;
▪ Connect FlashRunner LAN 2.0 Next Generation to host PC system (if you use it in
Host Mode);
▪ Power up FlashRunner LAN 2.0 Next Generation;
▪ Set up LAN settings (if you use the Ethernet connection);
3.3.1 Interfacing with your Test/Programming equipment
Build one or more ISP cables to connect FlashRunner LAN 2.0 Next Generation ISP
connectors to your target board(s). Wire up all the required connections (power,
oscillator, ISP signals) to target microcontrollers using the PinMap tool (for more
details please check the related chapter on FlashRunner 2.0 Programmer’s Manual).
3.3.2 Connecting to the Host PC System
You can connect FlashRunner LAN 2.0 Next Generation to the host system through
either the USB or LAN port.
FlashRunner LAN 2.0 Next Generation comes with a USB cable and an Ethernet
cross cable to connect directly to a host PC.
3.3.3 Powering Up
Power up FlashRunner LAN 2.0 Next Generation by connecting the included power
supply to DC plug connector.
3.3.4 Setting Up LAN Settings
If you connected FlashRunner LAN 2.0 Next Generation to the host PC using the
Ethernet connection, you need to set up the FlashRunner LAN 2.0 Next Generation IP
address. To learn how to set up the FlashRunner LAN 2.0 Next Generation address,
please refer to the FlashRunner 2.0 Programmer’s Manual.