Data Cable Connections Data Cable Connection (OBD-II/EOBD Vehicles)
12
The supplied 9 ft. (2.7 m) DA-4 data cable, includes an LED flashlight on the
vehicle DLC connector end (Figure 4-3). The LED flashlight is powered by the
diagnostic tool battery.
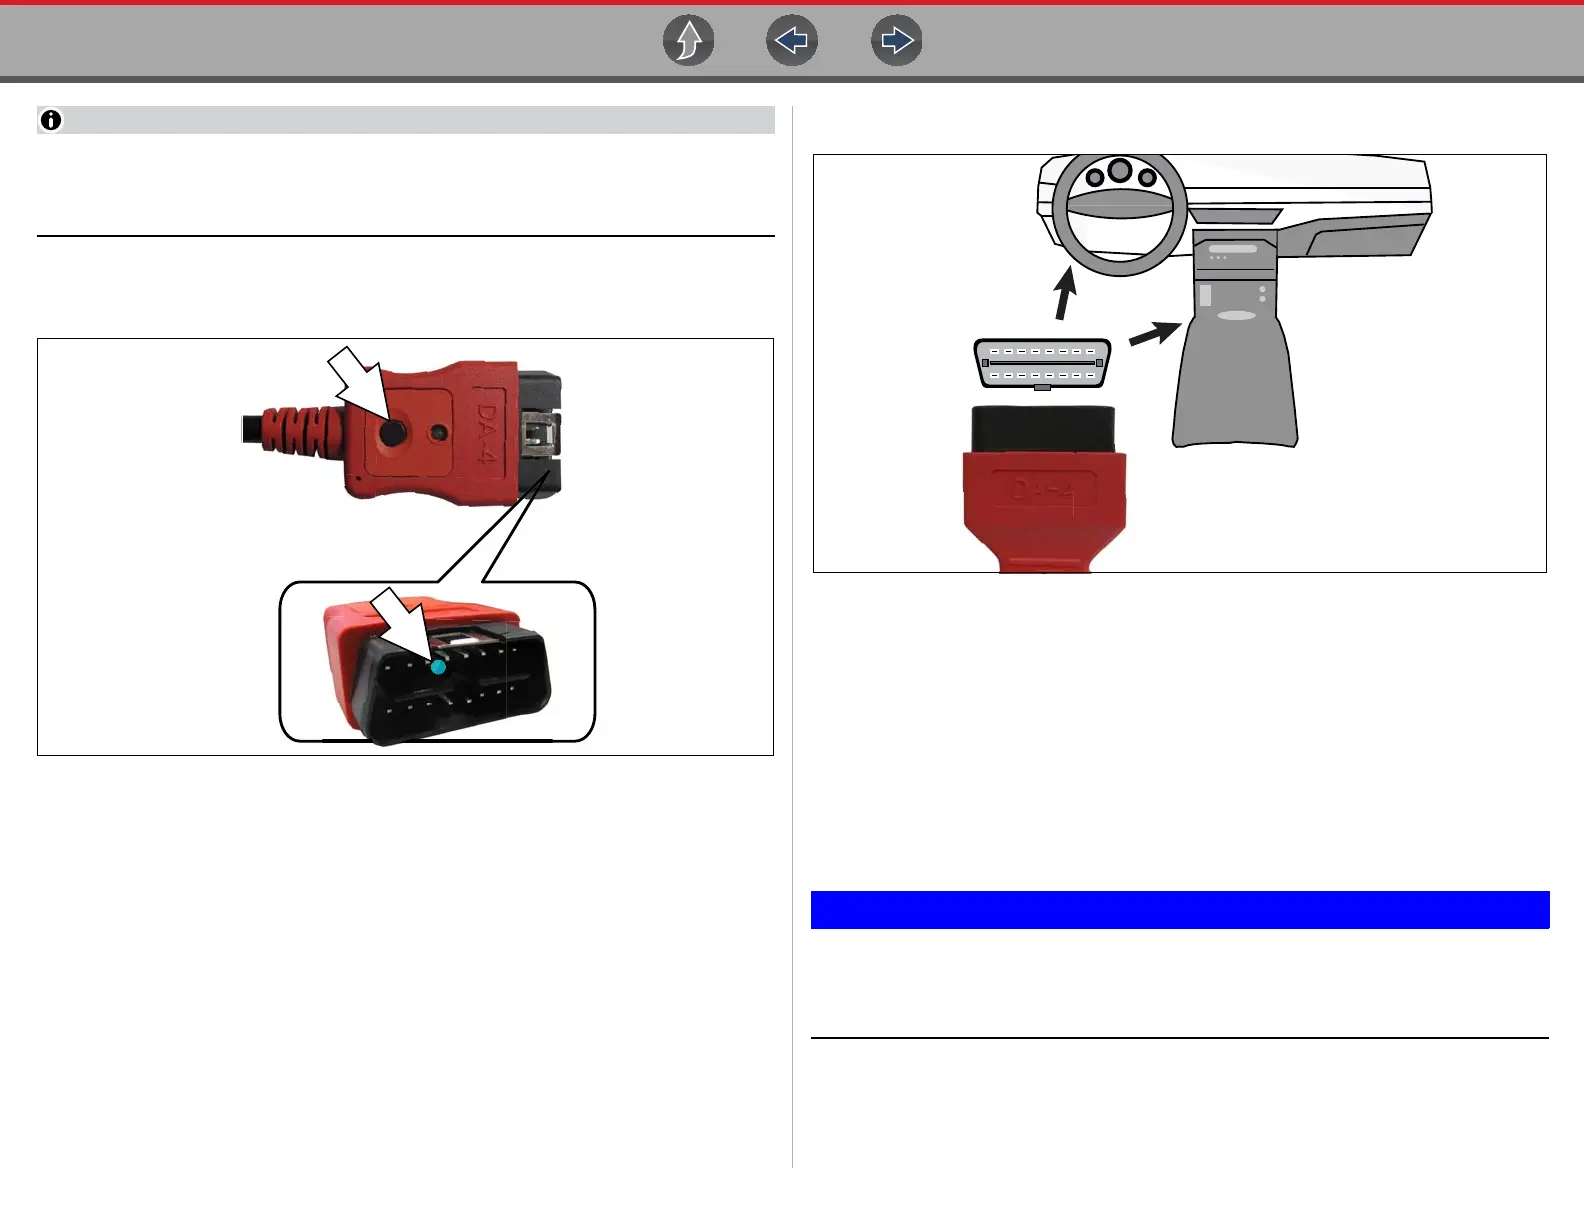
3. If needed, press the LED flashlight button switch on the end of the data cable
to turn the LED flashlight on (Figure 4-3), and locate the DLC.
Figure 4-3 DA-4 data cable LED flashlight
4. Connect the16-pin (J-1962) end of DA-4 cable (Figure 4-4) to the vehicle DLC.
Figure 4-4 DA-4 data cable (16-pin end) connection to vehicle DLC (typical DLC locations)
5. Select Continue once the data cable is connected.
The diagnostic tool establishes communication with the vehicle, then displays
a list of available tests, see Scanner - Automotive on page 19 for additional
information.
4.1.1 Optional OBD-II/EOBD Data Cable
A shorter 6 ft. (1.8 m) DA-4 OBD-II data cable is available as an option.
Contact your sales representative to purchase all optional accessories.
Only use original Snap-on data cables and accessories with your
diagnostic tool. Total data cable length must not exceed 114.17 inches
(2.9 meters).
21 3 4 5 6 7 8
109 11 12 13 14 15 16
DA-4
J-1962