46
OBD-II/EOBD OBD-II/EOBD Menu
z To perform an OBD-II/EOBD Test:
1. Select Start Communications from the OBD-II/EOBD menu.
A vehicle type options list displays:
– 12V Light Duty Vehicle
– 24V Heavy Duty/Goods Vehicle
2. Select an option from the vehicle type list.
A connection message displays.
3. Connect the data cable to the test vehicle.
4. Select Continue.
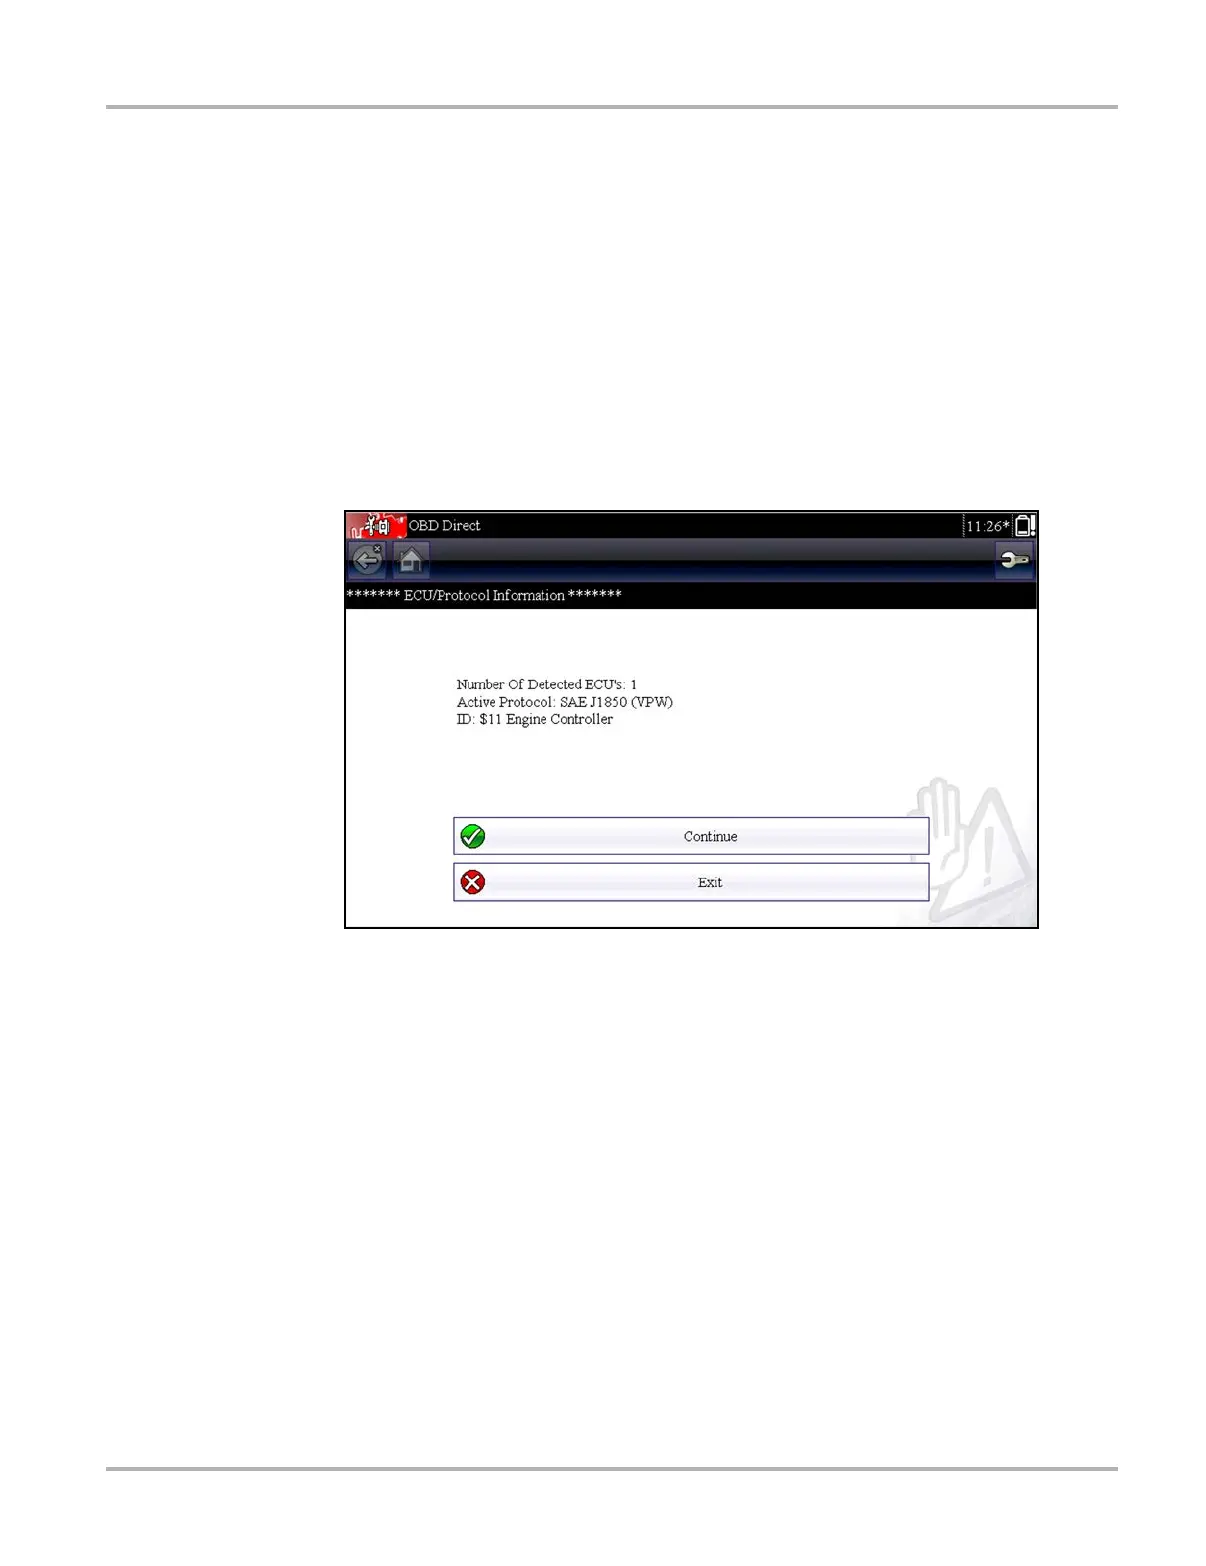
The Diagnostic Tool establishes a communication link with the test vehicle, then displays an
information screen that shows how many control modules were detected, which ECM is
communicating, and which communication protocol is being used (Figure 5-4).
Figure 5-4 Protocol information screen
5. Select Continue.
A Select Service menu of available tests displays, options include:
– Readiness Monitors‚ on page 47
– MIL Status‚ on page 47
– ($01) Display Current Data‚ on page 47
– ($02) Display Freeze Frame Data‚ on page 48
– ($03) Display Trouble Codes‚ on page 48
– ($04) Clear Emissions Related Data‚ on page 48
– ($05, 06, 07) Display Test param./Results‚ on page 49
– ($08) Request Control of On-board System‚ on page 49
– ($09) Read Vehicle Identification‚ on page 49
– ($0A) Emission Related DTC with Permanent Status‚ on page 50

 Loading...


