Manuel d'entretien et d'utilisation
user maintenance guide
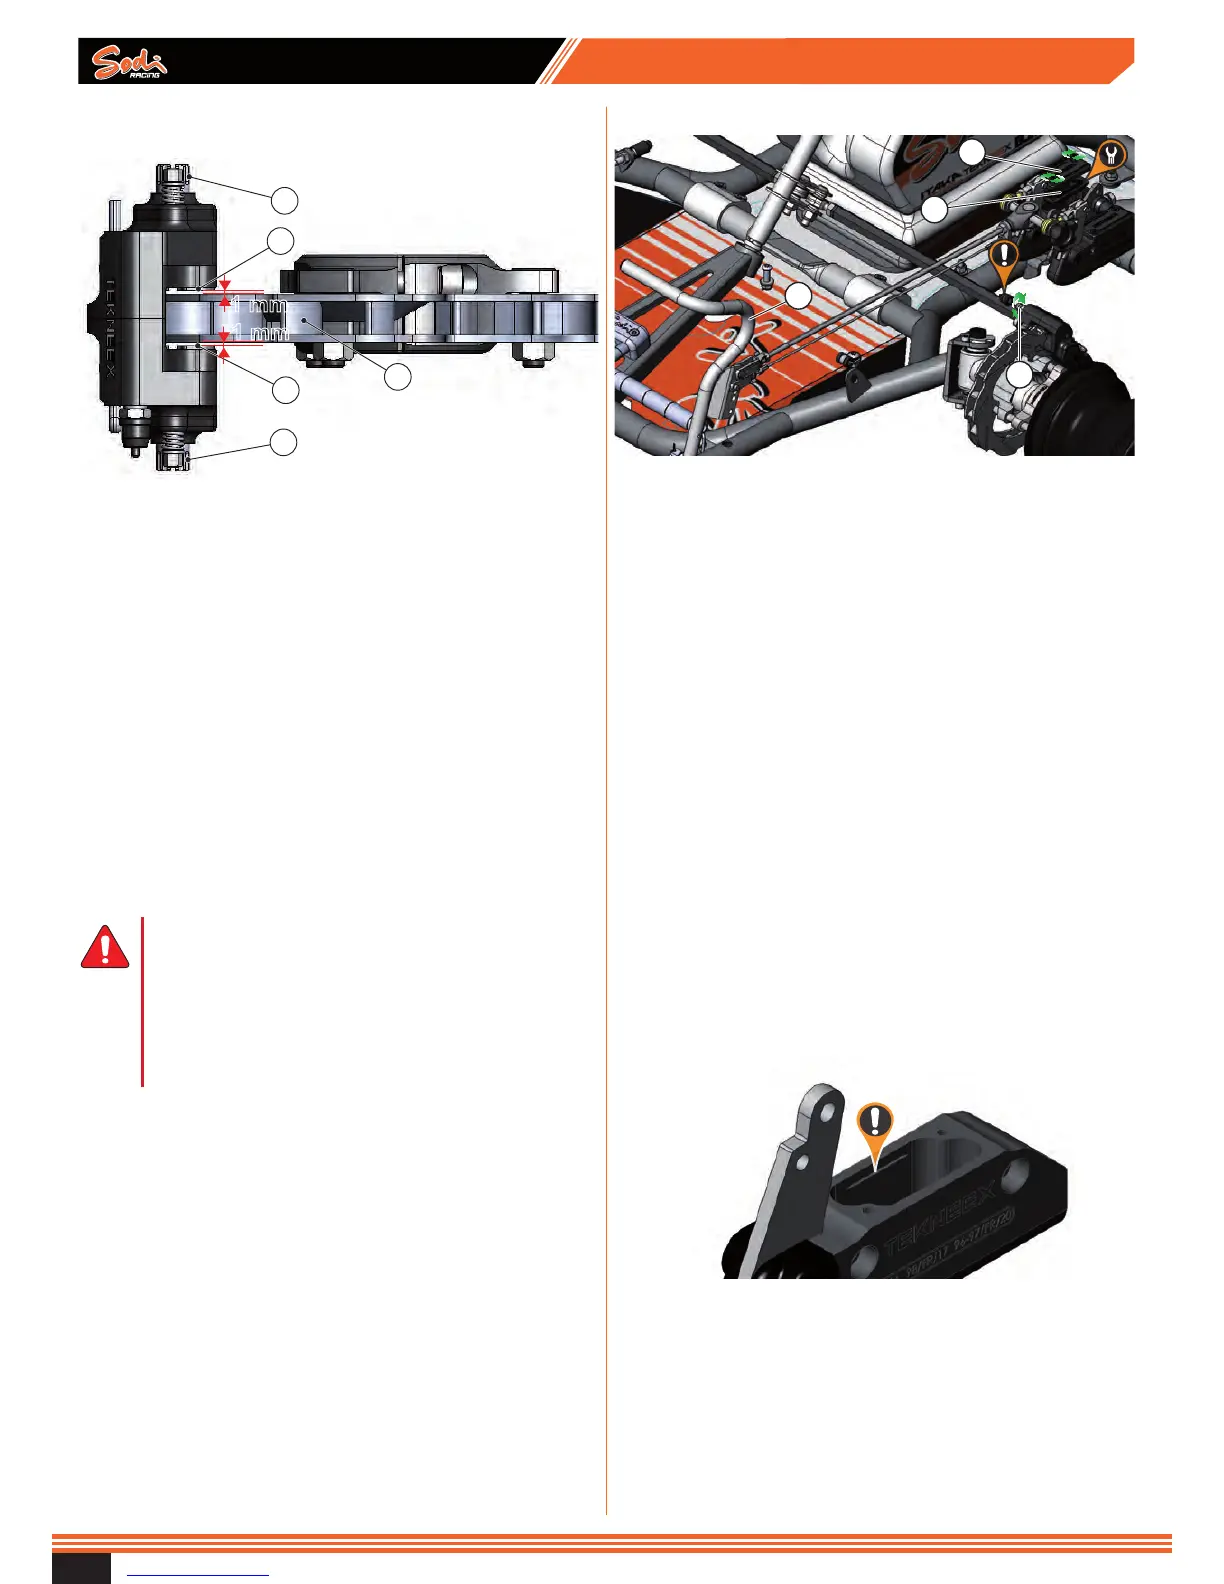
6.1.5 - Adjusting the gap between the pads and the
disc
1
3
1
3
2
1 mm
1 mm
Legend
1 Adjustment screw
2 Disc
3 Pad
● Tighten or loosen the screw (1) to obtain a 1 mm gap
between the disc (2) and the pad (3).
6.1.6 - Replacing the brake hose
● The brake uid hoses are a critical safety element. It is
very important to check their state regularly.
● Check the state of the hoses especially at connecting
points and xation points.
● Replace any damaged hose.
● Use a spanner to loosen the screw at each end of the hose
and the mounting points on the kart.
● Install a new hose with new seals and banjo screws.
● Ensure that the mounts securing the hoses to the kart are
properly tightened.
► The brake is an essential safety element.
Do not put the kart in operation if the break
system is faulty or if you have a doubt.
► Faulty braking system may lead to a serious or
even fatal injury.
► Check connexions of hoses, no leak.
► Use brake uid DOT 4 only.
6.1.7 - Bleeding the front brake circuit
2
1
3
4
Legend
1 Bleeder screw
2 Cap
3 Brake pedal
4 Diaphragm
● Use a pipe and a container to collect the used uid.
● Remove the protective caps from the bleed screws (1) on
each front calliper, and then place a hose on the bleed
screw. The other end of the hose should be placed in an
empty container.
● Gently unscrew the bleeder (1) screw and the cap (2).
● Repeatedly press the brake pedal (3) until all the uid has
drained out.
● When all the uid has been drained, remove the cap (2),
the diaphragm (4) and top up to the maximum level with
brake uid. Tighten the bleed screw (1), and then press the
brake pedal (3) three or four times.
● Loosen the bleeder screw (1) of the front right calliper.
Brake uid should ow out. Retighten the bleed screw, and
repeat this step several times to feed the circuit properly.
Remember to add brake uid to the master cylinder as
required. Bleed the circuit so that the brake uid owing
out of the hose contains no air bubbles.
● Retighten the calliper bleed screw (1), remove the pipe and
reapply the protective cap.
● Repeat the operation for the front left calliper.