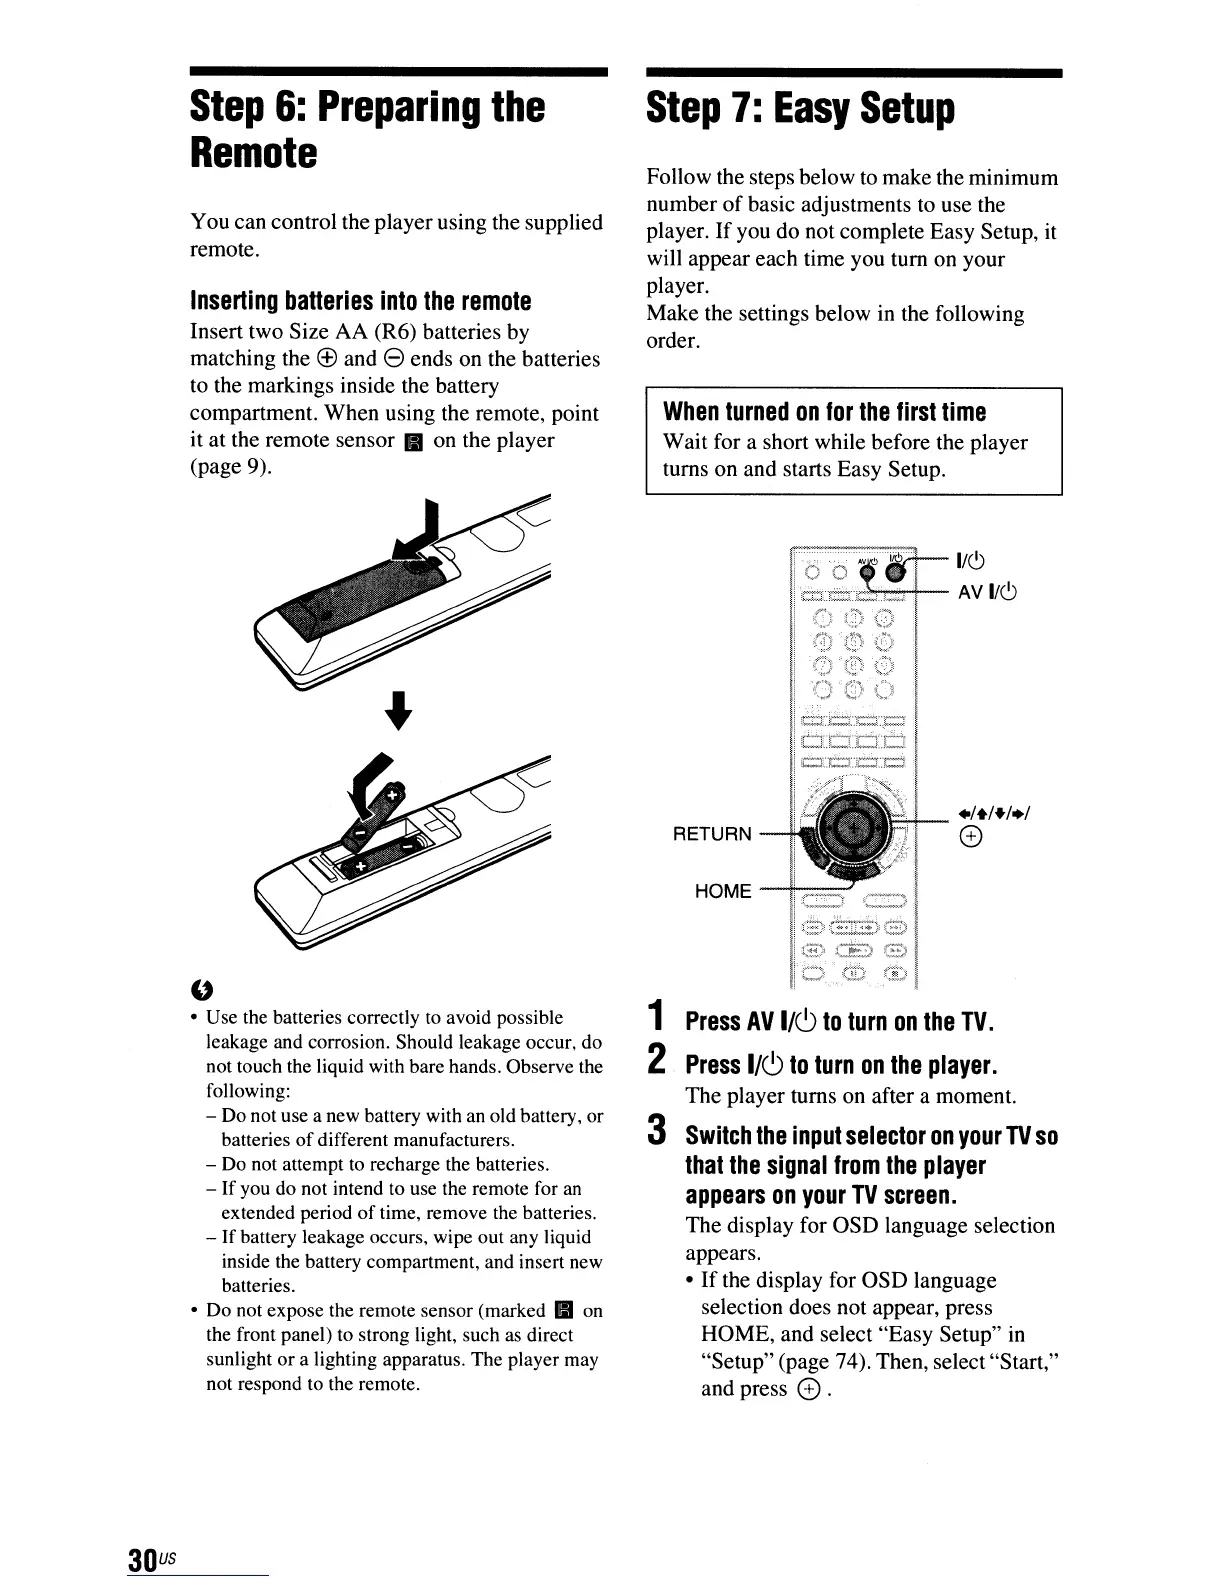
Step
6:
Prepari
ng
the
Remote
You can control the playerusing the supplied
remote.
Inserting
batteries
into
the
remote
Insert two Size AA (R6) batteries by
matching the
® and e ends on the batteries
to the markings inside the battery
compartment. When using the remote, point
it at the remote sensor
II
on the player
(page 9).
Step
7:
Easy
Setup
Follow the steps below to make the minimum
number
of
basic adjustments to use the
player.
If
you do not complete Easy Setup, it
will appear each time you tum on your
player.
Make the settings below in the following
order.
When
turned
on
for
the
first
time
Wait for a short while before the player
turns on and starts Easy Setup.
1~1~
~~V~
:(f)
~(~
.~)
'()
()
"()
'~F'd;'S
+/+/+/+;
o
:,
..
,.
. :.
~
~_
..
{r.=r:.c:;r.·.t:::i
RETURN
HOME-+-"""-.J
r'zL
i'
.;;=-~'Il
:[3:::'1
{~=)
.
I
1
Press
AV
1/6
to
turn
on
the
TV.
2
Press
I/CJ
to
turn
on
the
player.
The player turns on after a moment.
3
Switch
the
input
selector
on
your
TV
so
that
the
signal
from
the
player
appears
on
your
TV
screen.
The display for OSD language selection
appears.
•
If
the display for OSD language
selection does not appear, press
HOME, and select "Easy Setup"
in
"Setup" (page 74). Then, select"Start,"
and press
0.
u
• Use the batteries correctly
to
avoid possible
leakage and corrosion. Should leakage occur, do
not touch the liquid with bare hands. Observe the
following:
- Do not use a new battery with an old battery, or
batteries
of
different manufacturers.
- Do not attempt
to
recharge the batteries.
-
If
you do not intend to use the remote for
an
extended period
of
time, remove the batteries.
-
If
battery leakage occurs, wipe out any liquid
inside the battery compartment, and insert new
batteries.
• Do not expose the remote sensor (marked
II
on
the front panel)
to
strong light, such
as
direct
sunlight or a lighting apparatus. The player may
not respond to the remote.
30
us