68
GB
Note
• Insert the wireless transmitter with the S-AIR
logo facing up.
• Insert the wireless transmitter so that the V
marks are aligned.
• Do not insert other than the wireless transmitter
into the EZW-T100 slot.
3 Make sure to use the same screws to
secure the wireless transmitter.
Note
• Do not use other screws to fasten the wireless
transmitter.
To insert the wireless
transceiver into the S-AIR sub
unit
For details on installing the wireless transceiver
into the S-AIR sub unit, such as a surround
amplifier or S-AIR receiver, refer to the
operating instructions of the S-AIR sub unit.
Establishing sound
transmission between the
S-AIR main unit and S-AIR sub
unit (ID setting)
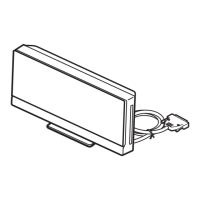
For the surround amplifier (not supplied)
For the S-AIR receiver (not supplied)
Simply by matching the ID of the S-AIR main
unit and the S-AIR sub unit, you can establish
sound transmission. You can use multiple
S-AIR main unit by setting a different ID for
each component.
To set the ID of the S-AIR main
unit
1 Press "/1 on the S-AIR main unit.
The system turns on.
2 Press FUNCTION repeatedly until
“DVD” appears in the front panel
display.
3 Press DISPLAY while the system is
in stop mode.
The Control Menu display appears on the
TV screen.
4 Press X/x to select [SETUP],
then press .
The options for [SETUP] appear.
5 Press X/x to select [CUSTOM], then
press .
The Setup Display appears.
6 Press X/x to select [AUDIO SETUP],
then press .
The options for [AUDIO SETUP] appear.
7 Press X/x to select [S-AIR SETUP t],
then press .
Note
• When the wireless transmitter is not inserted in
the S-AIR main unit, [S-AIR SETUP] cannot be
selected.
8 Press X/x to select [ID], then press .
Rear of the subwoofer
 Loading...