— 3 —
TABLE OF CONTENTS
SERVICE NOTE
1. POWER SUPPLY DURING REPAIRS ····························· 6
2. TO TAKE OUT A CASSETTE WHEN NOT EJECT
(FORCE EJECT) ································································ 6
SELF-DIAGNOSIS FUNCTION
1. SELF-DIAGNOSIS FUNCTION ······································· 7
2. SELF-DIAGNOSIS DISPLAY ·········································· 7
3. SERVICE MODE DISPLAY ············································· 7
3-1. Display Method ·································································· 7
3-2. Switching of Backup No. ··················································· 7
3-3. End of Display ···································································· 7
4. SELF-DIAGNOSIS CODE TABLE··································· 8
1. GENERAL
Welcome!···················································································1-1
Checking supplied accessories ··················································1-1
Quick Start Guide ······································································1-1
Getting Started ···········································································1-2
Using this manual ··································································1-2
Step 1 Preparing the power supply·······································1-2
Step 2 Inserting a cassette ····················································1-4
Recording – Basics ····································································1-4
Recording a picture ································································1-4
Checking the recording
– END SEARCH/EDIT SEARCH/Rec Review ····················1-7
Playback – Basics ······································································1-7
Playing back a tape ································································1-7
Viewing the recording on TV ················································1-9
Advanced Recording Operations ···············································1-9
Photo recording······································································1-9
Using the wide mode ···························································1-10
Using the fader function ······················································1-11
Using special effects – Picture effect ···································1-11
Using special effects – Digital effect ···································1-12
Adjusting the white balance manually·································1-13
Using the PROGRAM AE function ·····································1-13
Adjusting the exposure manually ········································1-14
Focusing manually·······························································1-14
Advanced Playback Operations···············································1-15
Playing back a tape with picture effects ······························1-15
Playing back a tape with digital effects ·······························1-15
Quickly locating a scene using the
zero set memory function ·····················································1-15
Searching a recording by date – Date search – ····················1-16
Searching the boundaries of recorded tape by title
– Title search ········································································1-16
Searching for a photo – Photo search/Photo scan················1-16
Editing ·····················································································1-17
Dubbing a tape ·····································································1-17
Editing partially on a DV tape – DV synchro-editing
(DCR-TRV10E only) ···························································1-18
Audio dubbing ·····································································1-18
Superimposing a title ···························································1-19
Making your own titles ························································1-20
Labeling a cassette ·······························································1-20
Customizing Your Camcorder ·················································1-21
Changing the MENU settings ··············································1-21
Resetting the date and time ··················································1-22
Memory Stick Operations························································1-23
Using a memory stick – introduction···································1-23
Recording still images on memory sticks
– Memory photo recording ··················································1-24
Recording an image from a mini DV tape
as a still image ·····································································1-25
Copying still images from a recorded tape – Photo save ·······1-26
Viewing a still picture – Memory photo playback···············1-26
Superimposing a still picture in a memory stick on a moving
picture– M. CHROM/M. LUMI/C. CHROM ······················1-27
Preventing accidental erasure – Image protection ···············1-28
Writing a print mark – PRINT MARK ································1-29
Deleting images ···································································1-29
Playing back images in a continuous loop
–SLIDE SHOW ···································································1-30
Additional Information ····························································1-30
Usable cassettes ···································································1-30
Troubleshooting ···································································1-31
Self-diagnosis display ··························································1-32
Warning indicators and messages ········································1-32
Using your camcorder abroad··············································1-33
Maintenance information and precautions···························1-33
Quick Reference ······································································1-34
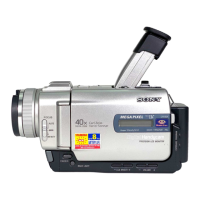
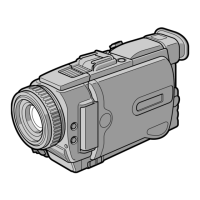
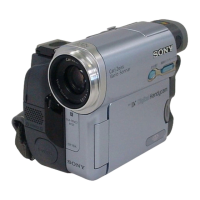
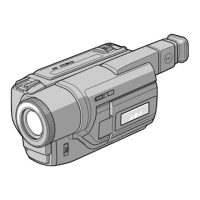
Identifying the parts and controls ········································1-34
2. DISASSEMBLY
2-1. LCD PANEL (PD-110 BOARD,
INVERTOR TRANS UNIT) ···········································2-1
2-2. FRONT PANEL ASSEMBLY ·········································2-2
2-3. CABINET (L), BT PANEL ASSEMBLY ·······················2-2
2-4. EVF ·················································································2-3
2-5. LB-60 BOARD································································2-3
2-6. DD-123 BOARD, VC-217 BOARD ·······························2-4
2-7. MECHANISM DECK·····················································2-4
2-8. CS FLAME ASSEMBLY ················································2-5
2-9. LENS, OUTER CONNECTOR (HOT SHOE),
JK-170 BOARD ······························································2-5
2-10. MS SHASSIS,
CONTROL SWITCH BLOCK (PS-4550) ······················2-6
2-11. CK-84 BOARD, SPEAKER ···········································2-6
2-12. LCD, CONTROL SWITCH BLOCK ·····························2-7
2-13. SERVICE POSITION
(Mainly for voltage measurement and check) ·················2-8
2-14. CIRCUIT BOARD LOCATION ·····································2-9
2-15. FLEXIBLE BOARDS LOCATION ······························2-10
3. BLOCK DIAGRAMS
3-1. OVERALL BLOCK DIAGRAM (TRV8/TRV8E) ·········3-1
3-2. OVERALL BLOCK DIAGRAM (TRV10/TRV10E) ·····3-5
3-3. POWER BLOCK DIAGRAM·········································3-9
4. PRINTED WIRING BOARDS AND
SCHEMATIC DIAGRAMS
4-1. FRAME SCHEMATIC DIAGRAM································4-1
4-2. PRINTED WIRING BOARDS AND
SCHEMATIC DIAGRAMS ············································4-4
•FP-83 (CCD IMAGER)
PRINTED WIRING BOARD AND
SCHEMATIC DIAGRAM ······························4-6
•VC-217 (FOCUS/ZOOM MOTOR DRIVE)(1/11)
SCHEMATIC DIAGRAM ······························4-9
•VC-217 (CAMERA)(2/11)
SCHEMATIC DIAGRAM ····························4-12
•VC-217 (BLOCKING COMPRESS)(3/11)
SCHEMATIC DIAGRAM ····························4-15
•VC-217 (VIDEO INTERFACE)(4/11)
SCHEMATIC DIAGRAM ····························4-18
•VC-217 (DV PROCESS)(5/11)
SCHEMATIC DIAGRAM ····························4-21
•VC-217 (REC/PB HEAD AMP)(6/11)
SCHEMATIC DIAGRAM ····························4-25
•VC-217 (VIDEO IN/OUT)(7/11)
SCHEMATIC DIAGRAM ····························4-29