When pressing AUTO TOUCH-UP cannot
reduce the red-eye phenomenon
of
a subject
shot by flash, you can adjust the image
manually.
If
you perform additional editing, such as enlarging,
reducing the image size, rotating
or
moving an image,
after the red-eye correction, the red-eye correction
may not take effect. Perform the red-eye correction
after these editorial operations.
1 From the
':,J.
Edit menu (page 18),
press
<lIt> to select
r,)
(Red-eye
Correction) and then press ENTER.
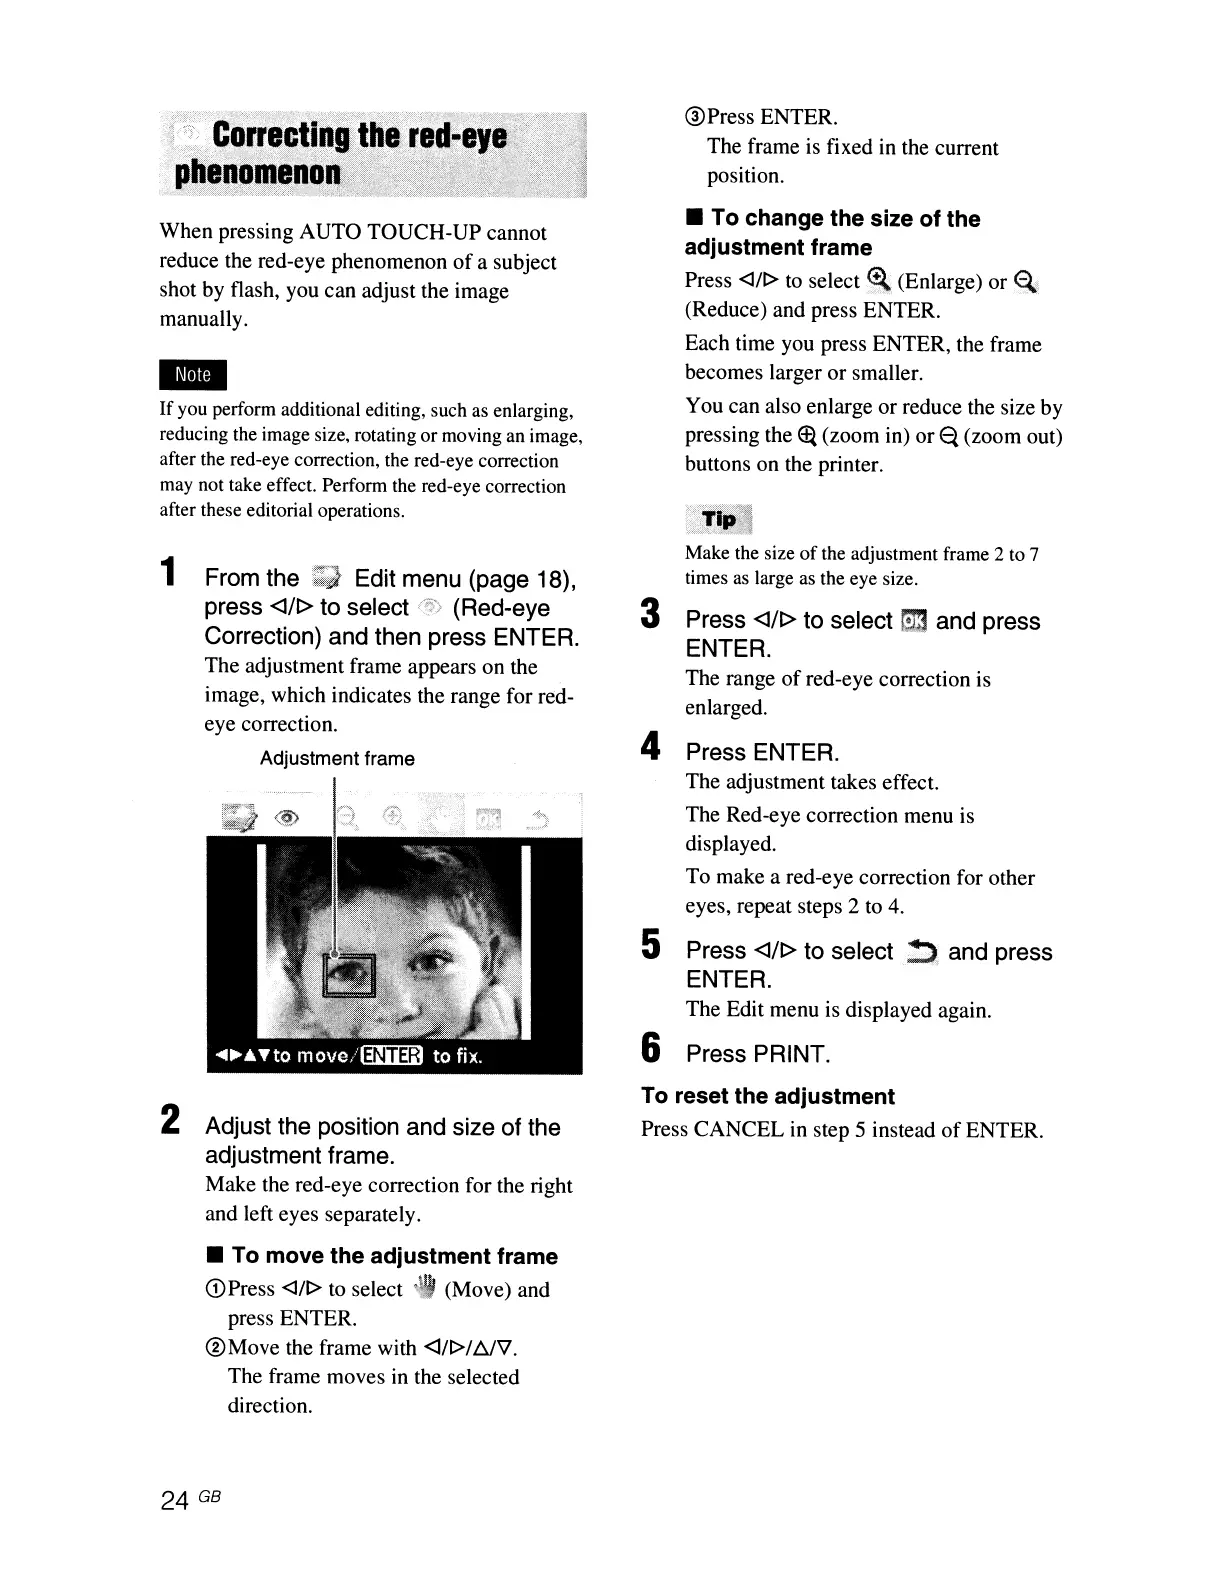
The adjustment frame appears on the
image, which indicates the range for red-
eye correction.
Adjustment frame
2 Adjust the position and size of the
adjustment frame.
Make the red-eye correction for the right
and left eyes separately.
• To move the adjustment frame
(DPress
<III>
to
select"
(Move) and
press ENTER.
®Move
the frame with <l/l>lbJ'l.
The frame moves in the selected
direction.
24 GB
®Press ENTER.
The frame is fixed
in
the current
position.
• To change the size of the
adjustment frame
Press
<III>
to
select
~
(Enlarge) or
~.
(Reduce) and press ENTER.
Each time you press ENTER, the frame
becomes larger or smaller.
You can also enlarge
or
reduce the size by
pressing the
~
(zoom in) or
~
(zoom out)
buttons on the printer.
Make the size
of
the adjustment frame 2 to 7
times
as
large as the eye size.
3 Press <lIt> to select
l:J:J
and press
ENTER.
The range
of
red-eye correction is
enlarged.
4 Press ENTER.
The adjustment takes effect.
The Red-eye correction menu is
displayed.
To make a red-eye correction for other
eyes, repeat steps 2 to
4.
5 Press <lIt> to
select~.
and press
ENTER.
The Edit menu is displayed again.
6 Press PRINT.
To reset the adjustment
Press CANCEL in step 5 instead
of
ENTER.