1 Press PRINT.
The print quantity indication is displayed.
2 Set the print quantity.
• To increase the print quantity one by
one, press
~
repeatedly.
• To reduce the print quantity one by one,
press
'V
briefly repeatedly.
• To reset the print quantity to I, press
'V
for more than two seconds.
3 Press PRINT.
1 Select
POEJ
(Save) and then press
ENTER.
The dialog box used to specify the
destination folder
is
displayed.
2 Select the destination where you
want to save the image.
Press
DJ'V
to select "Memory Stick,"
"CompactFlash," "SO Card," "xD-Picture
Card" or "External Device," and press
ENTER.
When you select "External Device," a dialog
box for selecting a drive may be displayed.
Fol1ow the instructions
on
the screen to select
the destination drive.
The dialog box used for setting a date is
displayed. You can save the set date with
the image.
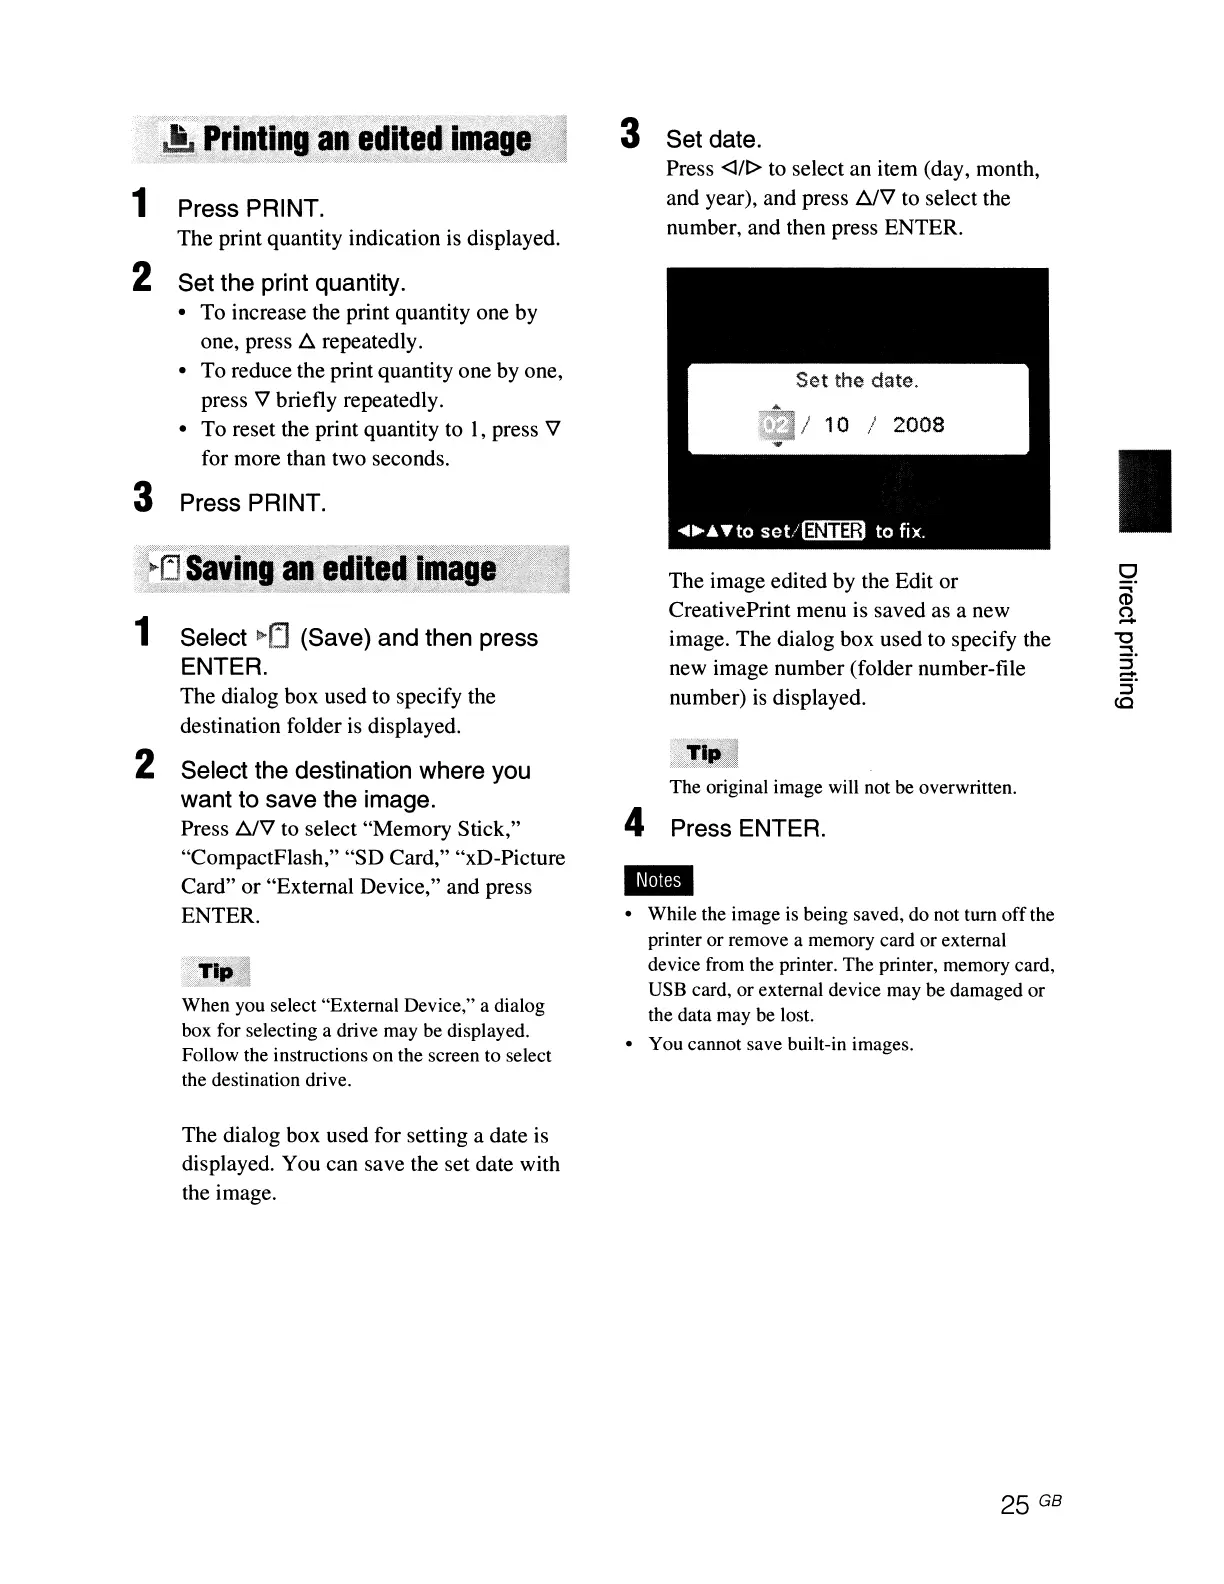
3 Set date.
Press <lIt> to select an item (day, month,
and year), and press
DJ'V
to select the
number, and then press ENTER.
Set
the date.
/
10
/
2008
I
~~.A't'to
set.'l3Iiiii)
to
fix.
The image edited by the Edit or
CreativePrint menu is saved as a new
image. The dialog box used to specify the
new image number (folder number-file
number)
is
displayed.
The original image will not be overwritten.
4 Press ENTER.
--
• While the image is being saved, do not turn offthe
printer
or
remove a memory card
or
external
device from the printer. The printer, memory card,
USB card, or external device may be damaged
or
the data may be lost.
• You cannot save built-in images.
25 GB
I