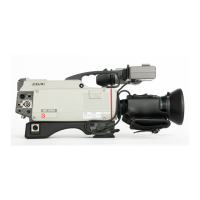
DXC-D30(UC)
DXC-D30P(CE)
1-35
68
Chapter 4 Viewfinder Screen Indications and Menus
Chapter 4 Viewfinder Screen Indications and Menus
Using SetupNavi and SetupLog with the DSR-1/1P
Recording the Menu Settings
onto a Tape
1
Connect the DSR-1/1P and load the tape onto
which the settings are to be recorded. Turn the
camera power on.
2
Make your basic menu settings.
For details of this operation, see “Basic Menu
Operations” (page 51).
3
Again, set the POWER switch to ON while
holding down the UP/ON button.
4
Make your advanced menu settings.
For details of this operation, see “Advanced Menu
Operations” (page 57).
5
Access advanced menu page 14.
PAGE14(NEXTm$ PREVm4)
SETUP NAVI
CAMERAmTAPE
mSTORE DATA
(YESm4)
EXIT MENU (YESm4)
“NO TAPE” appears if you neglected to load a
cassette.
6
Press the UP/ON button.
The following display appears.
PAGE14(NEXTm$ PREVm4)
SETUP NAVI
CAMERAmTAPE
mSURE TO STORE?
(YESm4)
NAME SET :
(YESm4)
( )
EXIT MENU (YESm4)
7
Set the cursor to “NAME SET” and press the UP/
ON button to record the menu setting onto the tape.
(Press the DOWN/OFF button without changing
the cursor position to cancel.)
The cursor (→) changes to the text entry cursor
(↓).
PAGE14(NEXTm$ PREVm4)
SETUP NAVI
CAMERAmTAPE
SURE TO STORE?
(YESm4)
NAME SET :
µ
( )
EXIT MENU (YESm4)
8
Enter a name for the data.
Moving the text entry cursor: Press the MENU
STATUS switch up to move the cursor to the
right, and press the MENU STATUS switch
down to move the cursor to the left.
Selecting the character: Press the UP/ON or
DOWN/OFF button repeatedly until the desired
character appears.
9
After completing text entry, move the cursor to the
parenthesis position.
The display changes as follows.
PAGE14(NEXTm$ PREVm4)
SETUP NAVI
CAMERAmTAPE
SURE TO STORE?
(YESm4)
mNAME SET :
(YESm4)
MY FILE
EXIT MENU (YESm4)
10
Move the cursor to “SURE TO STORE?” and
press the UP/ON button to record the menu
settings onto the tape (press the DOWN/OFF
button to cancel).
The display changes as follows and the data
recording begins.
PAGE14(NEXTm$ PREVm4)
SETUP NAVI
CAMERAmTAPE
mCANCEL TO STORE
(YESm$)
SETUP NAVI
MY FILE
EXIT MENU (YESm4)
Name of data
being recorded
Chapter 4 Viewfinder Screen Indications and Menus
69
Chapter 4 Viewfinder Screen Indications and Menus
To abort the data recording while in progress
Press the DOWN/OFF button.
After the data has been recorded, the following display
appears.
PAGE14(NEXTm$ PREVm4)
SETUP NAVI
CAMERAmTAPE
mSTORE DATA
DONE
EXIT MENU (YESm4)
Viewing SetupLog Data
1
Connect the DSR-1/1P and load the tape that
contains the recording to be viewed. Turn the
camera power on.
2
Play back the tape.
For details of playback operation, see the operating
instructions for the DSR-1/1P.
3
Press the MENU/STATUS switch up to the
STATUS side.
The display changes to page 1 of the status display.
PLA TAPE NEAR END
TCG 2:34 56:1:00
A
TW
EZ
E
VS
R
ND
0849
224MP
S1/00:0S1
:
3-520
U FILE: STD
+ :OFF
N
P
DTL:OFF
T
C
I
E
C
K
S
D
S
T :A5600EIHW
R S:SPOT LII.A
Y
P LOG1/3UTES
18
42
Each time you press upward the MENU/STATUS
switch, the status display cycles through the status
pages and playback display in the order: page 2,
page 3, the playback display (containing the
current settings), and page 1.
Status display (page 2)
PLA TAPE NEAR END
TCG 2:34 56:1:00
A
TW
EZ
E
VS
R
08 4429
224MP
S1/00:0S1
:
3-520
Y
P LOG2/3UTES
R S:±0
R S:SPOT L
U FILE: STD
+ :OFF
N
I
I
P
DTL:OFF
I
I
T
C
I
.
.
E
C
K
A
A
S
D
S
18
ND
PLA TAPE NEAR END
TCG 2:34 56:1:00
A
TW
EZ
E
VS
R
08 4429
224MP
:
3-520
Y
P LOG3/3UTES
A MA:±0
T LEV : +50
REQ:M
N
M
L
F
HUE:±0
G
D
L
I
.
T
K
M
V
D
S
N SAT : ±0IKS
: ±0 EUH
: ±0TAS
18
ND
Notes
In the following cases, changed settings that were not
recorded may appear as blank settings.
• SetupLog data is overwritten at intervals of a few
seconds during recording. If the settings are changed
frequently for certain items, it may not always be
recorded in time.
• If the recording time is very short, recording may be
ended before all of the data has been overwritten.
Settings during
recording