10
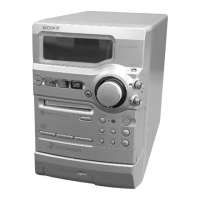
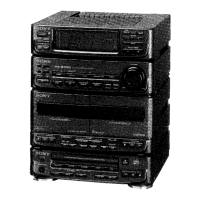
IOP DATA RECORDING AND DISPLAY WHEN OPTICAL PICK-UP AND NON-VOLATILE MEMORY (IC195 OF BD
(MD) BOARD) ARE REPLACED
The IOP value labeled on the optical pick-up can be recorded in the non-volatile memory. By recording the value, it will eliminate the need
to look at the value on the label of the optical pick-up. When replacing the optical pick-up or non-volatile memory (IC195 of BD (MD)
board), record the IOP value on the optical pick-up according to the following procedure.
Record Procedure:
1. Press the I/1 button to turn the power on.
2. Press the [FUNCTION] button to set the MD function.
3. Press three buttons of x , [MD ] and Z (CD3) simultaneously to enter the MD test mode and display “[Check]”.
4. Turn the [ENTER/YES] knob to display “[Service]”.
5. Press the [ENTER/YES] button to display “AUTO CHECK” (C01), and turn the [ENTER/YES] knob to display “Iop Write” (C05).
6. Press the [ENTER/YES] button.
7. The display becomes “Ref= @@@.@” (@ is an arbitrary number) and the numbers which can be changed will blink.
8. Input the IOP value written on the optical pick-up.
To select the number : Turn the [ENTER/YES] knob.
To select the digit : After press the [CD SYNC NORM SPEED] button to lights up the “IT” indication, press the [REC MODE]
button.
9. When the [ENTER/YES] button is pressed, the display becomes “Measu=@@@.@” (@ is an arbitrary number).
10. As the adjustment results are recorded for the step 8 value. Leave it as it is and press the [ENTER/YES] button.
11. “Complete!” will be displayed momentarily. The value will be recorded in the non-volatile memory and the display will become “Iop
Write” (C05).
12. Press the [REPEAT] button to complete. “Initialize” will be displayed and release the MD test mode.
Display Precedure:
1. Press the I/1 button to turn the power on.
2. Press the [FUNCTION] button to set the MD function.
3. Press three buttons of x , [MD ] and Z (CD3) simultaneously to enter the MD test mode and display “[Check]”.
4. Turn the [ENTER/YES] knob to display “[Service]”.
5. Press the [ENTER/YES] button to display “AUTO CHECK” (C01), and turn the [ENTER/YES] knob to display “Iop Read” (C26).
6. Press the [ENTER/YES] button.
7. “@@.@/##.#” is displayed and the recorded contents are displayed.
@@.@ : Indicates the Iop value labeled on the pick-up.
##.# : Indicates the Iop value after adjustment.
8. Press the [REPEAT] button to complete. “Initialize” will be displayed and release the MD test mode.
WHEN MEMORY NG IS DISPLAYED
If the nonvolatile memory data is abnormal, “E001 MEMORY NG” will be displayed so that the MD deck does not continue operations.
In this case, set the test mode promptly and perform the following procedure.
Procedure:
1. Enter the MD test mode (refer to page 32).
2. Normally a message for selecting the test mode will be displayed. However if the nonvolatile memory is abnormal, the following will be
displayed “INIT EEP?”.
3. Press three buttons of x , [MD ] and [REC MODE] simultaneously.
4. Turn the [ENTER/YES] knob to display “MDM-7X2A”.
5. After press the [CD SYNC NORM SPEED] button to lights up the “IT” indication, press the [REC MODE] button. If the nonvolatile
memory is successfully overwritten, the normal MD test mode will be set and a message to select the MD test mode will be displayed.
N X
N X
N X
w
w
w
.
x
i
a
o
y
u
1
6
3
.
c
o
m
Q
Q
3
7
6
3
1
5
1
5
0
9
9
2
8
9
4
2
9
8
T
E
L
1
3
9
4
2
2
9
6
5
1
3
9
9
2
8
9
4
2
9
8
0
5
1
5
1
3
6
7
3
Q
Q
TEL 13942296513 QQ 376315150 892498299
TEL 13942296513 QQ 376315150 892498299
http://www.xiaoyu163.com
http://www.xiaoyu163.com