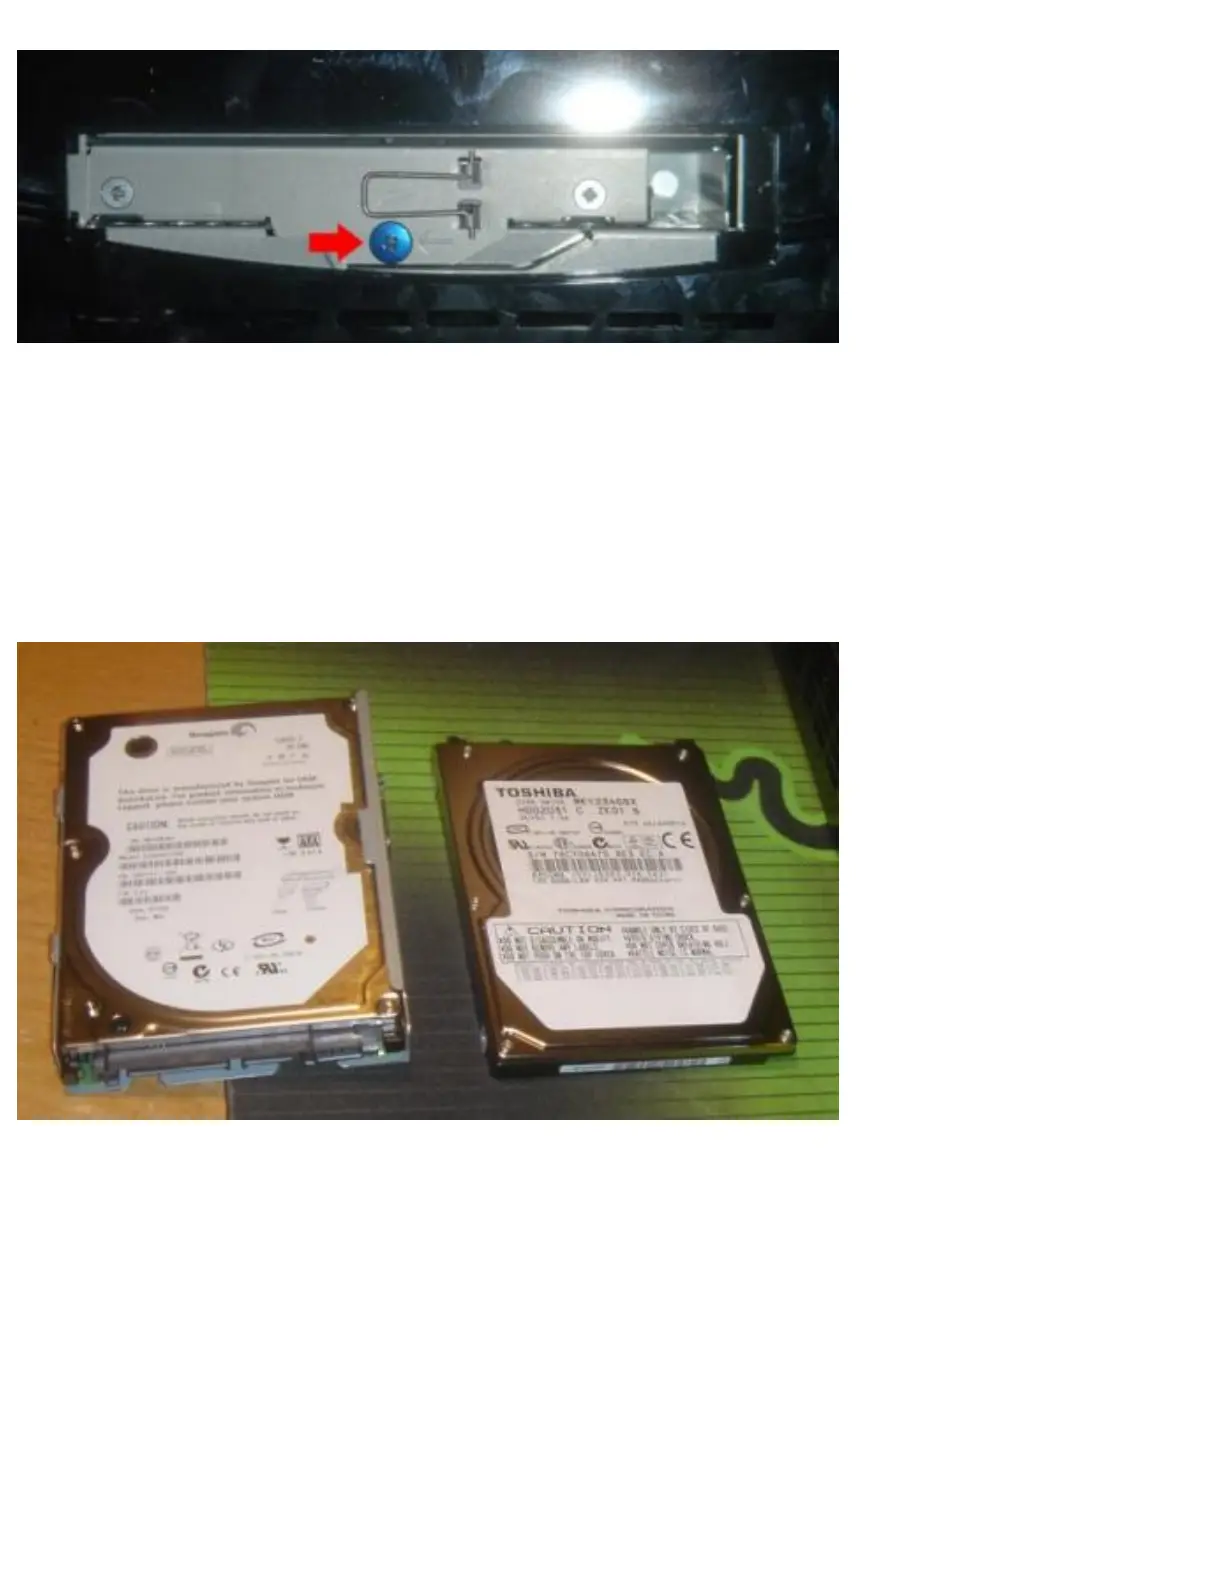
The next step is to remove the blue screw that holds the HDD caddy in place using the Phillips head
screwdriver. Once you have done so, flip up the metal handle that is on the front of the caddy, and slide
the HDD towards the FRONT of the Playstation 3 to dislodge it. Once you have done so you can
remove the HDD tray.
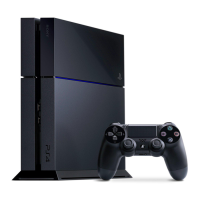
Once you have access to the tray outside the PS3, you can take out the 4 screws which hold the original
Playstation 3 HDD in place, and swap in your new 2.5MM SATA Notebook HDD.
Once the new HDD is secured in the HDD caddy, you need to place the caddy back inside the PS3 unit,
and slide it toward the REAR of the console to lock it in place. Once you have done so, the final step is
to use your Phillips head screwdriver to replace the blue screw which anchors the HDD caddy to the
Playstation 3. Pop on the plastic cover, and boot up the console.