1-4
18
Basic hookups
Hookup 2 : DVD-VCR setup
Notes
• If you connect the AC power cord before the antenna connections are completed, the channels
may be incorrectly set. If this happens, see “Step 6 : Presetting channels” on page 26.
•Do not press any buttons on the DVD-VCR or remote commander during Auto preset.
•Auto preset starts automatically only when you plug in the AC power cord for the first time
after you purchase the DVD-VCR.
•Auto preset can be performed by pressing x on the unit
continuously for 5 seconds or more
with the DVD-VCR power turned off.
Plug the DVD-VCR into an AC outlet.
The DVD-VCR automatically presets the DVD-VCR’s clock and TV channels
when the DVD-VCR is plugged into the AC outlet.
The DVD-VCR starts presetting the
clock and channels.
When Auto preset is completed, the
current time appears in the display
window.
Yo u have now completed DVD-VCR setup.
To change the on-screen display language to French or Spanish, see
“Step 4 : Selecting a language” on page 20.
The clock is set using a time signal provided by some TV channels. If the clock
is incorrect, or “–:–” appears in the display window, see “Using Manual Clock
Set” on page 24.
To add or disable channels manually, see “Presetting/disabling channels
manually” on page 28.
AC power cord
to AC outlet
Getting Started
19
Basic hookups
Hookup 3
Connecting a cable box with many scrambled channels
Recommended use
Use this hookup if your cable system scrambles all or most channels.
What you can do with this hookup
•Record any channel by selecting the channel on the cable box
What you cannot do
•Record with the cable box turned off
•Record one channel while watching another channel
After you have completed hookup…
After you have completed hookup, plug the DVD-VCR into an AC outlet and see
“Step 4 : Selecting a language” on page 20.
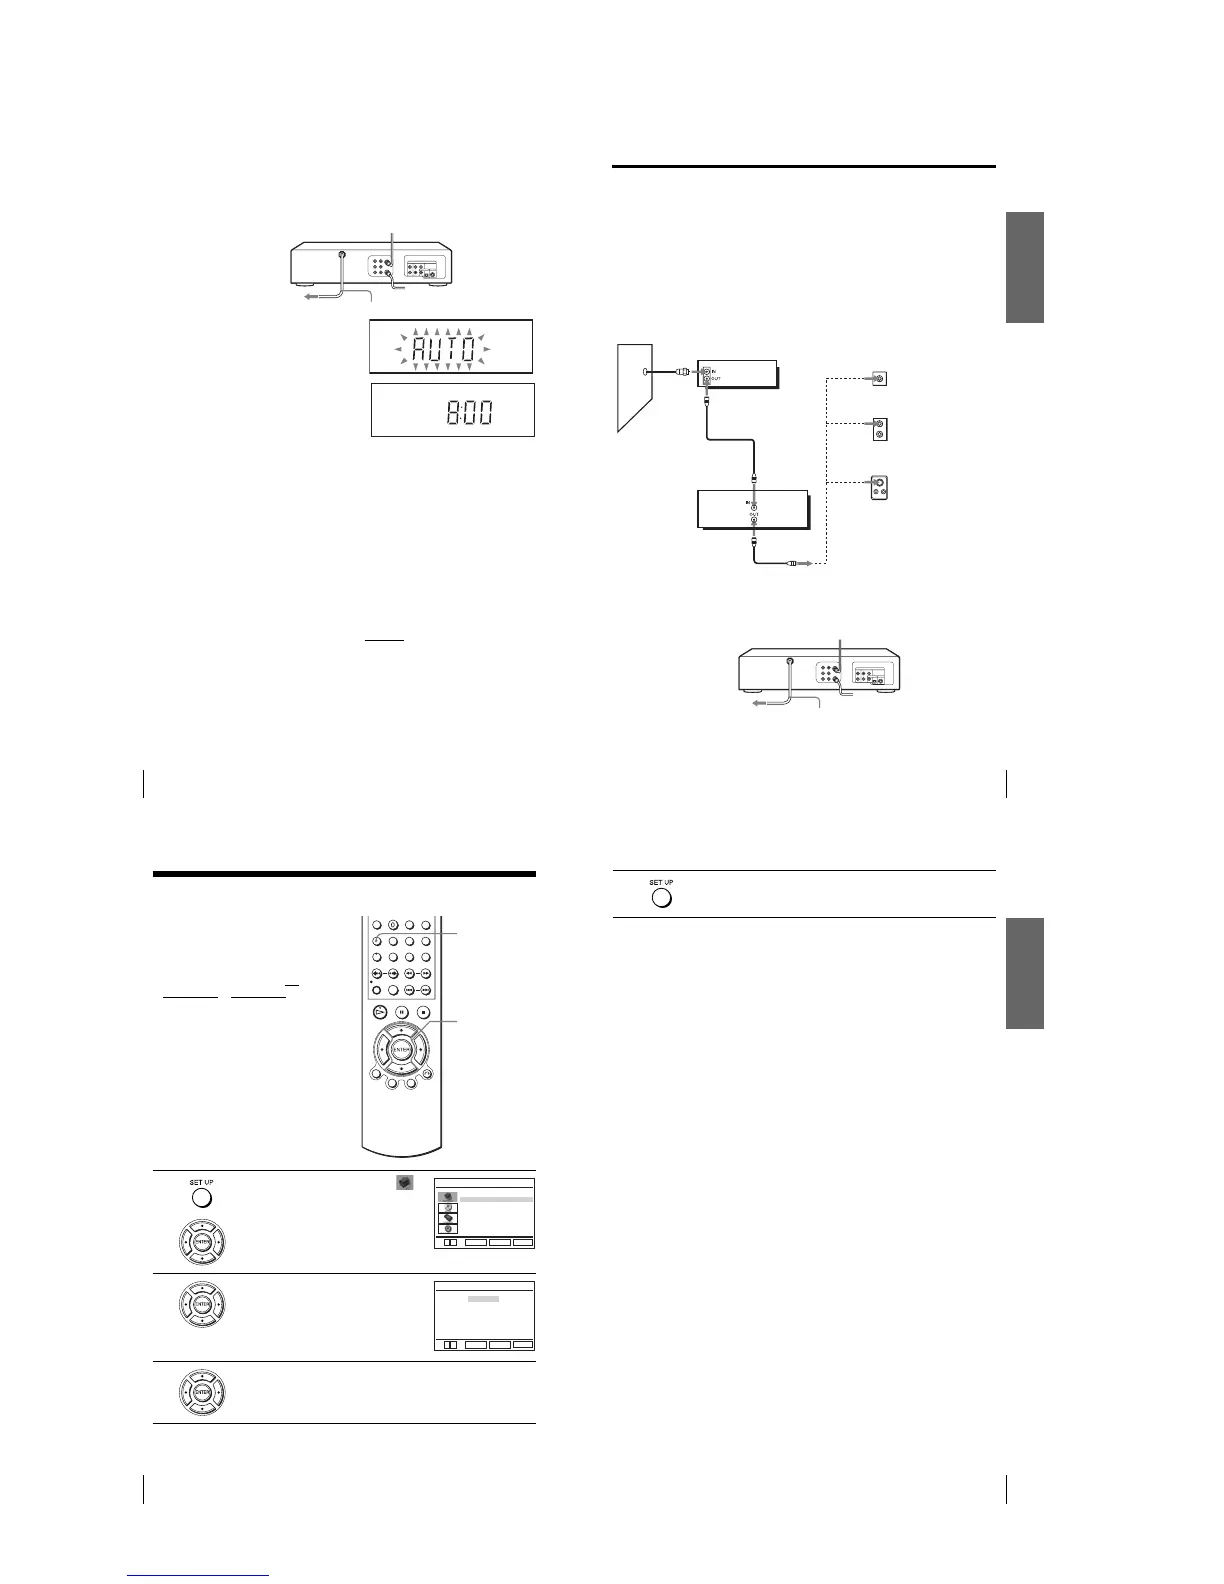
Rear of TV
VHF/UHF
VHF
UHF
DVD-VCR
Match the type of
connector on your
TV: A, B, or C.
For connector
types B and C, no
UHF connection
is required.
B
C
or
or
Cable box
A
VHF
UHF
Wall
to AC outlet
AC power cord
20
Selecting a language
Step 4 : Selecting a language
Yo u can change the on-screen display
language.
Before you start…
•Turn on the DVD-VCR and your TV.
•To control the DVD-VCR, set TV
/
DVD·VIDEO
to DVD·VIDEO on the
remote (page 10).
•Set the “RF Output Channel” to “3CH” or
“4CH” in “OPTION SETUP” menu
(page 110). If your TV is connected to the
DVD-VCR using A/V connections, set the
TV to video input.
• If the DVD player is in play mode, you
cannot display the setup menu. Stop the
DVD playback.
1
Press SET UP, then press V/v to select
(OPTION) and press ENTER.
2
Press V/v to select “Language”, then press
ENTER.
The “LANGUAGE/IDIOMA/LANGUE”
menu appears.
3
Press V/v to select the desired language, English, Spanish or French, then
press ENTER.
V/v
ENTER
SET UP
Language
Channel Setup
Auto Power Off
RF Output Channel
Clock Set/Adjust
:English
[ Off ]
[3CH]
RETURN
OPTION SETUP
SET UP
ENTER
vV
RETURN
LANGUAGE/IDIOMA/LANGUE
SET UP
ENTER
vV
English
Français
B
Español
Getting Started
21
Selecting a language
4
Press SET UP to exit the menu.
 Loading...