5-25
3-18.TAPE SENSORS, REEL SENSOR
AND EP SW LEVER
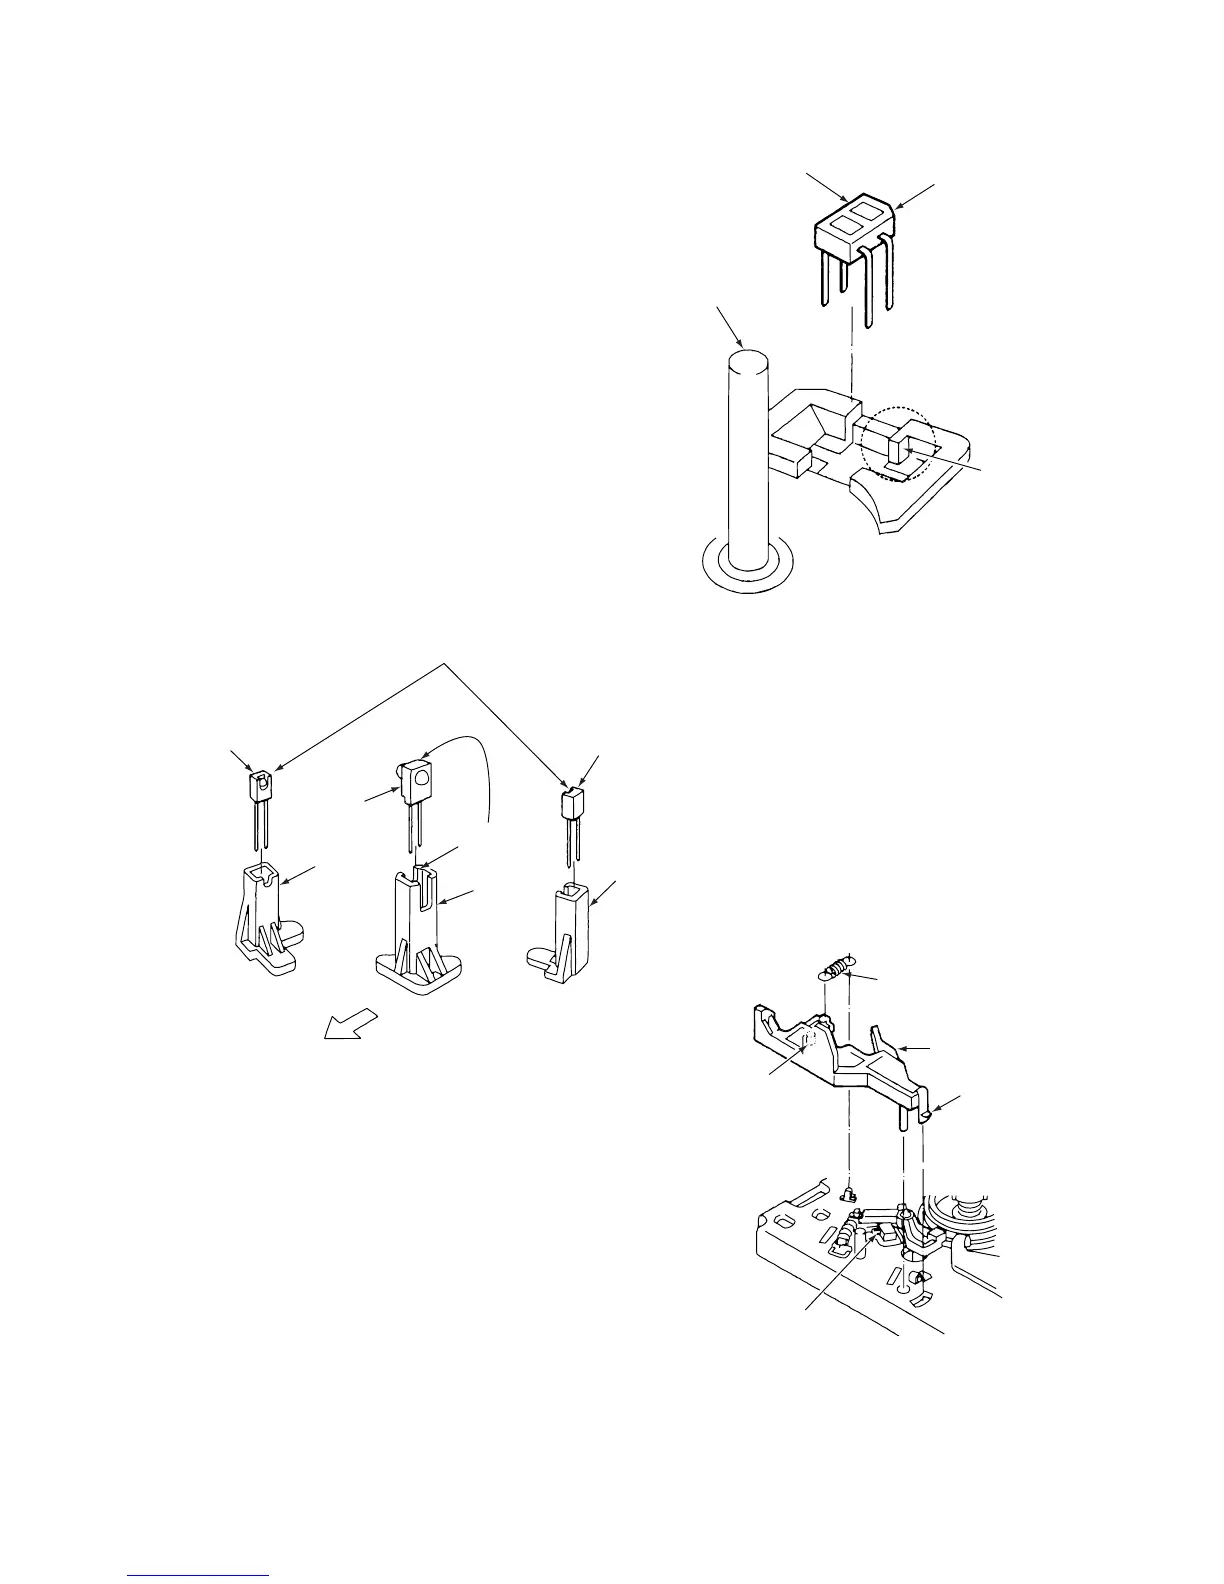
3-18-1 TAPE TOP SENSOR AND TAPE END
SENSOR (See Fig. 3-18-1)
1) Refer to section 3-2 and remove the mechanism unit.
2) Refer to section 3-3-1 and remove the cassette mecha-
nism assembly.
3) Remove the soldering from the MC-1 PWB assembly,
then remove the photo diodes 1, 2 and the LED 3.
When removing the photo diode 2 on the tape top
sensor side, refer to section 3-15 and remove the main
cam.
ASSEMBLY NOTES:
1. Fit the photo diodes 1 and 2 so that their photorecep-
tors to face the LED 3, as shown in Fig. 3-18-1. Align
the cuts in the LED 3 and the holder 4.
Push the photo diodes 1, 2 and the LED 3 as far
down as they will go, so that they do not protrude above
the top of their holders.
2. Do the soldering quickly.
Turn the photoreceptors to
face the LED 3
1 Photo
diode
(Tape end
sensor)
3 LED
4 Holder
Holders
Front
Align the cuts
Holders
2 Photo
diode
(Tape top
sensor)
Fig. 3-18-1
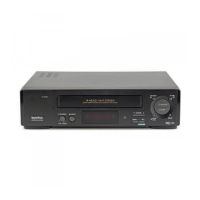
3-18-2. REEL SENSOR (See Fig. 3-18-2)
1) Refer to sections 3-12-2 and 3-12-4. then remove the
clutch mounting assembly, the T soft brake assembly
and the take up reel assembly.
2) Refer to section 3-13-2, then remove the wheel gear 2,
the wheel gear 1. and the brake control lever.
3) Remove the soldering from the MC-1 PWB assembly,
then remove the photo diode (reel sensor) 1.
ASSEMBLY NOTES:
1. When assembling the parts, align the cut on the photo
diode (reel sensor) 1 with the protrusion on the
mechanism chassis 2.
2. Do the soldering quickly.
Fig. 3-18-2
3-18-3. EP SWITCH LEVER (See Fig. 3-18-3)
1) Refer to section 3-3-1 and remove the cassette mecha-
nism assembly.
2) Remove the EP switch spring 1.
3) Remove the clamp 2, then remove the EP switch lever
3.
ASSEMBLY NOTES:
1. Apply grease (VHJ-0100) to the protrusion 4 on the
back of the EP switch lever 3.
2. After fitting the cassette mechanism assembly. check
that in EJECT mode. the EP switch lever 3 does not
touch the EP switch 5 .
1 EP switch spring
3 EP switch lever
2 Clamp
5 EP switch
4 Protrusion on
back
(apply grease here)
Fig. 3-18-3