19
Installation of the 4:3 Mask / Connections
Chapter 1 Overview
Installation of the 4:3
Mask
When the aspect ratio is switched from 16:9 to 4:3, replace
the 16:9 mask with the supplied 4:3 mask.
Installing the 4:3 mask
1
Remove the 16:9 mask.
2
Install the 4:3 mask (supplied).
1 Attach the lower portion of the mask.
2 Attach the upper portion of the mask by pressing it
until the click.
Replacing the 16:9 mask
Remove the 4:3 mask and replace the 16:9 mask using the
same procedures as those for installing the 4:3 mask.
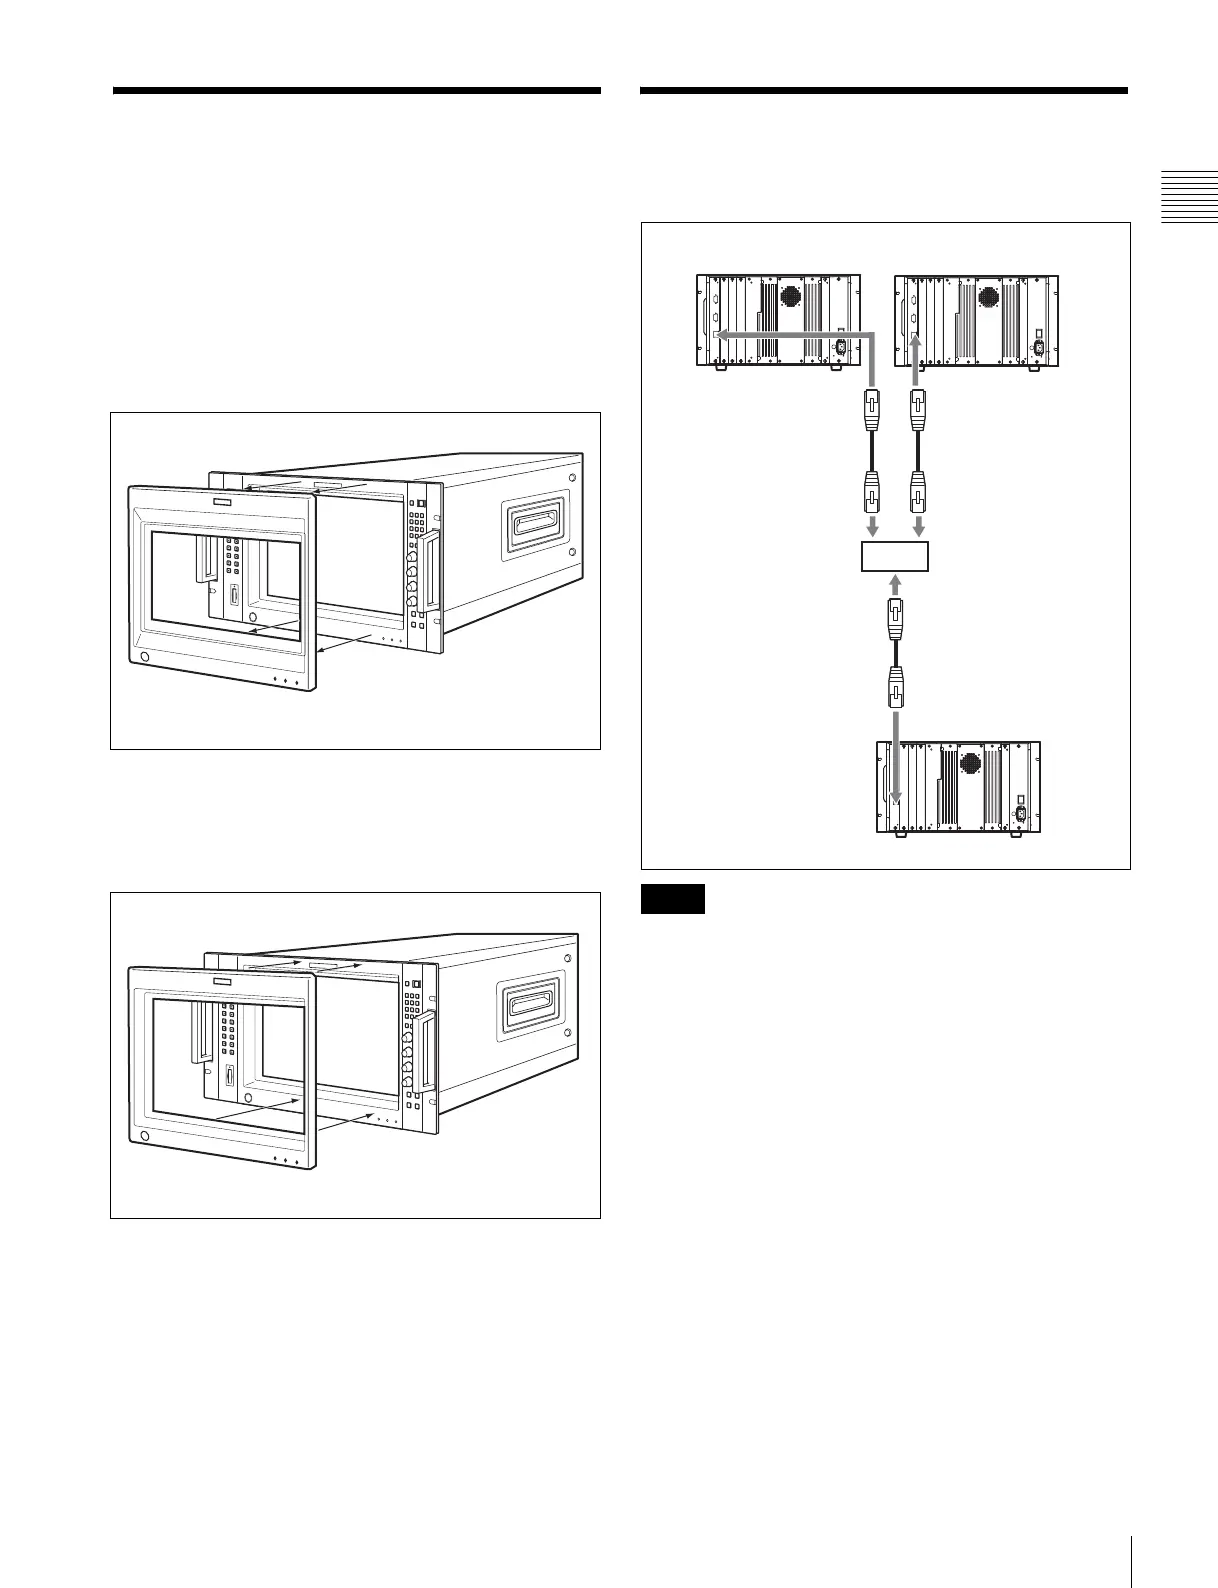
Connections
Connecting to the Network
• Turn off the MAIN POWER switch of the monitor
before connecting the units.
• Connect to the network by using a 10BASE-T/
100BASE-TX cable (shield type, optional).
• When an optional LAN cable is connected, use a shield
type cable to prevent miss-operation due to noises.
• Up to 32 monitors and the BKM-15R (max. 4) can be
connected.
• The monitor is controlled by the controller (controlled
monitor or BKM-15R) within the same subnetwork.
• Use an potional switching hub with auto select function
(AUTO MDI/MDI-X) of a straight/cross cable.
• When the BKM-15R is connected, set the NETWORK
switch of the BKM-15R to LAN.
Notes
Monitor
LAN (10/100) connector
LAN (10/100)
connector
Switching hub
(with AUTO MDI/
MDI-X function)
Monitor/
BKM-15R
LAN (10/100)
connector
Monitor