Page16
Section6 Operating Procedures
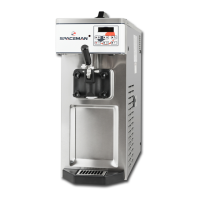
The machine has been selected to illustrate the pictured step-by-step operating
procedures. It has a 1.7liter capacity in freezing cylinder. The mix flows by gravity from
the hopper to the freezing cylinder through an air tube.
We begin our instructions at the point where we enter the store in the morning and find the
parts disassembled and laid out to air dry from the previous night’s cleaning.
These opening procedures will show you how to assemble these parts into the freezer with
fresh mix in preparation to serve your first portion.
Only there is raw material in the mix hopper can you run the machine “Cool”. You should
STOP the machine if there is no raw material in the hopper.
There are close relations between hardness setting up and environment temperature
producing the finished product actually.
Assembly
Note: When lubrication parts, use an approved food grade lubricant.
Step 1
Install the beater assembly.
Slide the beater o-ring into the flange on the
drive shaft of the beater assembly.
DO NOT LUBRICATE THE HEX END.
Insert the beater assembly through the rear shell bearing at the back of the freezing
cylinder and engage the hex end firmly into the female socket. When properly seated, the
beater will not protrude beyond the front of the freezing cylinder. Beater rotation must be
clockwise as viewed looking into the freezing cylinder.
Step 2
1. Assemble the freezer door. Place the large o-ring into the grooves on the back of the
freezer door and lubricate with lubricant.
2. Assemble the dispensing valve. Slide the O-rings and O-O ring into the grooves on
the draw valve and lubricate with lubricant.
3. Assemble the dispensing handle with dispensing handle retention. Insert the
dispensing handle through the slotted opening in the dispensing valve and align the
other end with the cross holes of the dispensing door.
Hint: The dispensing handle may be aligned with left or right cross hole. The
dispensing valve handle will be placed through the opposite cross hole of the
dispensing handle.
Insert the dispensing valve handle through the opposite cross hole and into the opening
of the dispensing handle.
Hint: The dispensing valve handle can be assembled at varied vertical positions.
Choose an angle which is comfortable for you. The dispensing valve must be raised
completely when the dispensing valve handle is down.