8999151EN: v1 11/03/2021
77
Original instructions (ENGLISH)
Website: www.spearheadmachinery.com
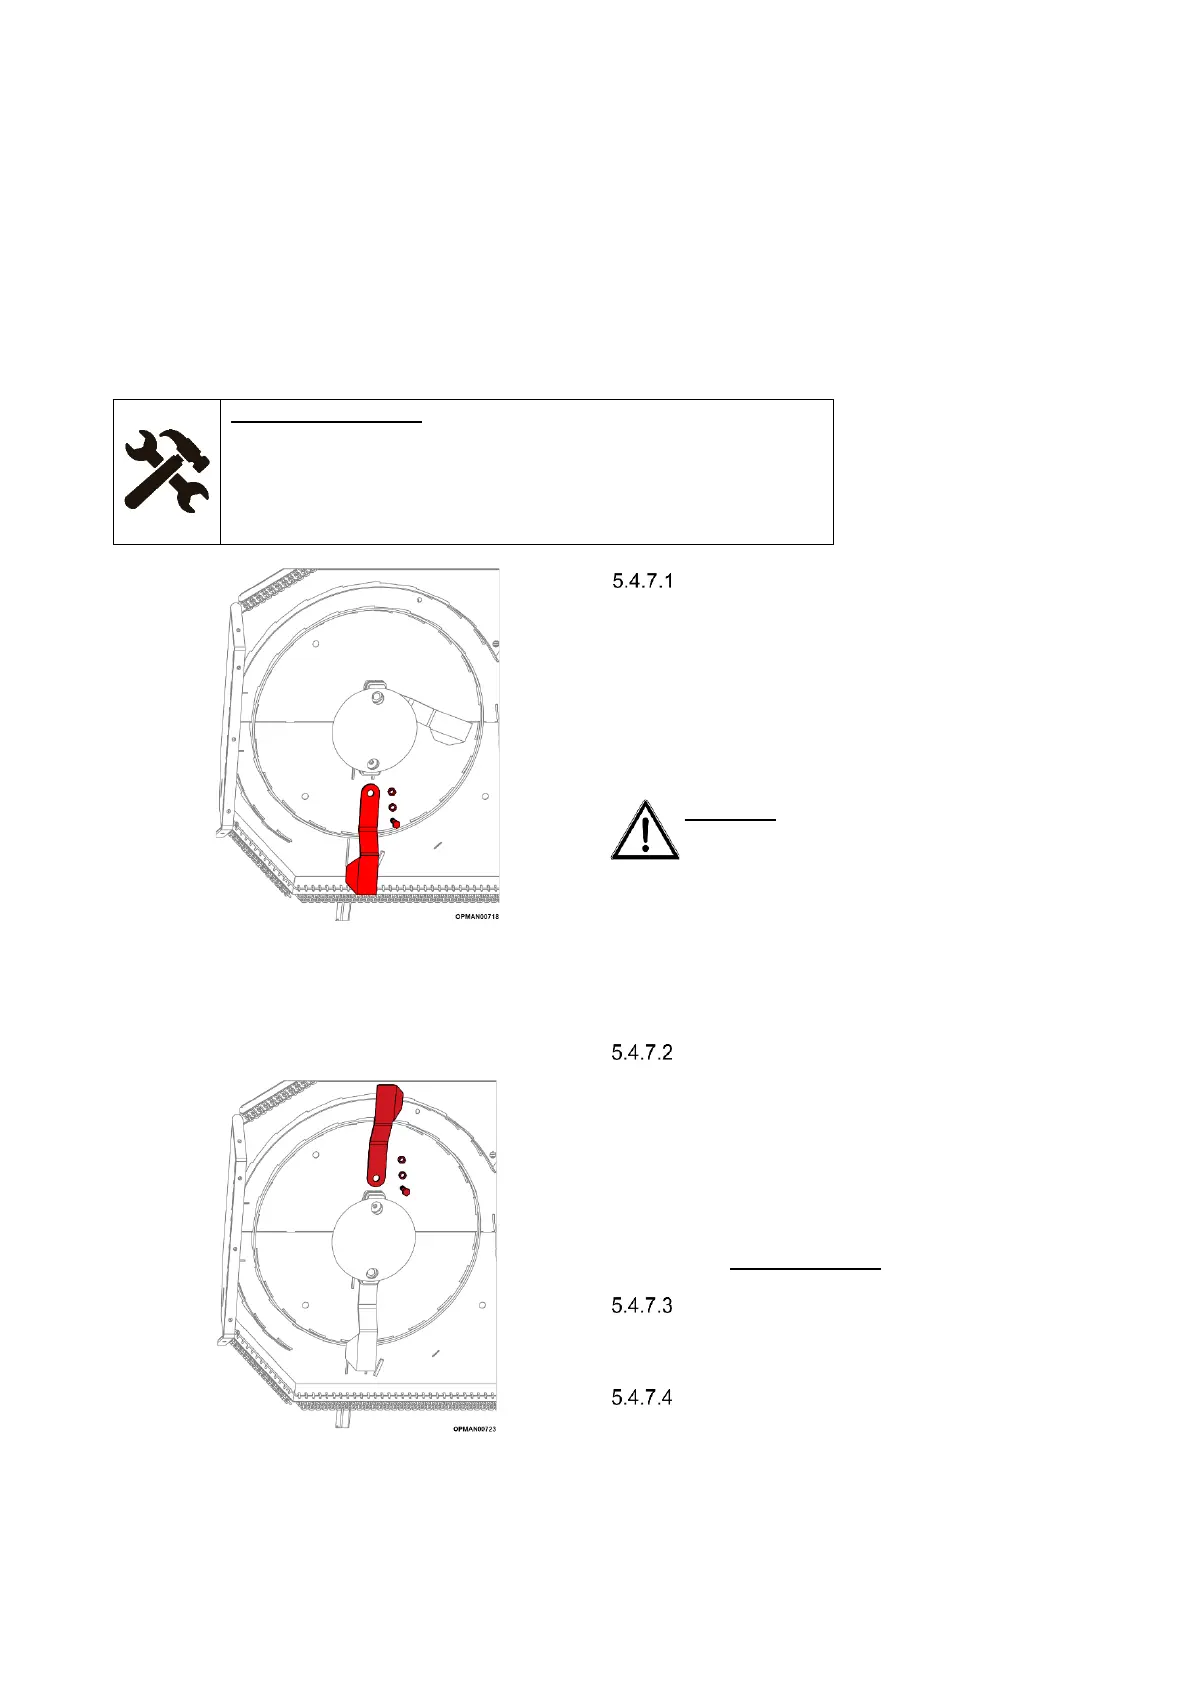
5.4.7 Anti-scalp Dish, Blade & Blade Carrier Removal & Replacement
IMPORTANT: Throughout this section be aware of the blade carrier and blades rotating. Before proceeding to
carry out any of the operations stated in this section; see Section 5.4.2 with regards to handling blade carrier
assemblies safely.
Throughout this section, the process is shown on a right-hand rotor. For complete clarity the exact same process
is applicable to the other left-hand rotor.
Anti-scalp Dish, Blade & Blade Carrier Removal
Equipment Required
• Torque wrench (see required settings in Torque Settings section)
• 36mm hex sockets/spanner
• 36mm hex spanner
• 55mm hex spanner
• Needle nose pliers
Before proceeding to carry out any work
ensure that the blades and blade carrier
are in their “dropped” and in a stationary
position on both rotors.
Ensuring that you’re wearing suitable
gloves, proceed to loosen the fasteners on
the first blade and carefully remove the
bolt, bush, nut and blade.
DANGER! When carrying out maintenance
work on or near the blade carrier, be careful
of free-swinging blades over-centering and
falling. It is recommended that Personal
Protection Equipment (PPE) is worn.
If an anti-scalp dish replacement is required proceed
to 5.4.7.5.
If the maintenance required is simply a
blade replacement and the blade carrier is
still in good condition, proceed to install the
new blade, with an accompanying new
bolt, bush and nut.
It is of upmost importance that new
fasteners and bushes are used on the
reassembly. Blade fasteners and bushes
are single use items.
Torque the new fasteners to the
recommended torque as stated in Section
?.?
Repeat processes 5.4.7.1 to 5.4.7.3 in the
same fashion on the second blade.
It is important that if a new blade is fitted
that the second “opposite” blade is
replaced also with a new item. This is to
ensure that the rotor when in operation
does not experience issues with vibration.