| Installation Guide | 15
Figure 10: Mounting Kit assembly
4.
Tighten the camera holder screws to secure the camera in position.
Once the camera mounting is complete, move on to cabling.
Cabling the Camera Link Camera
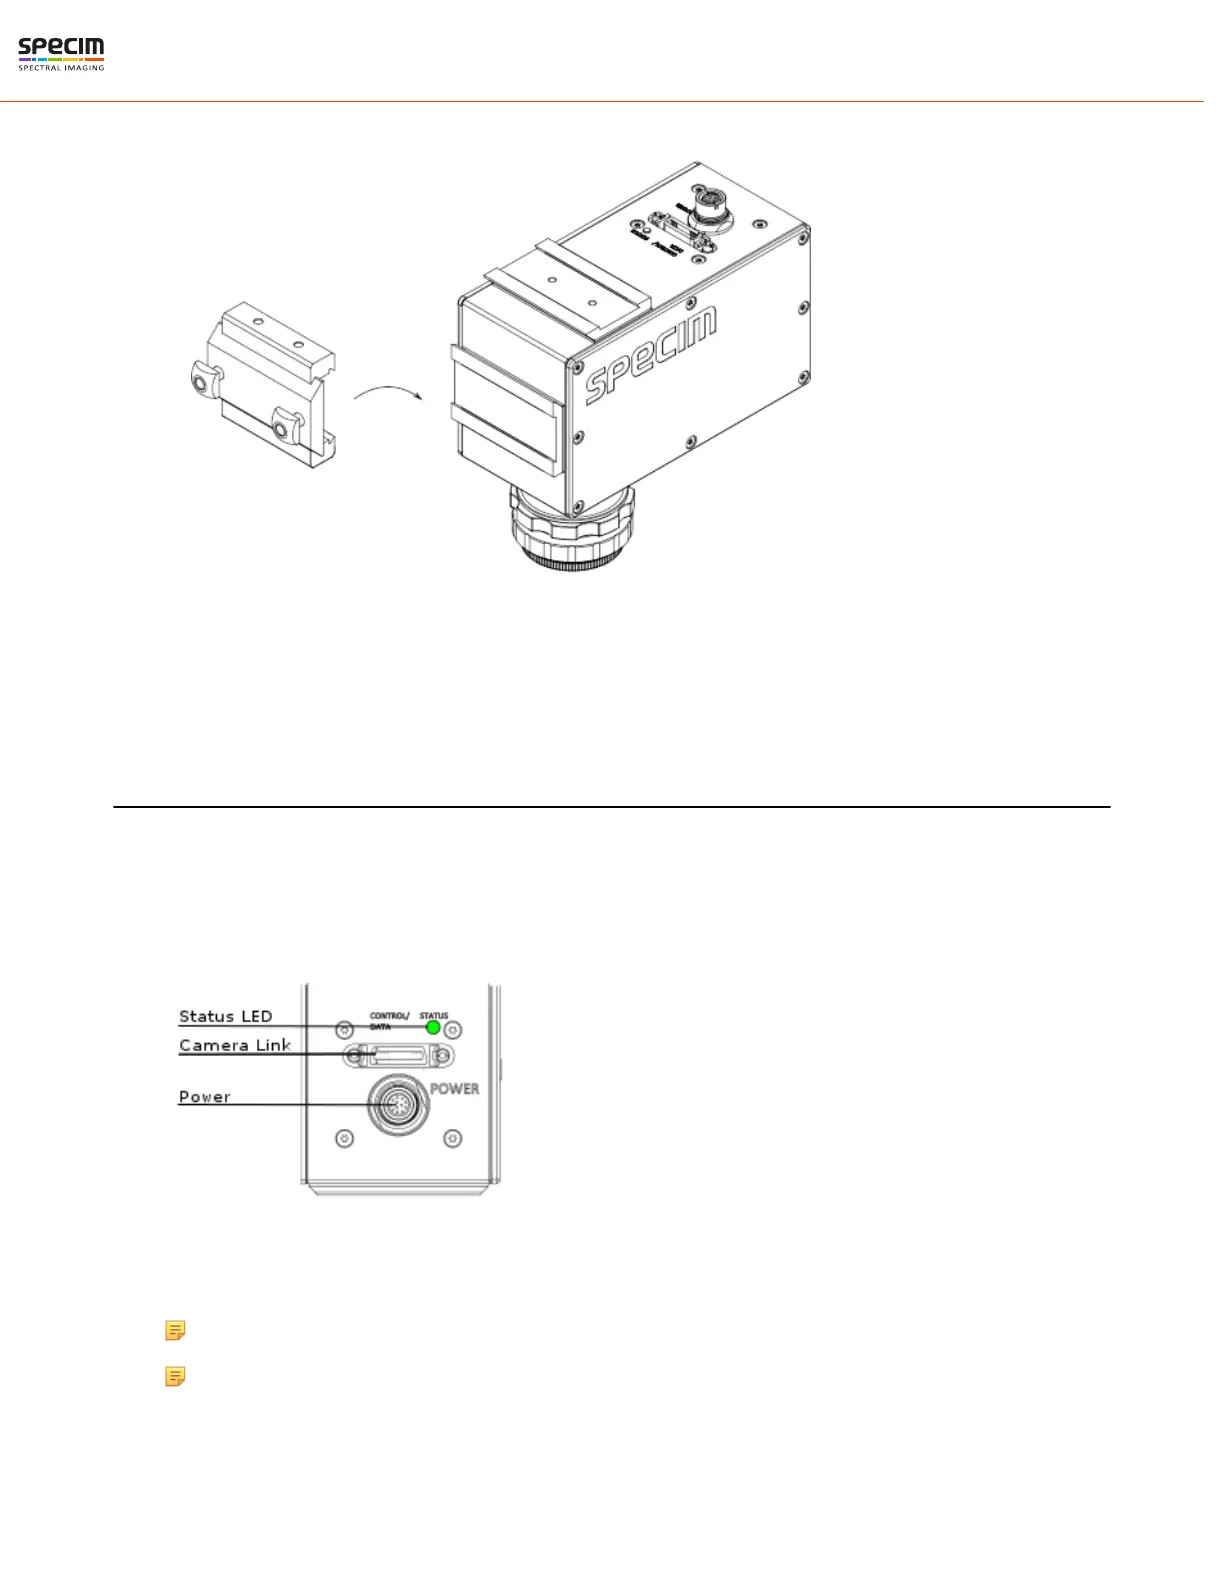
There are two connectors in the camera back panel (on the left picture below):
• Camera Link Connector
• Power Connector for 12V DC
Figure 11: Back panel connectors
Note: Leave at least 150 mm space behind the camera for cabling.
Note: Make sure that the Camera Link cable is connected before powering up the camera.
Connect the cables:
All rights reserved - Specim, Spectral Imaging Oy Ltd.
 Loading...