CS4000 Mini Controller with Ethernet
Page
x
T-38324-A 39-30-38324
Figures
Figure 1-1. Example of an Ethernet Network with a Connected Portable Laptop............. 1-3
Figure 1-2. Example of a 485 Network.............................................................................. 1-5
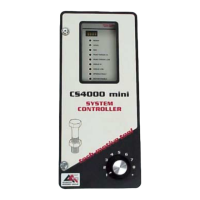
Figure 3-1. Front Panel View............................................................................................. 3-2
Figure 3-2. Top Panel View............................................................................................... 3-3
Figure 3-3. Bottom Panel View.......................................................................................... 3-4
Figure 3-4. Components Inside the Enclosure of the CS4000 Mini Controller
with Ethernet................................................................................................... 3-7
Figure 3-5. Front View of the TCM.................................................................................... 3-8
Figure 3-6. Rear View of the TCM and Location of the Servo Amplifier Fuse .................. 3-9
Figure 3-7. DCM Board and DCM Battery Location........................................................ 3-10
Figure 3-8. CS4000 Mini Controller with Ethernet Backplane......................................... 3-11
Figure 3-9. I/O Board ...................................................................................................... 3-13
Figure 3-10. Ethernet Interface Card ................................................................................ 3-14
Figure 3-11. Interbus-S Module Side View........................................................................ 3-16
Figure 3-12. Interbus-S Module Top View ........................................................................ 3-17
Figure 3-13. Ground Fault Circuit Interrupter.................................................................... 3-18
Figure 4-1. CS4000 Mini Controller with Ethernet Dimensions......................................... 4-2
Figure 4-2. Power/Connection Requirements................................................................... 4-3
Figure 4-3. Remote Input Circuit Schematics ................................................................... 4-8
Figure 4-4. Example of CS4000 Controller Remote I/O Wiring − Sourcing Outputs ........ 4-9
Figure 4-5. Example of CS4000 Controller Remote I/O Wiring − Sinking Outputs......... 4-10
Figure 5-1. Message Upon Starting the TINI Ethernet Interface Flash Utility................... 5-3
Figure 5-2. Selecting the COM Port Menu........................................................................ 5-4
Figure 5-3. Selecting ‘COM1’ RS-232 Port ....................................................................... 5-4
Figure 5-4. Establishing A Successful Connection via COM1 ......................................... 5-5
Figure 5-5. Error Message Displayed when COM1 is Already In Use .............................. 5-5
Figure 5-6. Selecting the “Flash TINI…” Option................................................................ 5-6
Figure 5-7. Selecting the Application File.......................................................................... 5-6
Figure 5-8. Error Message Displayed when the Attempted Connection Fails................... 5-7
Figure 5-9. Error Message Following An Unsuccessful Flash Attempt............................. 5-7
Figure 5-10. Second Error Message Following An Unsuccessful Flash Attempt................ 5-7
Figure 5-11. Confirming the IP Address, Subnet Mask and Default Gateway.................... 5-8
Figure 5-12. Selecting the “Set TINI Application Info…” Menu Option.............................. 5-10
Figure 5-13. Viewing the Application Settings Window - General Info tab....................... 5-11
Figure 5-14. Selecting the Application Settings Window - Ip Address tab ....................... 5-11
Figure 5-15. Selecting the Application Settings Window - Comm Options tab ................ 5-12
Figure 5-16. VSMain.ini configured for an Ethernet Network............................................ 5-14
Figure 5-17. Select the Icon and Enter A Name for the Hyperterminal Connection.......... 5-18
Figure 5-18. Select Communications Port ........................................................................ 5-19
Figure 5-19. Setting the Communications Port Settings ................................................... 5-20
Figure 5-20. Hyperterminal Window Showing Ethernet Interface Card (TINI)
Login Prompt ................................................................................................ 5-21
Figure 5-21. Opening the Command Prompt Window...................................................... 5-23