Waukesha Cherry-Burrell Maintenance
12/2010 95-03080 Page 39
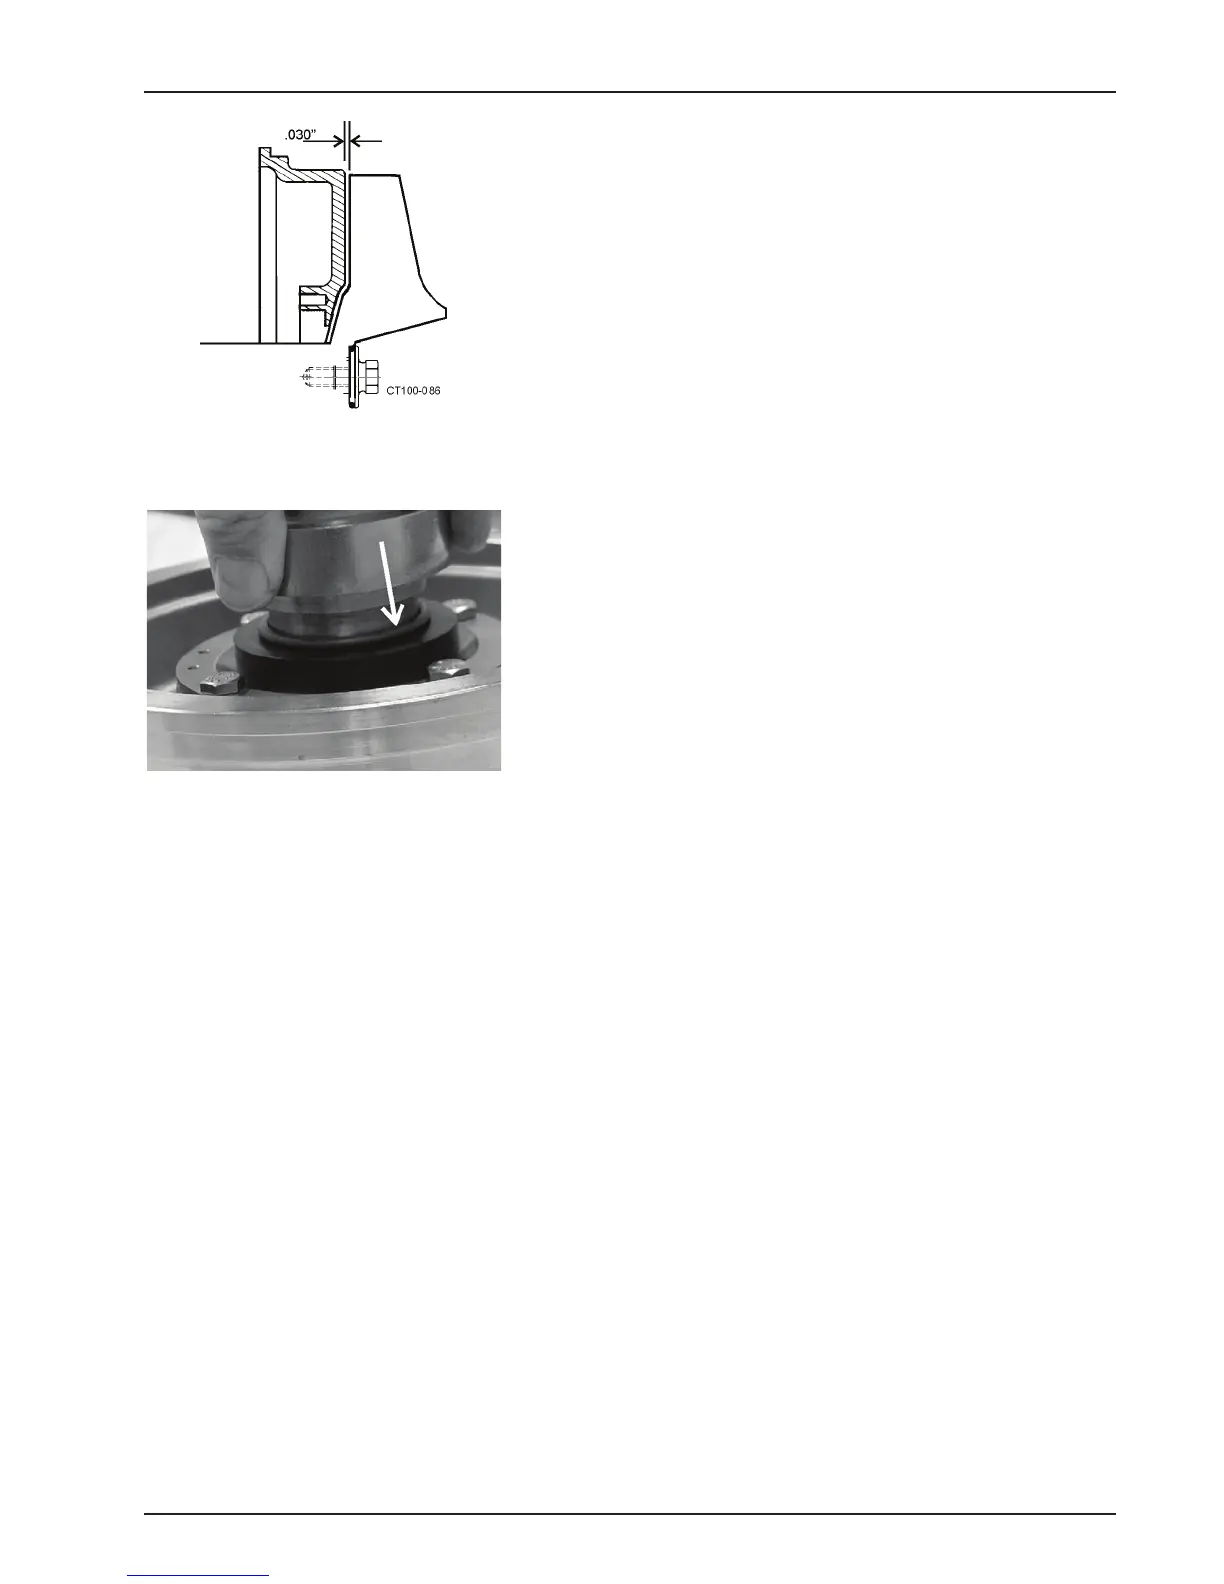
6. Temporarily put 0.03" shims between the impeller vane and
back plate to preset clearance. Be sure to remove shims
before final assembly. See Figure 42.
7. Place the o-ring (Figure 41, item F) on the shaft and use a
spring retainer to push o-ring into the rotary seal. See Figure
43.
8. Place the washer (Figure 41, item G) over the rotary seal with
tabs in the outside diameter notches.
9. Place the three springs (Figure 41, item J) in one side of the
spring retainer (hold them in place with silic
one sealer) and
slide the spring retainer (with the springs down) onto the
impeller shaft against washer.
10. Place the remaining three (3) springs in the spring retainer.
11. Slide the washer and o-ring (See Figure 41, items K and F)
onto the shaft against the spring retainer.
12. Use the spring retainer to press the o-ring into the rotary seal.
13. Remove the 1/4 NPT plug from the center port on the flush
ho
using. (See Figure 41, page 38, item N).
14. Install an o-ring (See Figure 41, items R and M) in both ends
of the housing.
15. Install the L-gasket in th
e seat retainer. (See Figure 41, items
T and U).
16. Install the stationary seal (Figure 41, item S) in the L-gasket.
17. Install the housing over the seal assembly.
18. With the flush ports facing away fr
om the backplate, place the
seat retainer (Figure 41, item U) on the housing.
19. Tighten the seat retainer in place
with four (4) hex screws
(Figure 41, item V).
NOTE: Be su
re to tighten the screws evenly until full metal-to-
metal contact is made on the backplate and seat retainer.
Figure 42 - Place Shims Between Impeller
and Backplate
Figure 43 - Installing the o-ring using the
Spring Retainer.