1.
Enter any desired name
A)
for your solar system into the field ① in Fig. 16
.
2.
Enter the installed power
A)
of the system into the field ②.
3.
Enter a description
A)
of the system into the field ③. Observe the note ④.
4. Use the Google Maps buttons ⑤ to ⑦ to navigate to the location of the system.
ð
The location data is displayed in the fields ⑧.
5. Enter an optional address of the system into the field ⑨.
6. Select the check box ⑩ and confirm via the button ⑪.
ð
Fig. 18
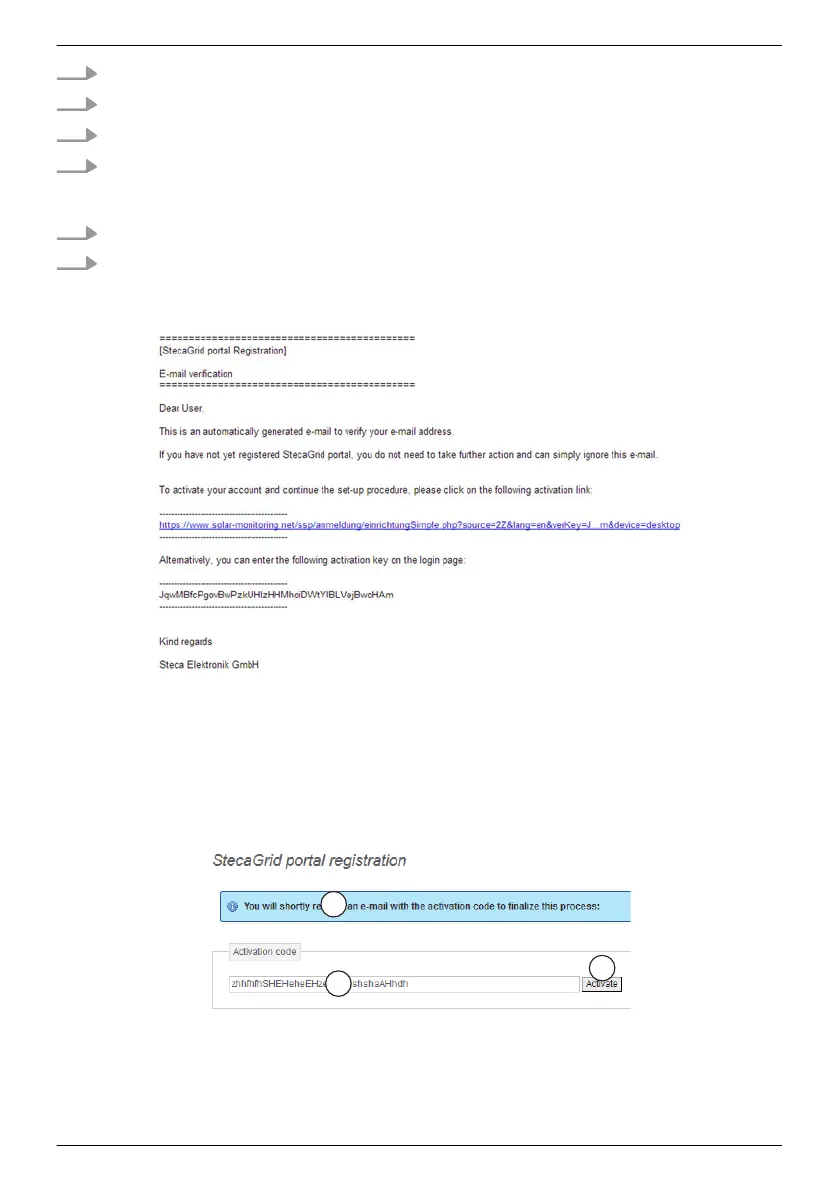
appears, an email with the activation code, as shown in Fig. 17 is sent to the
email address ① in Fig. 17 .
Fig. 17: Email with the activation code
A)
Data can be subsequently changed.
Completing registration
Fig. 18: Data entry form for the activation code
EN
747,431 | Z09 | 2015-09-30
57