Site Preparation Guide Preparing for Installation
Page 13
g. Moving counter-clockwise around the crate, remove the screws (10) securing panel #1
to the back of the crate. Slide the panel away and remove it from the crate.
h. Remove the screws (10) securing panel #2 to the back of the crate. Remove the panel.
Figure 10: Removing the back crate panels (printer bag not shown)
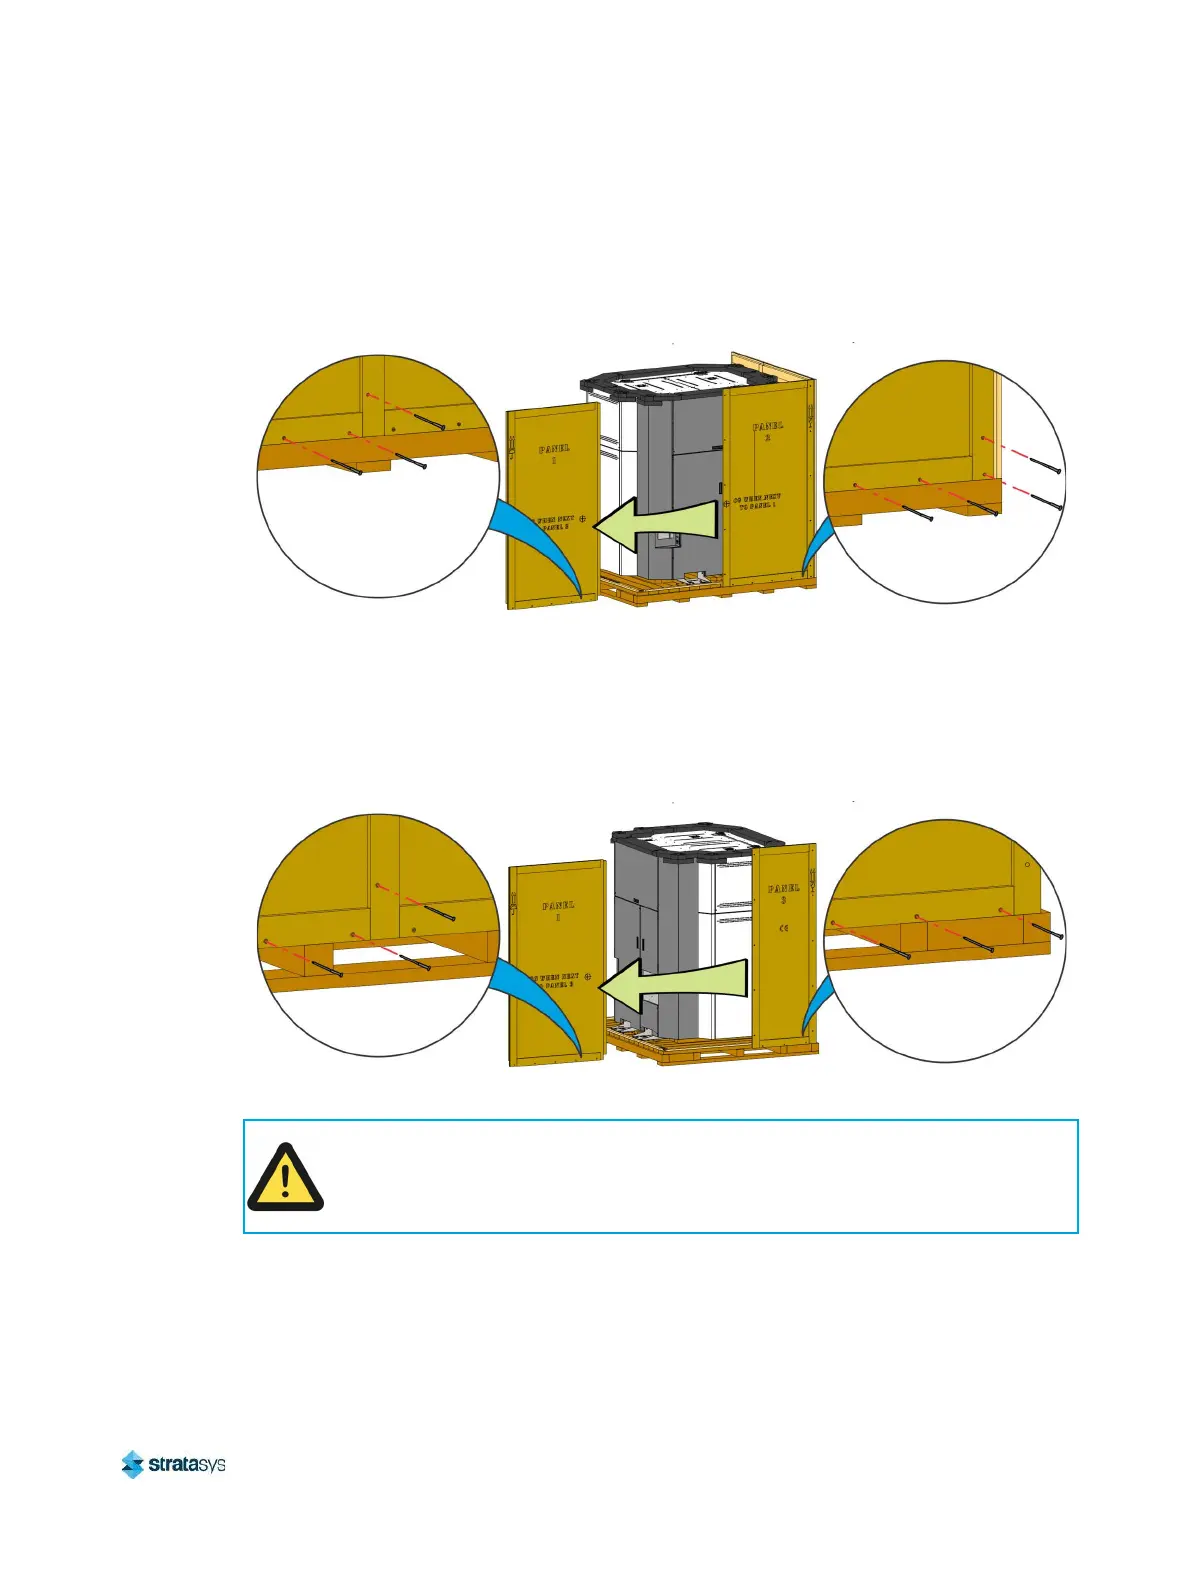
i. Moving counter-clockwise around the crate, remove the screws (10) securing panel #1
to the remaining side of the crate. Slide the panel away and remove it from the crate.
j. Remove the screws (3) securing the final panel #3 to the base of the crate. Remove the
panel.
Figure 11: Removing the remaining crate panels (printer bag not shown)
2. Carefully pull away and remove the plastic shrink wrap from the printer.
Caution:
If necessary, use a utility knife to cut away any remaining plastic shrink wrap
material. Use care when cutting the plastic shrink wrap to avoid scratching the
printer’s surfaces.