Site Preparation Guide Preparing for Installation
Page 18
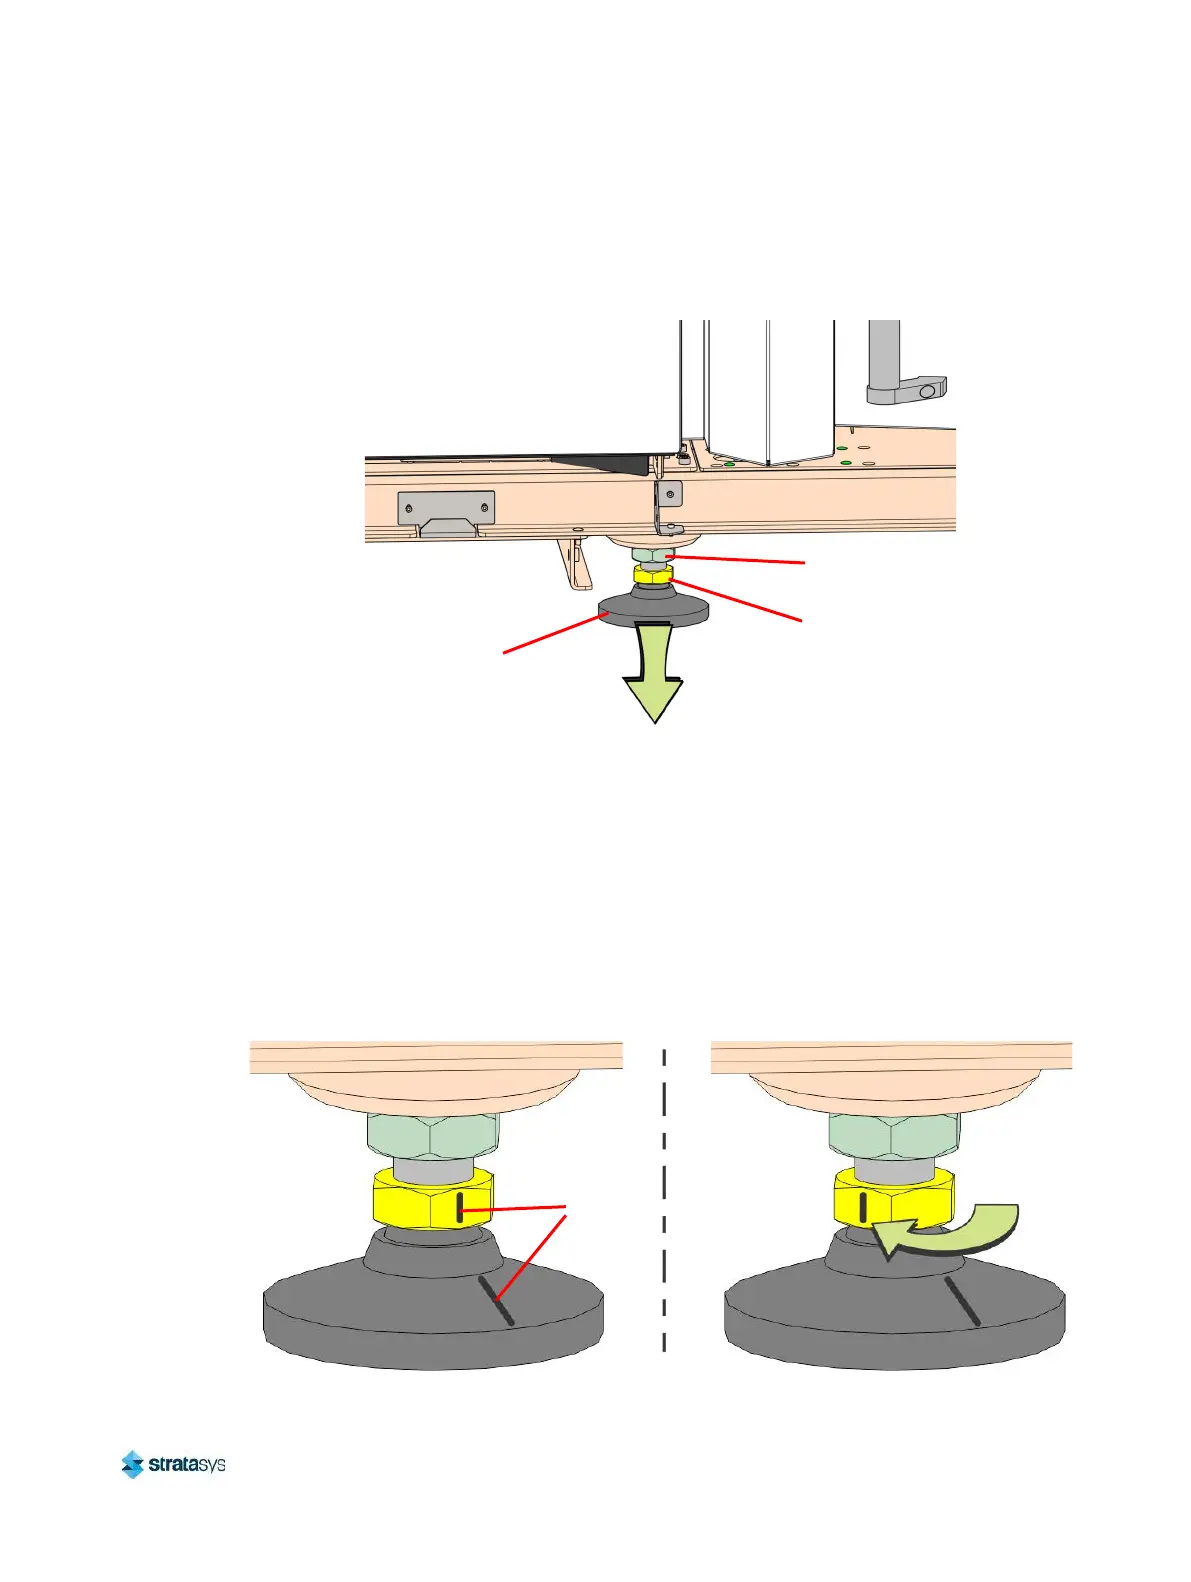
16. By hand, rotate the printer stabilizing foot clockwise until it firmly makes contact with the
floor. If it is difficult to turn, verify that the locking nut is loose. Use a 35 mm wrench to
loosen if necessary.
Figure 19: Lowering the Stabilizing Foot
17. While a second person pushes on the front right corner of the printer, attempt to slip a
piece of paper beneath the stabilizing foot. If the paper fits beneath the foot, lower the
stabilizing foot until it is no longer possible to fit the paper underneath.
18. Gently push the printer from the front and back to ensure that the printer is stable and does
not sway.
19. Mark the adjusting nut and the stabilizing foot to establish a reference alignment of the
stabilizing foot.
20. Using a 35 mm wrench, rotate the adjusting nut 60 degrees (the distance of one flat)
clockwise.
Figure 20: Final Foot Adjustment
Adjusting Nut
Locking Nut
Stabilizing Foot
Alignment
Marks