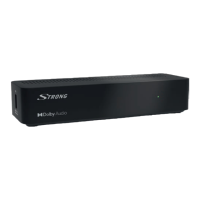
3.7 Extended connections for your home entertainment
Fig. 9
Connecting to a Digital Audio Amplier with S/PDIF
By connecting your receiver to a digital amplifier or home cinema set, you can enjoy the best possible
sound quality and multi-channel audio (depending on broadcast). Connect your Digital Audio
Amplifier or home cinema set with a suitable cinch cable to the S/PDIF connector on the back of the
receiver. Alternatively, if you’re using an analogue amplifier, then connect the audio output jack for
stereo audio.
Connecting to a digital audio amplier and TV using HDMI
By connecting your receiver to an HDMI equipped digital amplifier or home cinema set you will
enjoy the best possible sound quality and multi-channel audio (depending on broadcast). Connect
the HDMI output of the unit to an input of your amplifier, and then connect the HDMI output of the
amplifier to your TV set. Select the correct input on your amplifier to watch and listen to programmes.
4.0 STARTING UP FOR THE FIRST TIME
When you use your receiver for the first time, the Welcome “Preferred Language” menu appears. Use
pq to move the highlight to the language you wish to use in the menu. Once you have selected
your language, press the GREEN Next button to confirm and go to the next page. The receiver will
now show the “First Time Installation” screen where you can adapt important settings.
Use pq to move the highlight to the setting you wish to adapt and use t u to change values. Press
the GREEN Next button to confirm and to go to the next page or press the RED Back button to go one
menu step back. The following settings are available:
Region: Select the region in which the receiver is used. The selection Germany will
store all German channels below number 200 and others above. After
searching, German channels can be sorted in the channel list below 200 in
your preferred order. The selection Italy and France will store channels in
Logical Channel numbering (LCN). This means that it is operator defined
which channel will be stored on position 1 and so on. Sorting of channels
afterwards is not possible. If you like to sort the channels yourself, set the
region to Other. The selection Other will store channels in the found order.
Subtitle: Select On to display subtitles per default, select Off to hide subtitles per
default.*
Aspect Mode: Use this option to select the aspect ratio of the connected TV. The options
are: 4:3 for a 4:3 TV (black bars on top and bottom of picture) and 16:9 for 16:9
TV sets.
Scan mode: Select All to store scrambled and free-to-air channels or select Free to store
only free-to-air channels.
Connection: Use this option to select the established connection to your TV set. Select
HDMI or TV SCART.
* Availability of DVB/HoH subtitles depends on the broadcast. If subtitles are not supported, they can be activated via
Teletext if available.
8

 Loading...