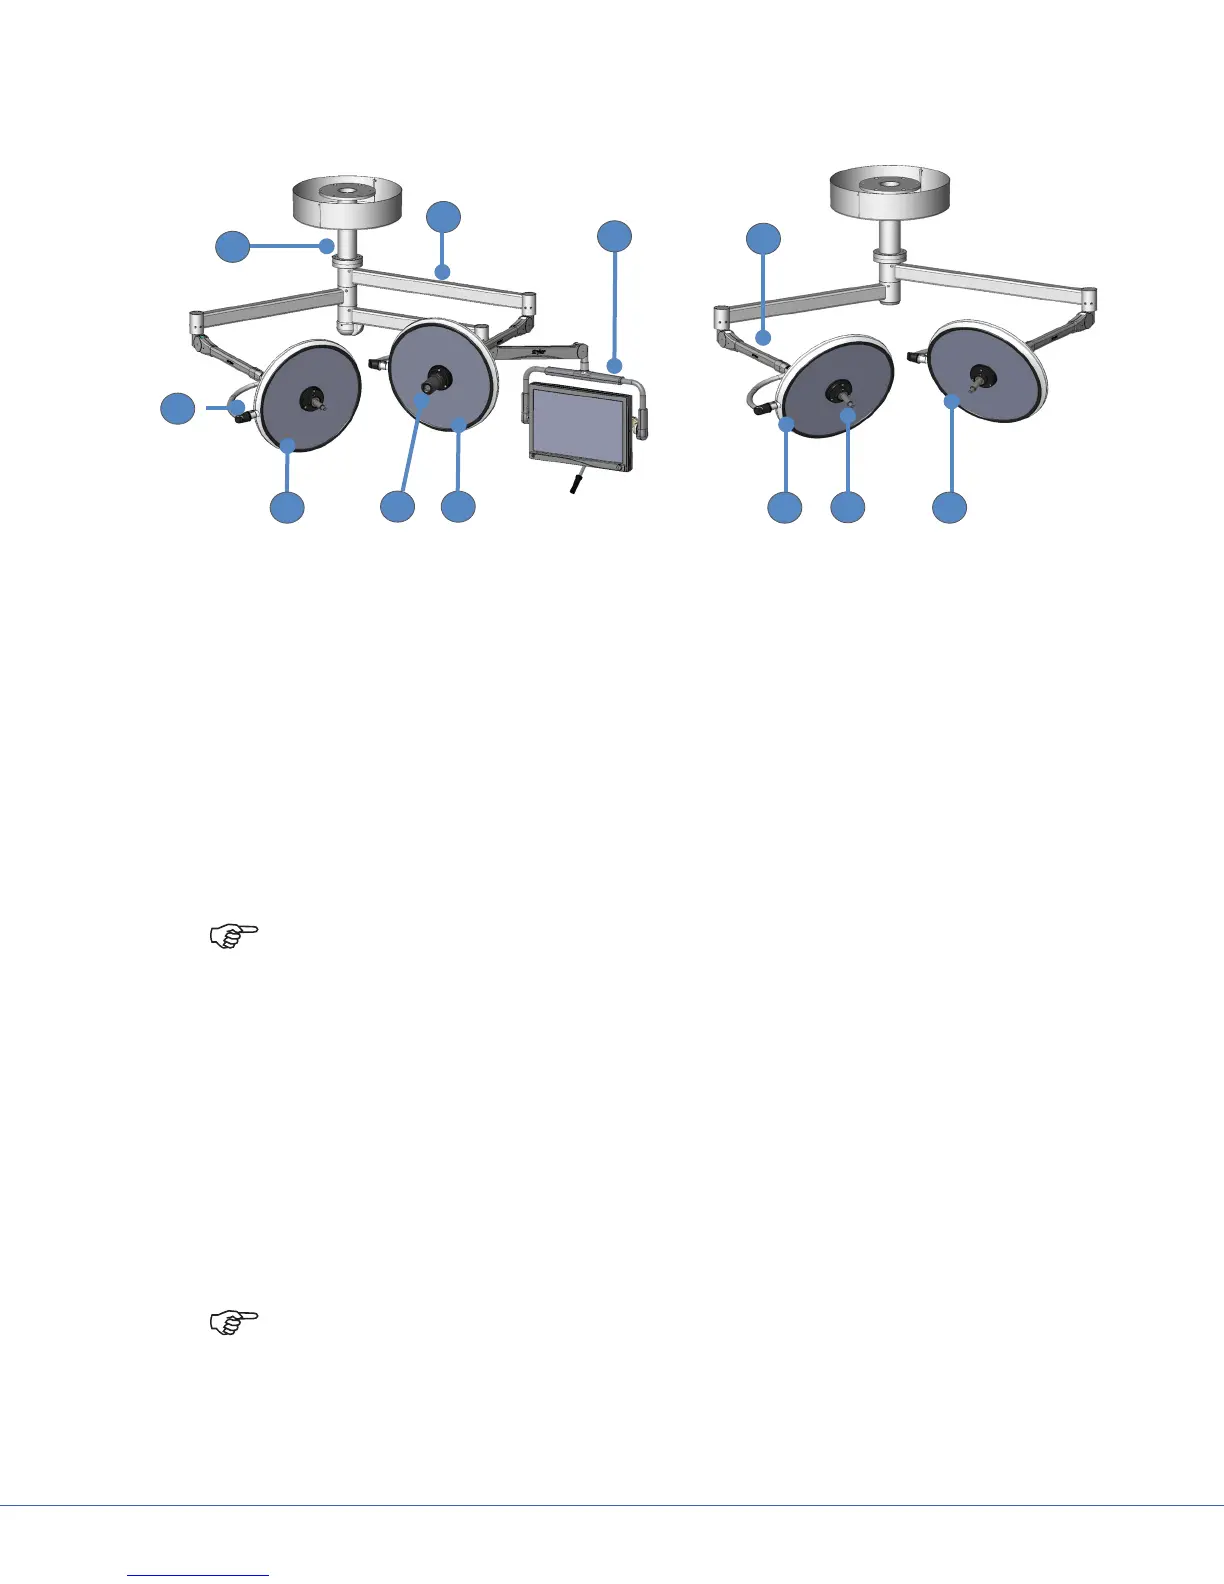
11
S
4. Product Description
1
11
9
3
7
6
2
4
5
10
8
Suspension and Lights
1. Drop Tube
2. Extension Arm
3. Flat Panel Yoke
(Flat Panel Monitor not included)
4. Spring Arm
5. Cardanic Suspension
6. Light head ( Light 2)
7. In-Light Camera (optional)
8. Light 1
9. Light 4 (optional)
10. Weighted Light Handle
11. Light 3 (optional)
Note: The medical grade at panel monitor (pictured) is not included with the system.
4.1 Optional Equipment
4.1.1 In-Light Camera
The Visum® Blade LED Surgical Light system can be congured to include an optional camera (item 7 in the
Product Description gure). The camera would be attached to Light 1.
4.1.2 Wall Control Panel
The wall control panel controls the light intensity of the Visum® Blade LED Surgical Lights as well as the
optional In-Light Camera.
Note: In-Light Camera is always associated with Light 1.