EasyManua.ls Logo

Stryker X8000 - Page 63

Stryker X8000
71 pages
Print Icon
To Next Page IconTo Next Page
To Previous Page IconTo Previous Page
Loading...
61
1650
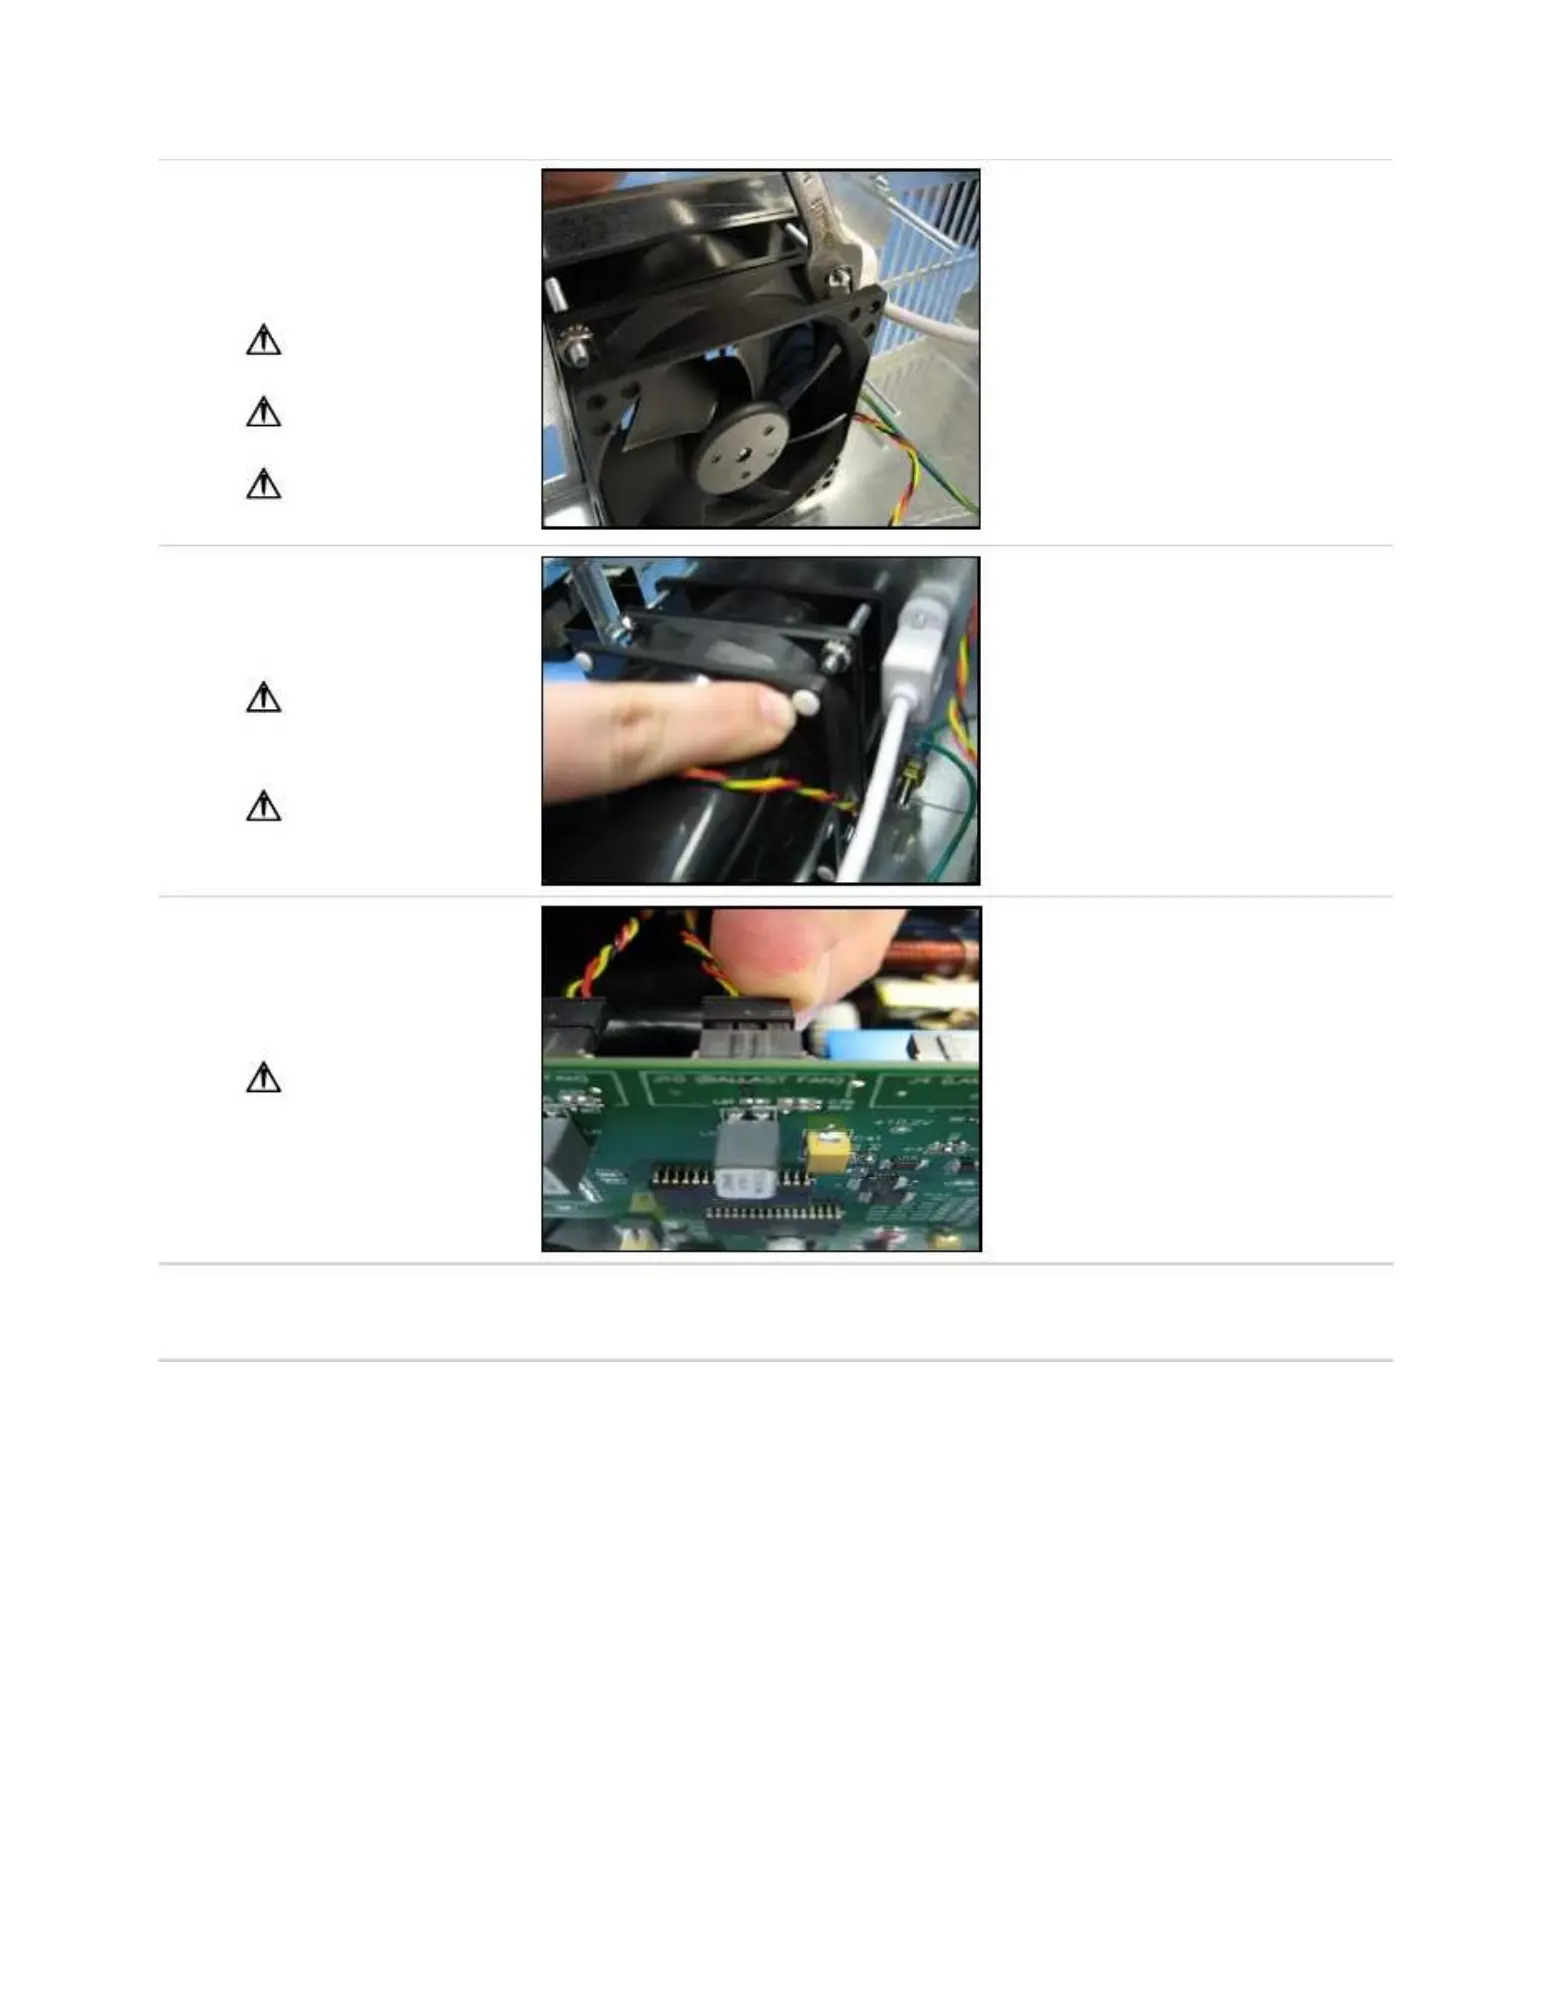
Screw nuts to 3-Wire Fan
for Ballast side to PEM’s
until secure against Fan
Duct as shown.
Do not bend fan
fl
ange
by
over-tight
ening.
Leave lower inside nut
o
ff
.
Use Loctite 290 on
stando
ff
s.
•
Loctite
290
• 11/32”
Wrench
•
#8-32
KEP
Nuts (3) (491)
•
3-Wire
Fan
(507)
•
Fan
Duct
(498)
•
X8000
Chassis
(343)
1660
Secure Ballast Duct to
3-Wire Fan on Ballast side
using Nylon Snap Rivets.
Turn Chassis on side to
set rivets in place.
It may help to use
Needlenose Pliers for hard
to reach spaces!
• Needlenose
pliers
•
Nylon
Snap
Rivets (4)
(816)
•
Ballast
Duct
(326)
•
3-Wire
Fan
(507)
1670
Connect 3-Wire Fan from
Ballast Fan to Control
Board connector J10
(BALLAST FAN).
Do not bend C
ontrol
Board!
•
3-Wire
Fan
Cable from
Ballast Fan (3-
Pin 3-Wire)
•
X8000
Control
Board (873)
1680
Complete assembly of the
unit (procedure 15.0, seq
1560 - 1600).