EasyManua.ls Logo

Stryker X8000 - Bulb Fan

Stryker X8000
71 pages
Print Icon
To Next Page IconTo Next Page
To Previous Page IconTo Previous Page
Loading...
62
17.0 Bulb Fan
S
e
q
.
T
a
s
k
D
e
s
c
r
i
p
t
i
o
n
F
i
g
u
r
e
T
o
o
l
s
N
e
e
d
e
d
P
a
r
t
s
1690
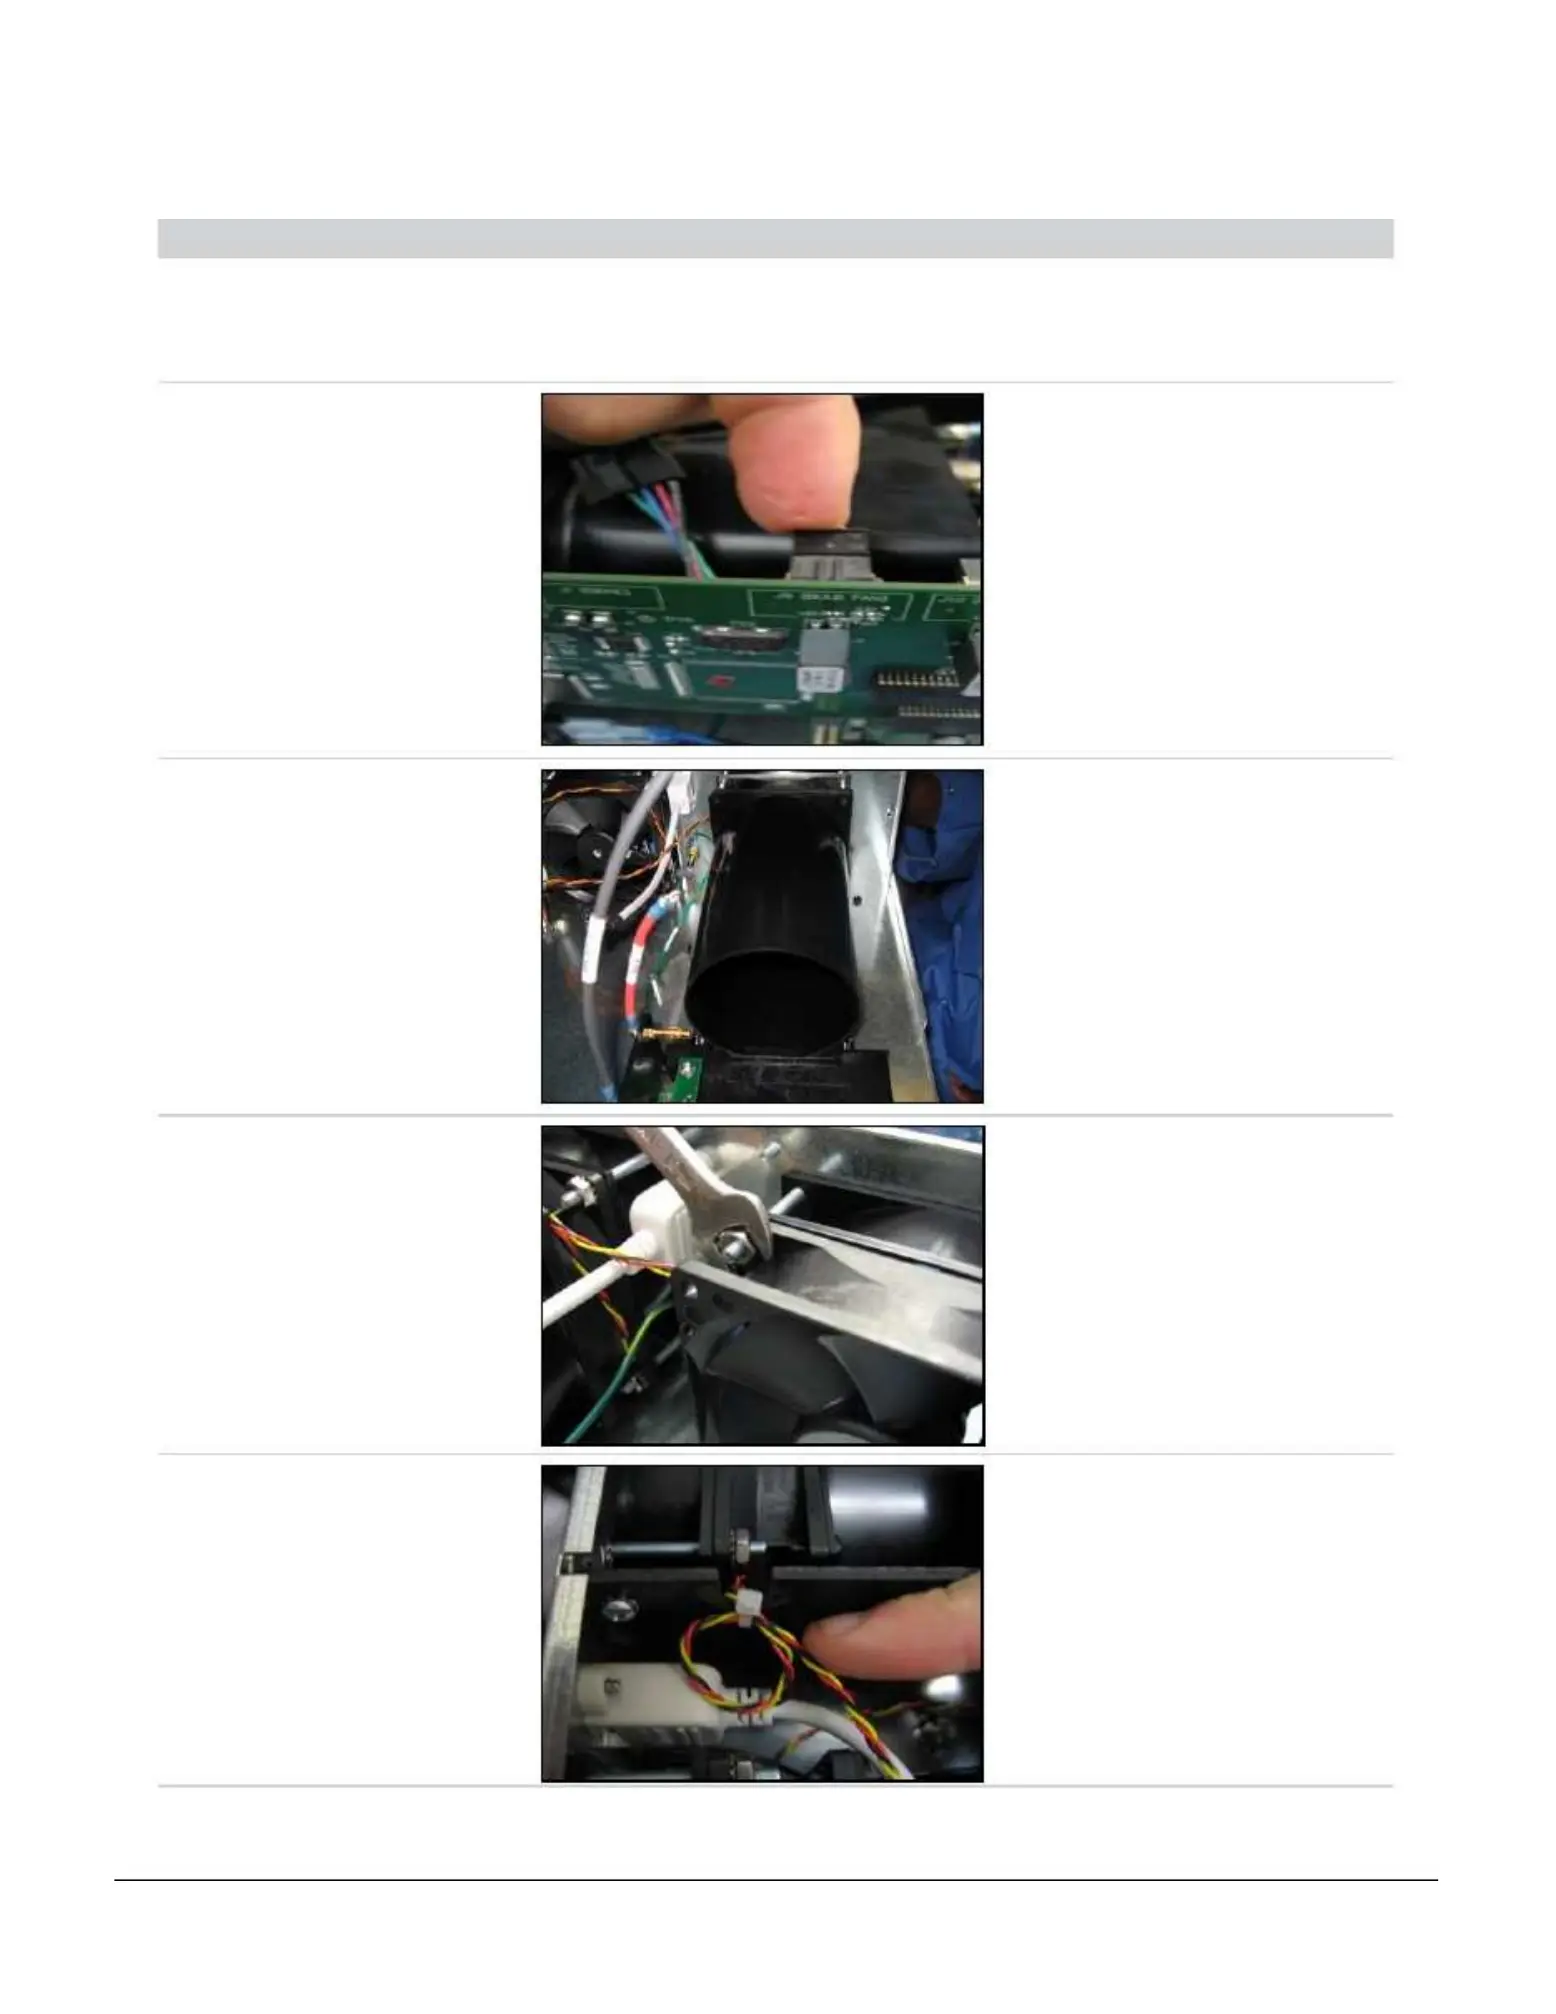
Remove Chassis Cover
from Chassis (procedure
1.0). Remove the Bulb
Assembly.
1700
Disconnect 3-Wire Fan
cable from Control Board
connector J9 (BULB
F
AN).
•
3-Wire
Fan
Cable from
Bulb Fan (3-
Pin 3-Wire)
•
X8000
Control
Board (873)
1710
Use a screwdriver to pop
rivets on the bulb duct free
and remove duct.
• Flathead
Screwdriver.
•
Nylon
Snap
Rivets (4)
(816)
•
Bulb
Duct
(325)
•
3-Wire
Fan
(507)
1720
Remove nuts from PEMs
and remove fan.
• 11/32”
Wrench
•
#8-32
KEP
Nuts (3) (491)
•
3-Wire
Fan
(507)
•
Fan
Duct
(498)
•
X8000
Chassis
(343)
1730
Remove wire tie securing
3-Wire Fan cable from Bulb
Fan to Separator as shown.
Remove Fan and get new
Fan.
•
Cable
Tie
Cutters
• Standard
Cable Tie
(873)
• Separator
(328)
•
Bulb
Fan
Cable (507)