SunFounder PiCar-X Kit
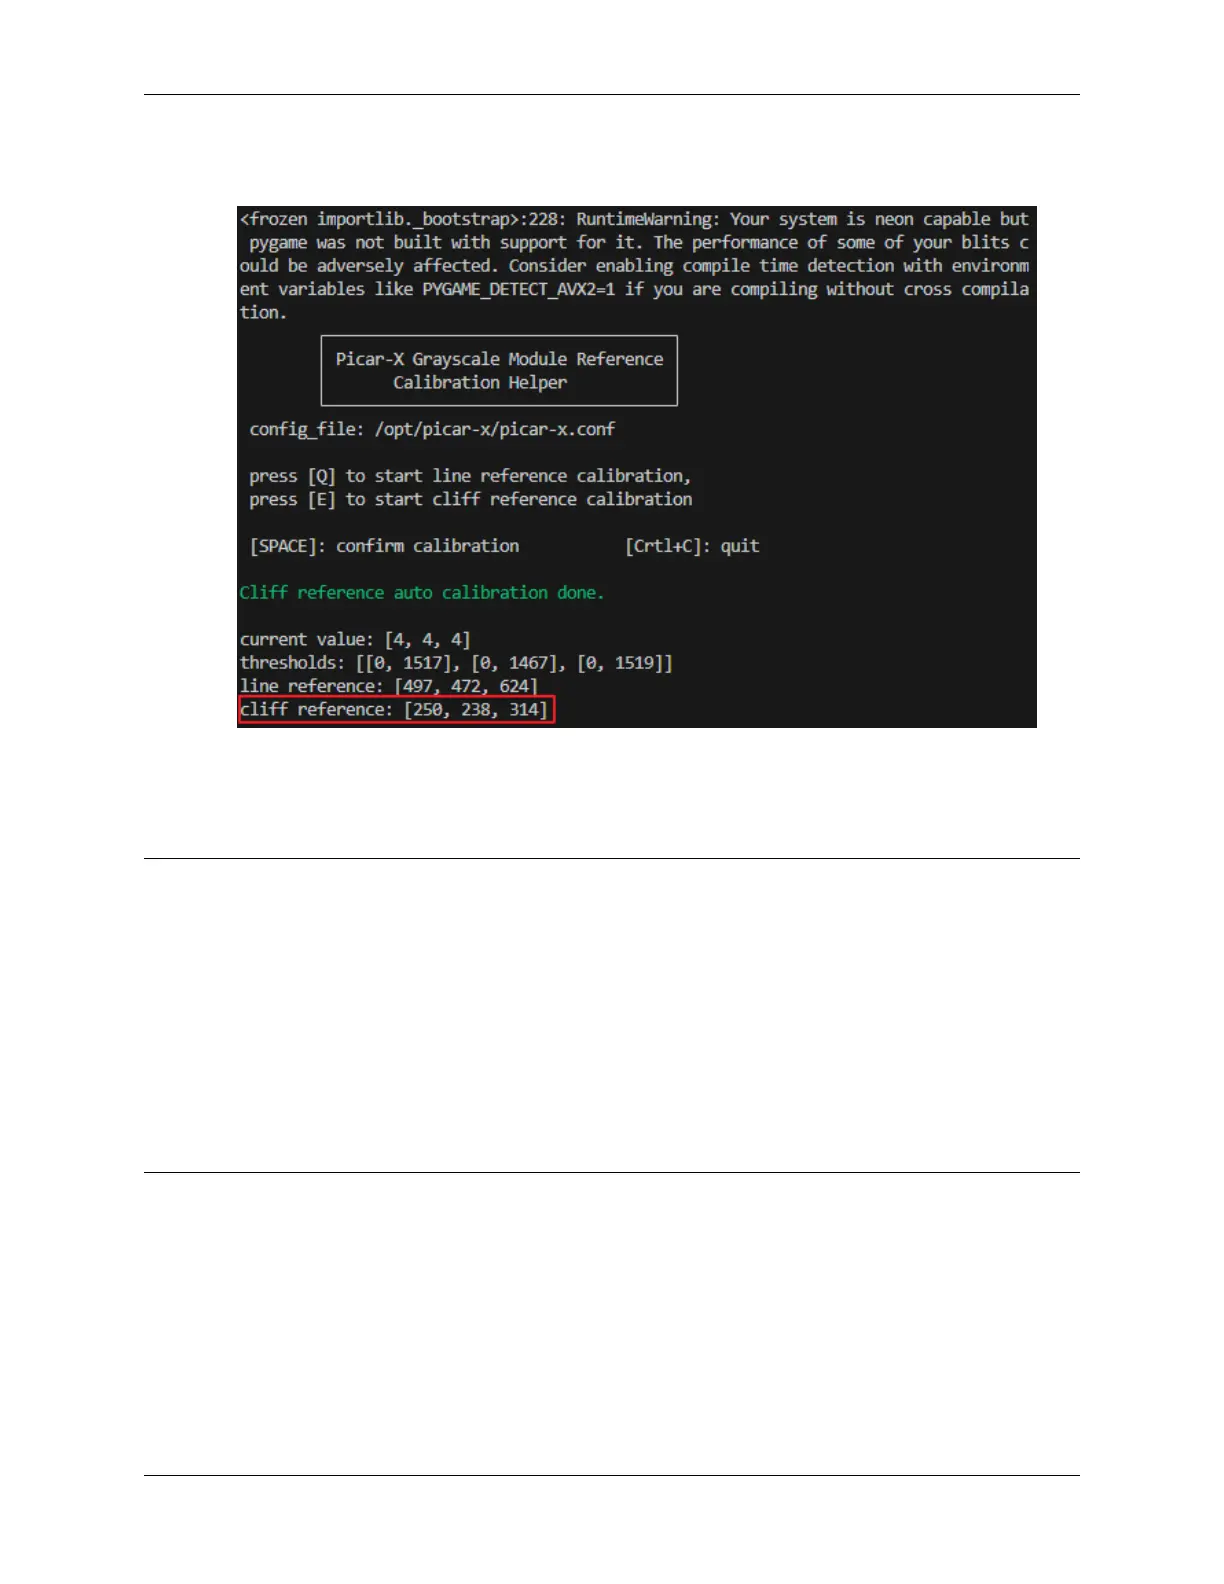
6. Next, suspend the PiCar-X in mid-air (or position it over a cliff edge) and press the “E” key. You’ll observe that
the “cliff reference” values are also updated accordingly.
7. Once you’ve verified that all the values are accurate, press the “space” key to save the data. You can then exit the
program by pressing Ctrl+C.
After the PiCar-X assembly is completed, try running the projects below:
Note: Hello, welcome to the SunFounder Raspberry Pi & Arduino & ESP32 Enthusiasts Community on Facebook!
Dive deeper into Raspberry Pi, Arduino, and ESP32 with fellow enthusiasts.
Why Join?
• Expert Support: Solve post-sale issues and technical challenges with help from our community and team.
• Learn & Share: Exchange tips and tutorials to enhance your skills.
• Exclusive Previews: Get early access to new product announcements and sneak peeks.
• Special Discounts: Enjoy exclusive discounts on our newest products.
• Festive Promotions and Giveaways: Take part in giveaways and holiday promotions.
Ready to explore and create with us? Click [] and join today!
4.2. 0. Calibrating the PiCar-X 47