S
S
S
R
R
R
F
F
F
6
6
6
1
1
1
8
8
8
B
B
B
6
6
6
U
U
U
s
s
s
e
e
e
r
r
r
’
’
’
s
s
s
M
M
M
a
a
a
n
n
n
u
u
u
a
a
a
l
l
l
~28~
and System available.
12) Machine Version: this function is only used by maintenance person authorized by
manufacturer.
13) Hardware setting: this function is only used by maintenance person authorized by
manufacturer.
14) Software setting: this function is only used by maintenance person authorized by
manufacturer.
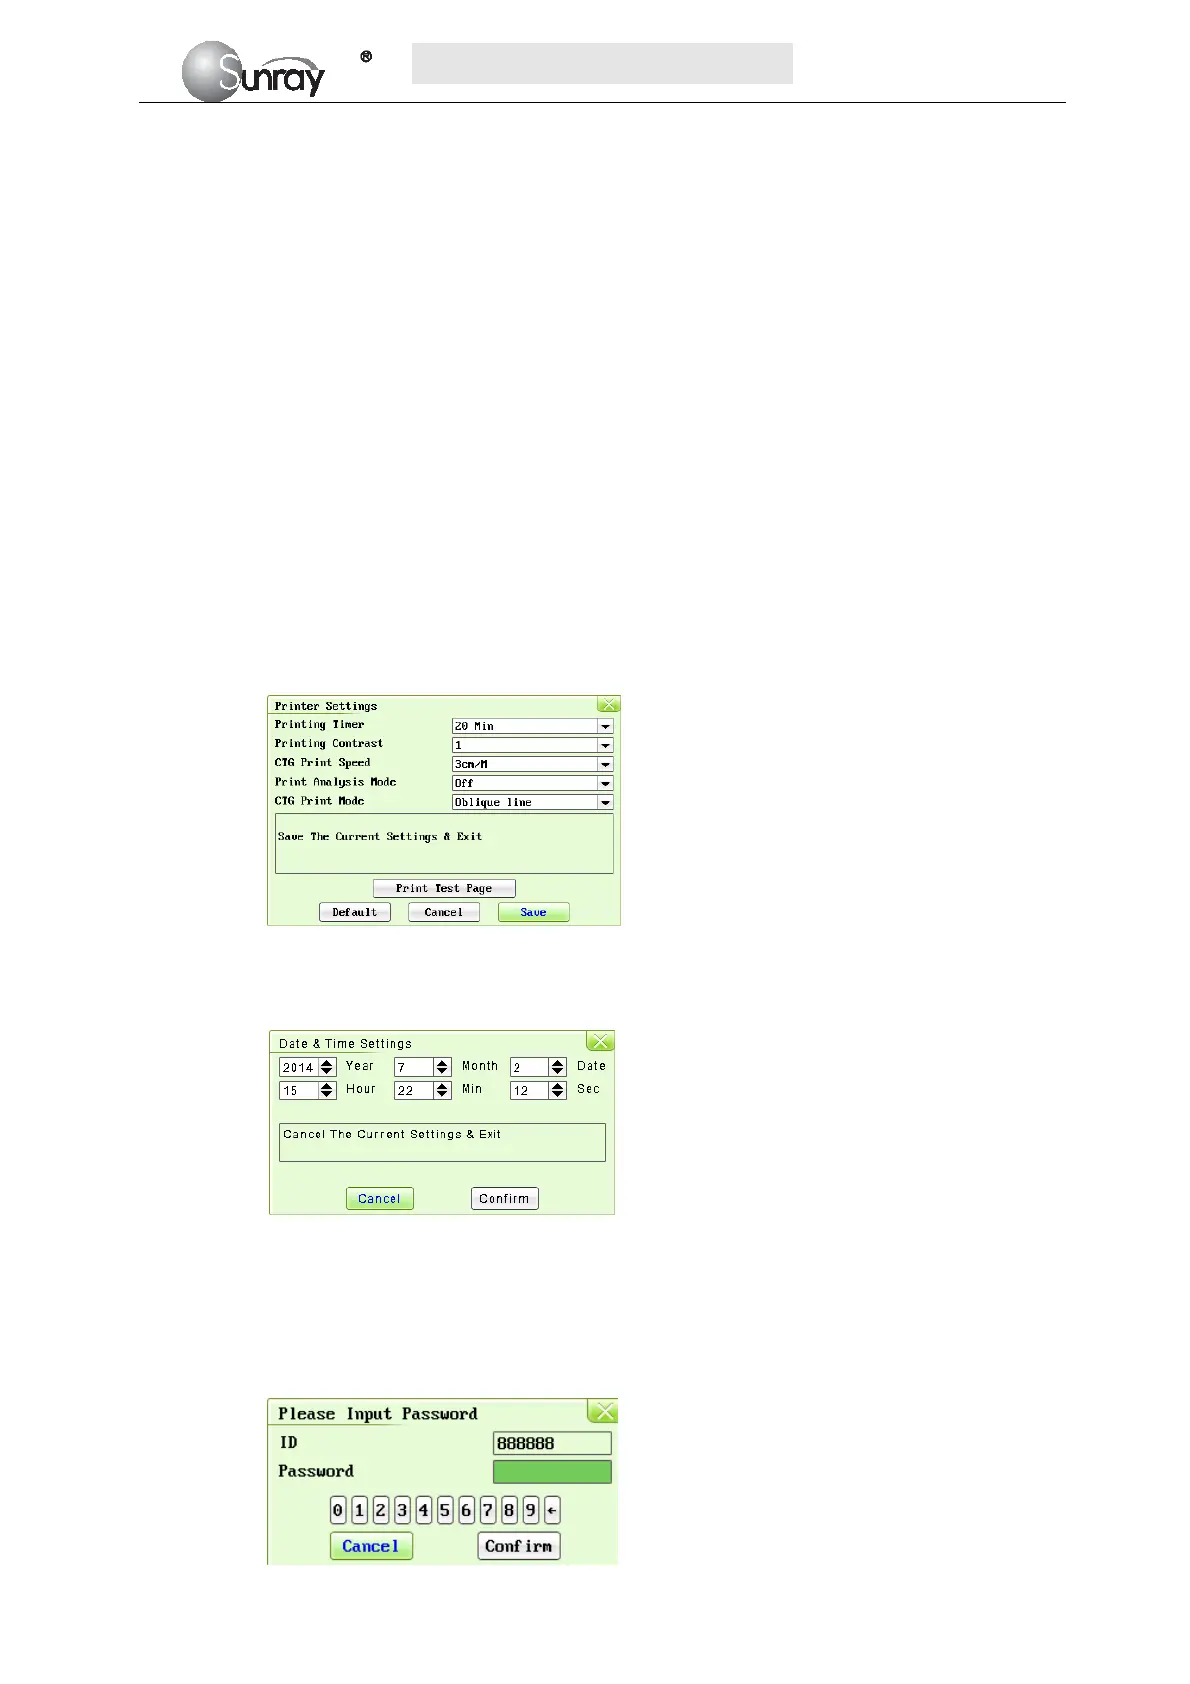
15) Printer Settings: select the Printer Settings, and enter the printer submenu, see Fig.6-3.
Printing Timer: The printing timer determines the elapsed time for each print. Off, 10min,
20min, 30min, 40min, 50 min, 60 min, and 120 min available. For a fixed time, the
recorder stops when the time is up. For Off, there is no time limit. Or you can select the
printing range to print the traces range you want (refer to section 5.5). Whatever the
setting is, the recorder stops when this patient’s traces come to the end or if the PRINT
key is pressed in midway.
Printing Contrast: how dark of the printing. Five levels are available (level 1~5)
CTG Print Speed: 1cm/min, 2cm/min, 3cm/min adjustable
Print Analysis Mode:CST, NST, Krebs, Fischer, Off.
CTG Print Mode: broken line, oblique line.
Fig.6-3
16) Time Settings: select the Time Settings, and enter the system date and time submenu, see
Fig.6-5.
Fig.6-4
17) IP Setting: set up the apparatus IPV4 address
18) Log on: select the Log on, and enter the system login interface, see Fig.6-5. Input the ID and
password, and select “Confirm”. Then login the authorized setting interface, you can set the
Alarm Volume and change password.