Questions? Call or Text +1-801-658-0015 • 11
e Micro Welder Experts
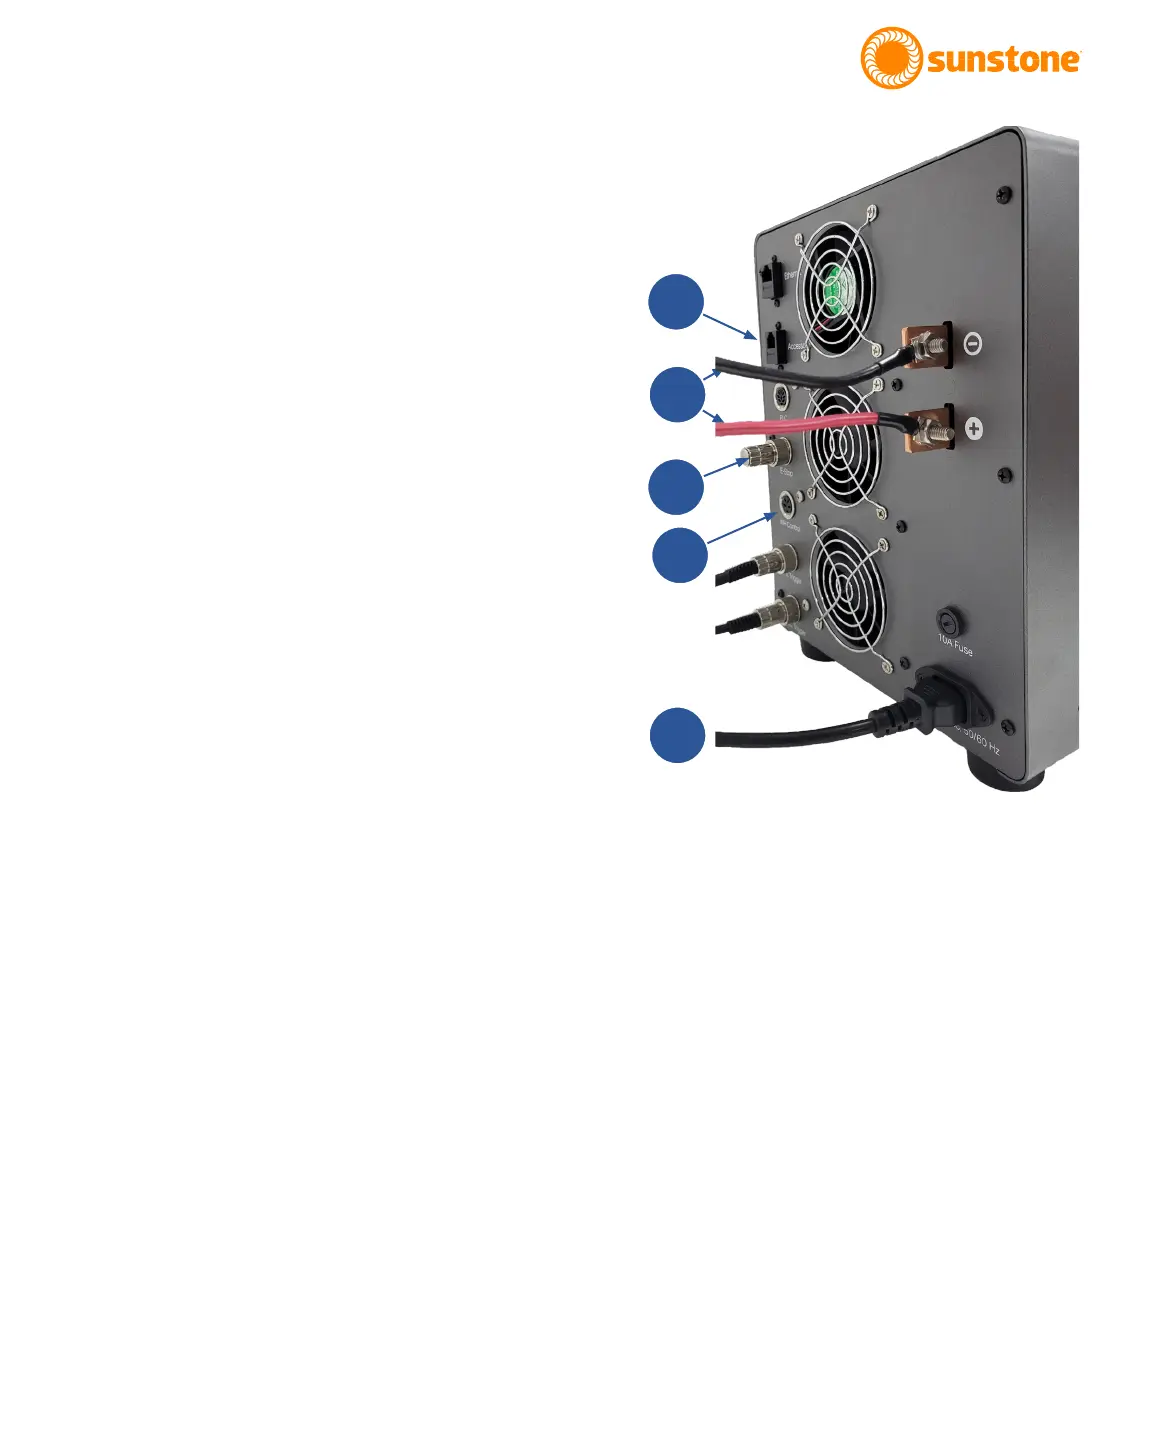
How to Set Up Your Welder
• Unbox the welder and place on a stable surface.
• Connect the E-Stop Bypass Plug or an E-Stop
switch into the E-Stop Port on the back of the
welder. See (C) in Figure 11.1.
• Connect the female end of the power cord into
the Pico’s Power Inlet and connect the male
end into an AC power outlet (90-220VAC). See
(E) in Figure. 11.1.
• Connect the weld cables (B) from the weld head
or hand attachment to the positive and nega-
tive weld terminals.
• Use the included ¼-20 socket cap
screw with lock washer and hex nut.
• Attach the ends of the weld cables
coming from the weld head or hand
piece rmly to the copper terminals on
the back panel of the welder. One cable
should be attached to the negative, one
cable should be attached to the posi-
tive.
• Connect the Weld Head Control cable (if using
the Sunstone Micro E weld head) to the Weld
Head Control Port (D).
• Attach one end of the cable to the Accessory
Port (A) on the back of the welder. Connect the
other end of the cable to the Comm Port on the
weld head.
• Determine which weld trigger conguration is
best for your setup and connect accordingly.
Options include:
• Direct Control using an Analog foot
pedal
• Auto Mode
The system is now properly connected and ready to
weld.
Figure 11.1. Unbox the Pico and make sure
these basic connections are completed: Power
(E), weld cables (B), E-Stop (C), and Accessory
Port (A).
B
E
C
A
D