24 • Questions? Call or Text +1-801-658-0015
Users Guide
• Edit the name and or notes.
• Press the Save Over Selected Weld Button (G).
• A message will pop up on the screen asking
for conrmation before allowing the weld to be
edited and saved.
To load an existing weld schedule:
• Tap on a previously saved schedule, so the
scheduled is highlighted.
• Press the Load button (I). The weld schedule is
now loaded and ready to be used.
To delete an existing weld schedule:
• Select the schedule you wish to delete by
tapping on a previously saved schedule, which
will highlight the schedule.
• Press the Delete Selected Weld Button (J).
• A message will pop up on the screen asking for
conrmation before deleting the weld schedule.
Communications Screen
Operation
Select the Communications Screen icon in the Naviga-
tion Bar to access the Pico’s automation features. The
Communications Screen has three sub sections: The
PLC tab, the Alarms tab, and the Import/Export tab, as
shown in Figure 24.1.
Under the PLC Tab (A) you’ll review pin states for the
8DIN connector on the back of the Pico and also pro-
gram up to four schedules. Each of these features are
access via two sub-tabs: Basic PLC I/O and Remote
Schedule Select.
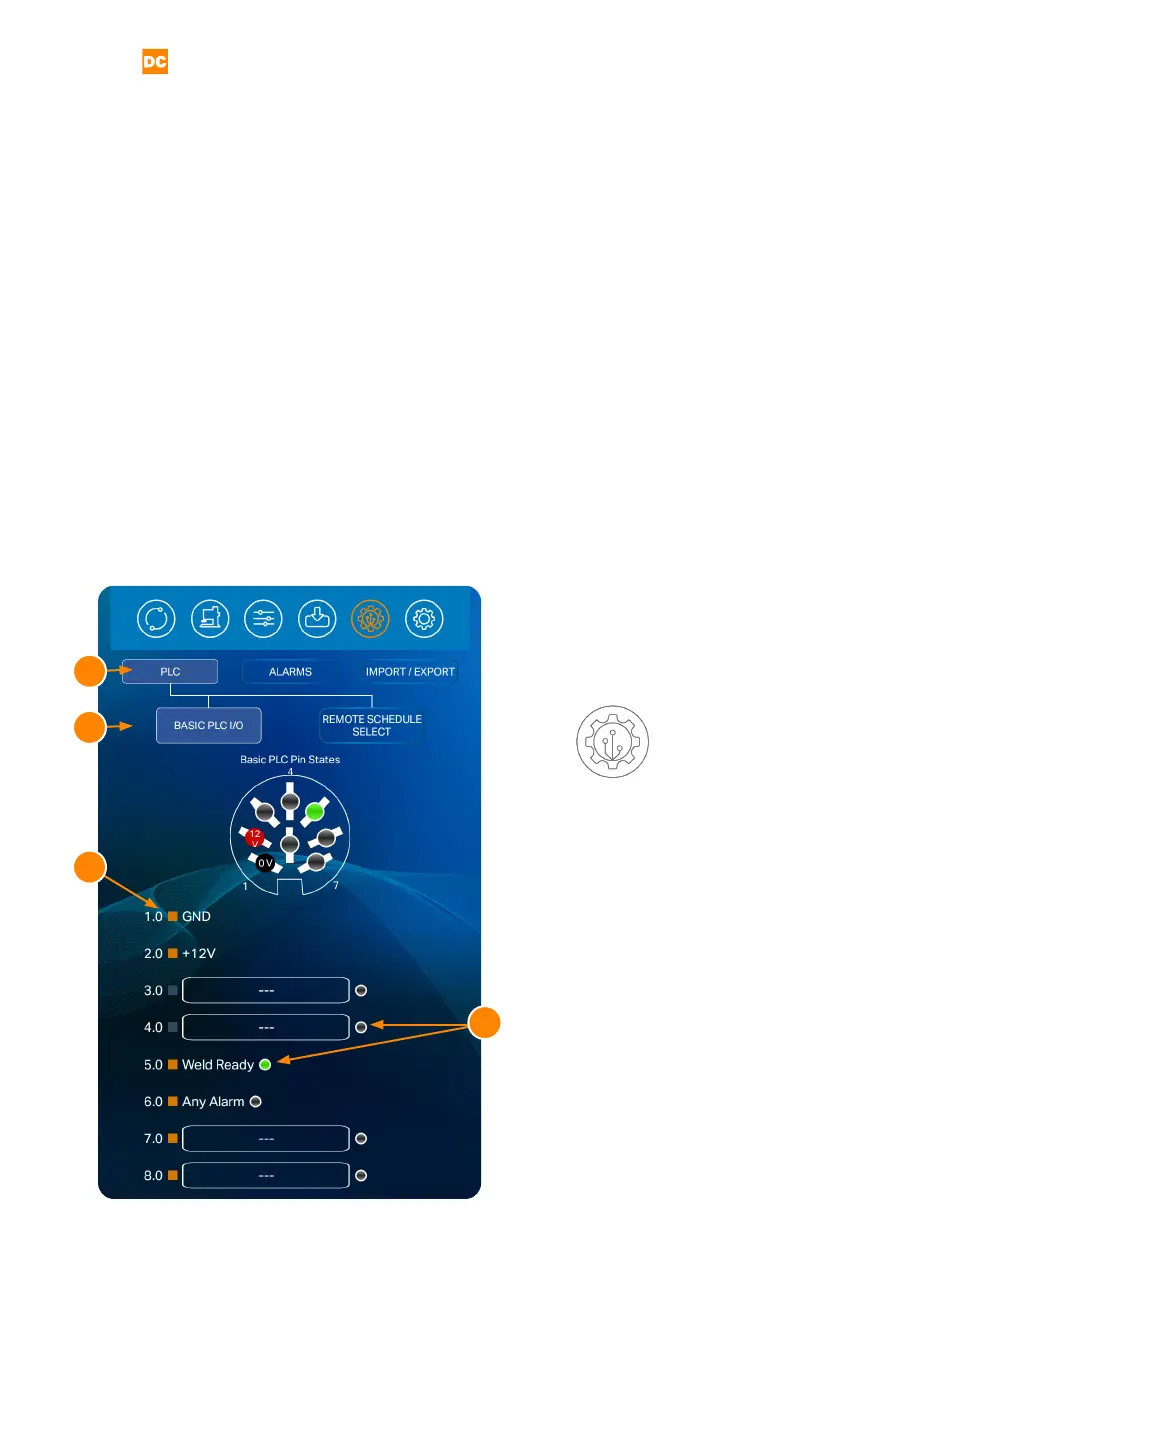
Basic PLC I/0 (B)
The Basic PLC I/O tab (B) shows the pin states for the
8DIN connector on the back of the power supply (la-
beled PLC). Some pins are hard-coded (pins 1, 2, 5, and
6), while others have a drop-down list of options from
Figure 24.1. Select the Communications Screen icon
in the Navigation Bar to access the Pico’s automation
features. The Communications Screen has three sub
sections: The PLC tab, the Alarms tab, and the Import/
Export tab.
A
B
C
D