28 • Questions? Call or Text +1-801-658-0015
Users Guide
Note: If a warning and its corresponding alarm are
both enabled and active, then only the alarm will be
displayed. Warnings are active until the corresponding
alarm is also active.
Active warnings and alarms can be cleared and reset
by toggling the switch next to the alarm or by using the
PLC inputs (Pin 3 or Pin 4).
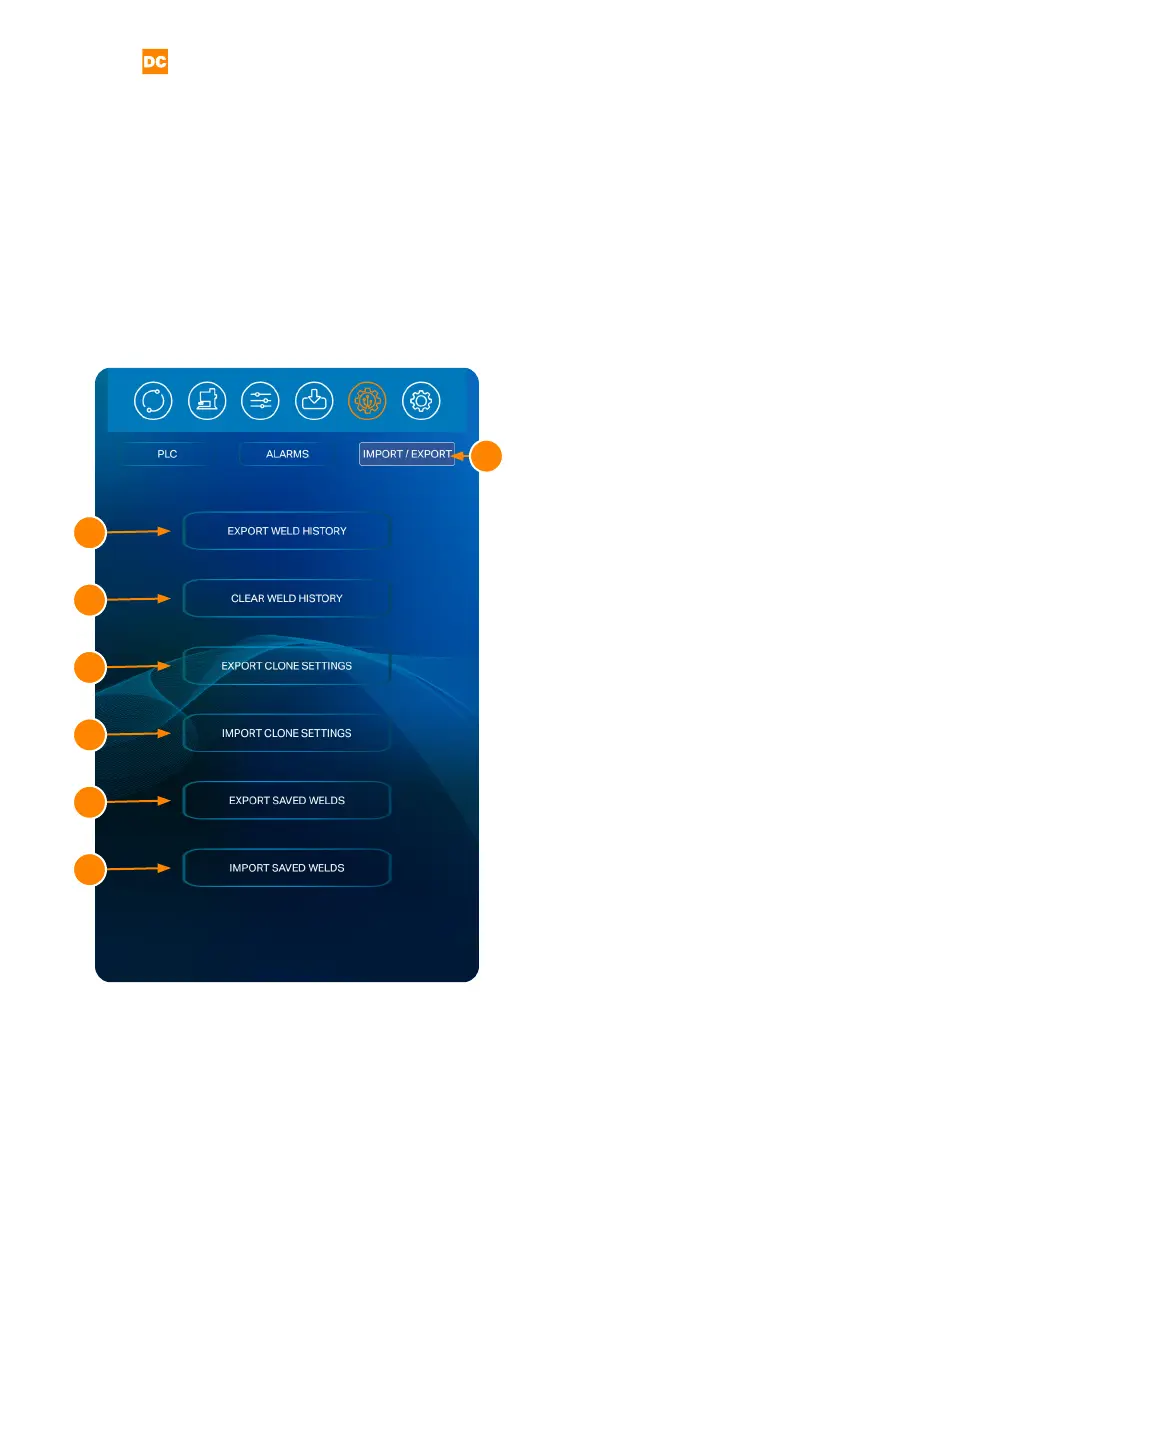
The Pico allows you to import or export weld sched-
ules. In the Communications Screen, press the Import/
Export Tab (A) to get started. The Import/Export control
panel contains six weld schedule features to help you
manage this helpful feature. See Figure. 28.1
Export History (B)
Press the Export History Button (B) to export the past
weld results history to a USB drive. The exported CSV
le will include all weld parameters and comparator val-
ues. Make sure a USB drive is attached to the USB port
found on the Pico’s left panel.
Clear Weld History (C)
Press the Clear Weld History Button (C) to clear the past
weld results history.
Export Clone Settings (D)
The Export Clone Setting feature saves all the welder
settings, including all saved schedules, to a USB drive.
This feature is benecial for operators who need to
implement multiple identically congured welders. After
you’ve exported a cloned le, remove the USB drive,
insert the USB drive into another Pico welder, and use
the Clone Import feature to upload the saved schedules
and clone the new welder.
Import Clone Settings (E)
The Import Clone Settings feature uploads the export-
ed welder settings and schedules from a USB drive and
saves them onto another welder.
Export Saved Welds (F)
The Export Saved Welds features copies all the saved
weld schedules to a USB drive. Unlike cloning, the Ex-
Figure 28.1. The Pico alarms control panel will display
certain power supply statuses, active warnings, active
alarms, and other alarm-related settings.
A
B
G
F
E
D
C