Questions? Call or Text +1-801-658-0015 • 13
e Micro Welder Experts
Save/Load Screen (D)
Touch the Save/Load Screen icon (D) to save
weld settings or load weld settings from a
previously saved weld. See page 23.
Communications Screen (E)
Touch the Communications Screen icon (C) to
access PLC controls for automation, settings
for alarms, and features for importing/exporting pre-set
welds. See page 24 for PLC instructions.
Systems Settings Screen (F)
Touch the Settings Screen icon (F) to modify
the Pico’s basic settings, such as language,
date and time, speaker volume, screen bright-
ness, and more. See page 29 to learn how to make
system changes.
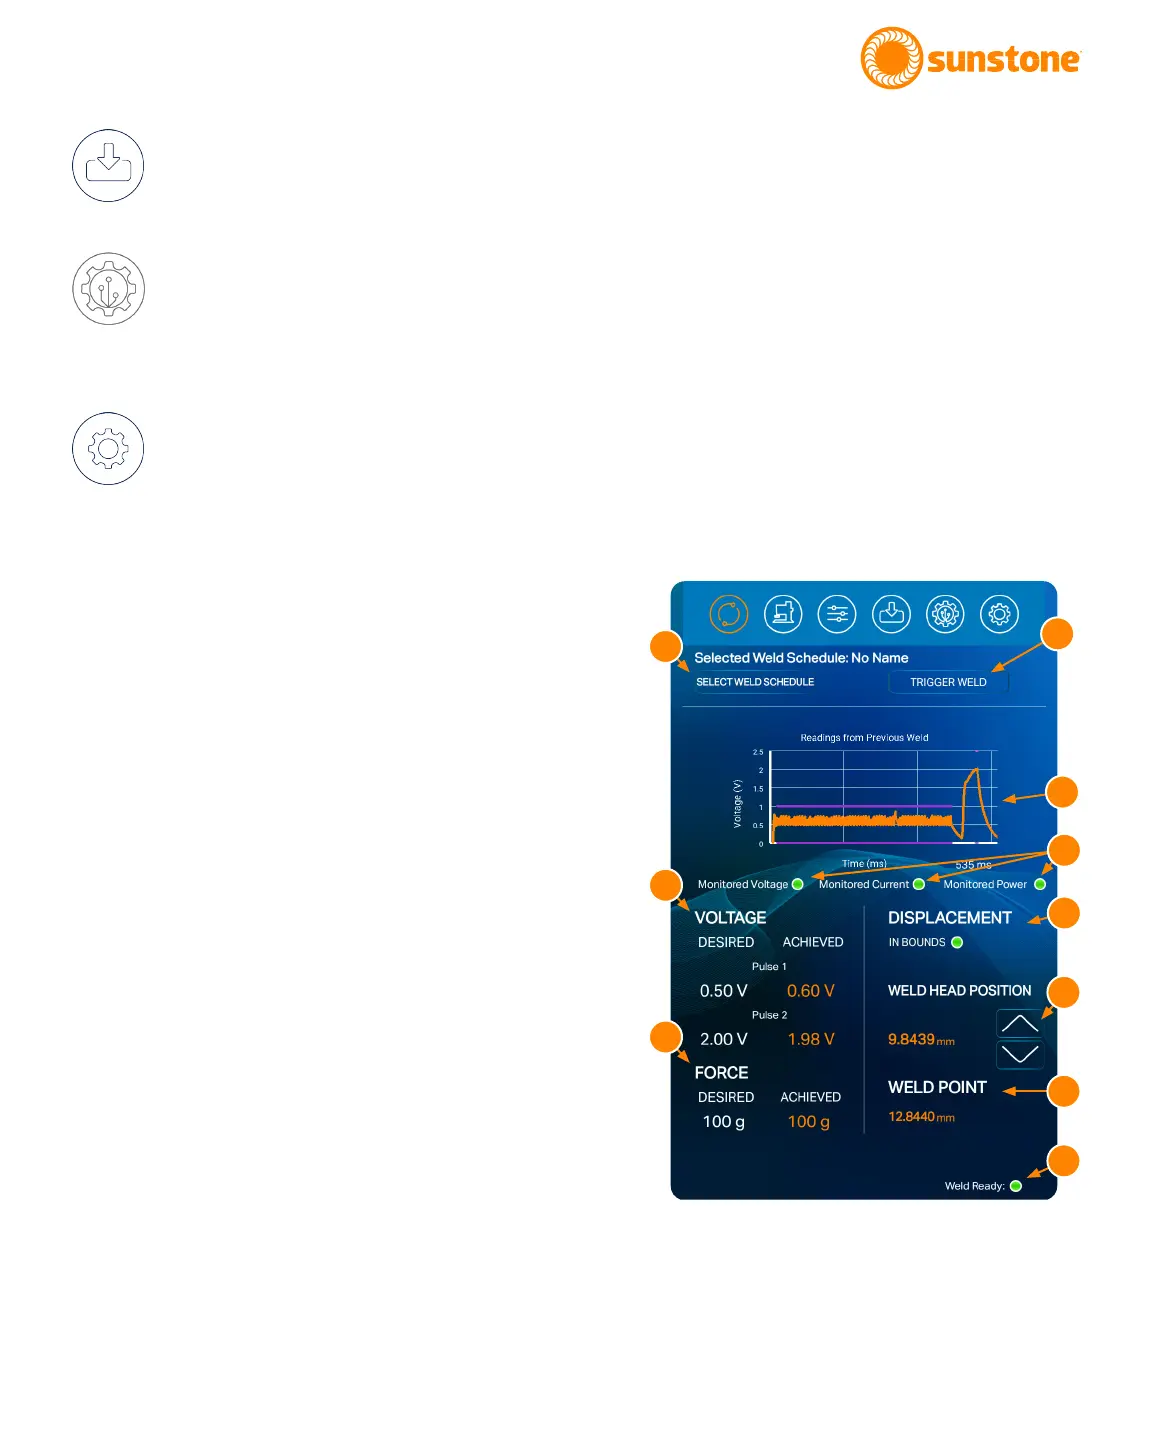
Run Screen Operation
The Run Screen, seen in Figure 13.1, displays current
settings relating to the weld discharge and weld head.
Additionally, the achieved results from the previous
weld are displayed here as well. The Run Screen is
equivalent to a “home” screen and should be the active
screen when triggering a weld.
Important: The Pico will only release energy and trig-
ger a weld when the Run Screen or Settings Screen is
active. If another screen is displayed, the Pico will not
trigger a weld.
To quickly load an existing weld schedule from the Run
Screen, tap the Select Weld Schedule button (G) in
Figure 13.1 and select the schedule from the pop-up
window. Existing weld schedules can also be loaded in
the Save/Load Screen, further explained on page 23.
You can trigger a weld in Auto mode by pressing the
Trigger Weld button (J). Pressing this button will act as if
you depressed a foot pedal plugged into the Secondary
Trigger Port found on Pico’s rear panel.
Figure 13.1. The Run Screen.
G
H
I
J
K
L
N
P
M
O