Questions? Call or Text +1-801-658-0015 • 21
e Micro Welder Experts
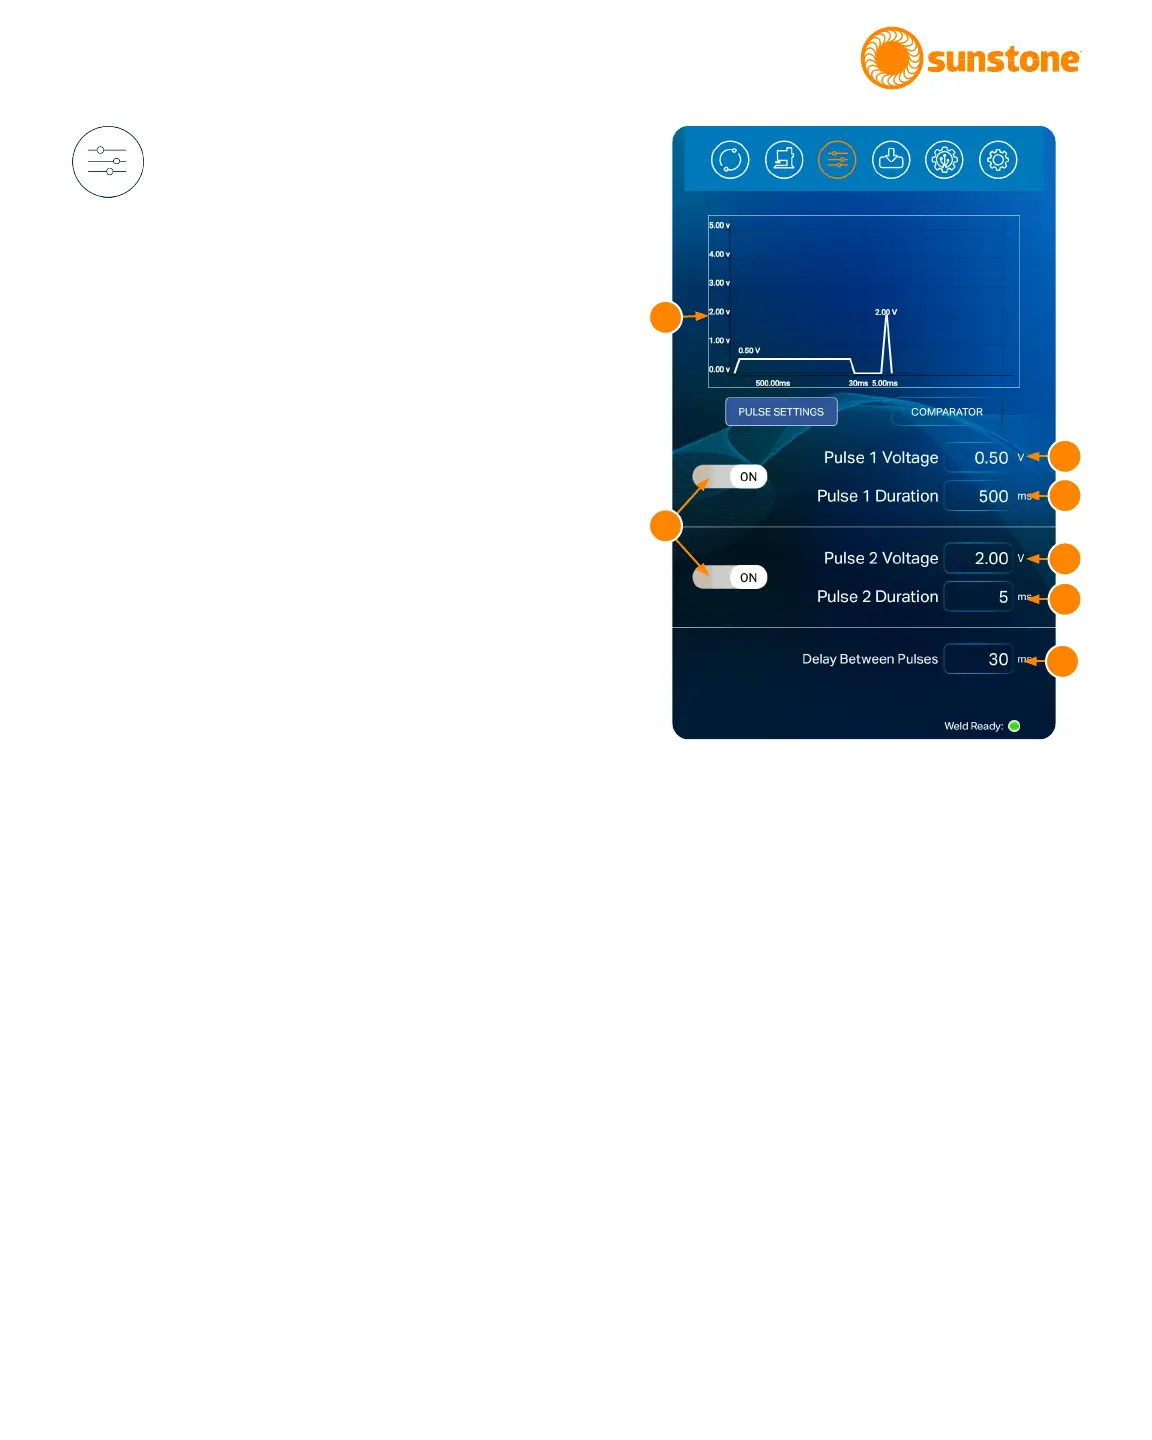
Weld Settings Screen
Operation
The Weld Settings Screen is used to set the desired
voltage and duration of the weld discharge. The Pico
can be congured to release two independently set
pulses of weld energy with customizable pre-weld delay
and delay between pulses.
Pulse settings dictate the amount of energy that will
be released during each weld. As voltage and length
increase, weld heat will increase.
A graph (A) at the top of the Weld Control Screen dis-
plays a visual representation of the expected waveform
based on the weld settings and parameters you choose
here. Weld voltage is displayed on the Y axis and weld
discharge length (time) is displayed on the X axis.
A total of two weld pulses can be enabled/disabled. Us-
ing multiple pulses can increase weld quality. With both
pulses enabled, the Pico will discharge two separate
times with each weld trigger/initiation. The rst pulse is
useful to remove surface inconsistencies and contami-
nants which helps to displace oils, break through oxide
layers, and seat the welding electrodes. The second
pulse is used to fuse the metals.
To set pulse parameters, rst toggle the button (B) to
ON to enable the pulse, or OFF to disable the pulse for
Pulse 1 or Pulse 2. If both pulses are disabled, no weld
will occur and an alert will display if a weld is triggered.
The voltage of each pulse can be adjusted from 0.1 V to
5 V. To adjust voltage, touch the Voltage box (C) of the
desired pulse. A pop-up box will appear. Use the slider
bar or the number pad to set the displacement limit; or
incrementally adjust the value using the arrow buttons.
Press the Close Button to enter the limit.
Figure 21.1. The Weld Settings Screen is used to set the
desired voltage and duration of the weld discharge. The
Pico can be congured to release two independently
set pulses of weld energy with customizable pre-weld
delay and delay between pulses. Press the Voltage and
Duration boxes to change values.
A
C
B
C
D
D
E