26 • Questions? Call or Text +1-801-658-0015
Users Guide
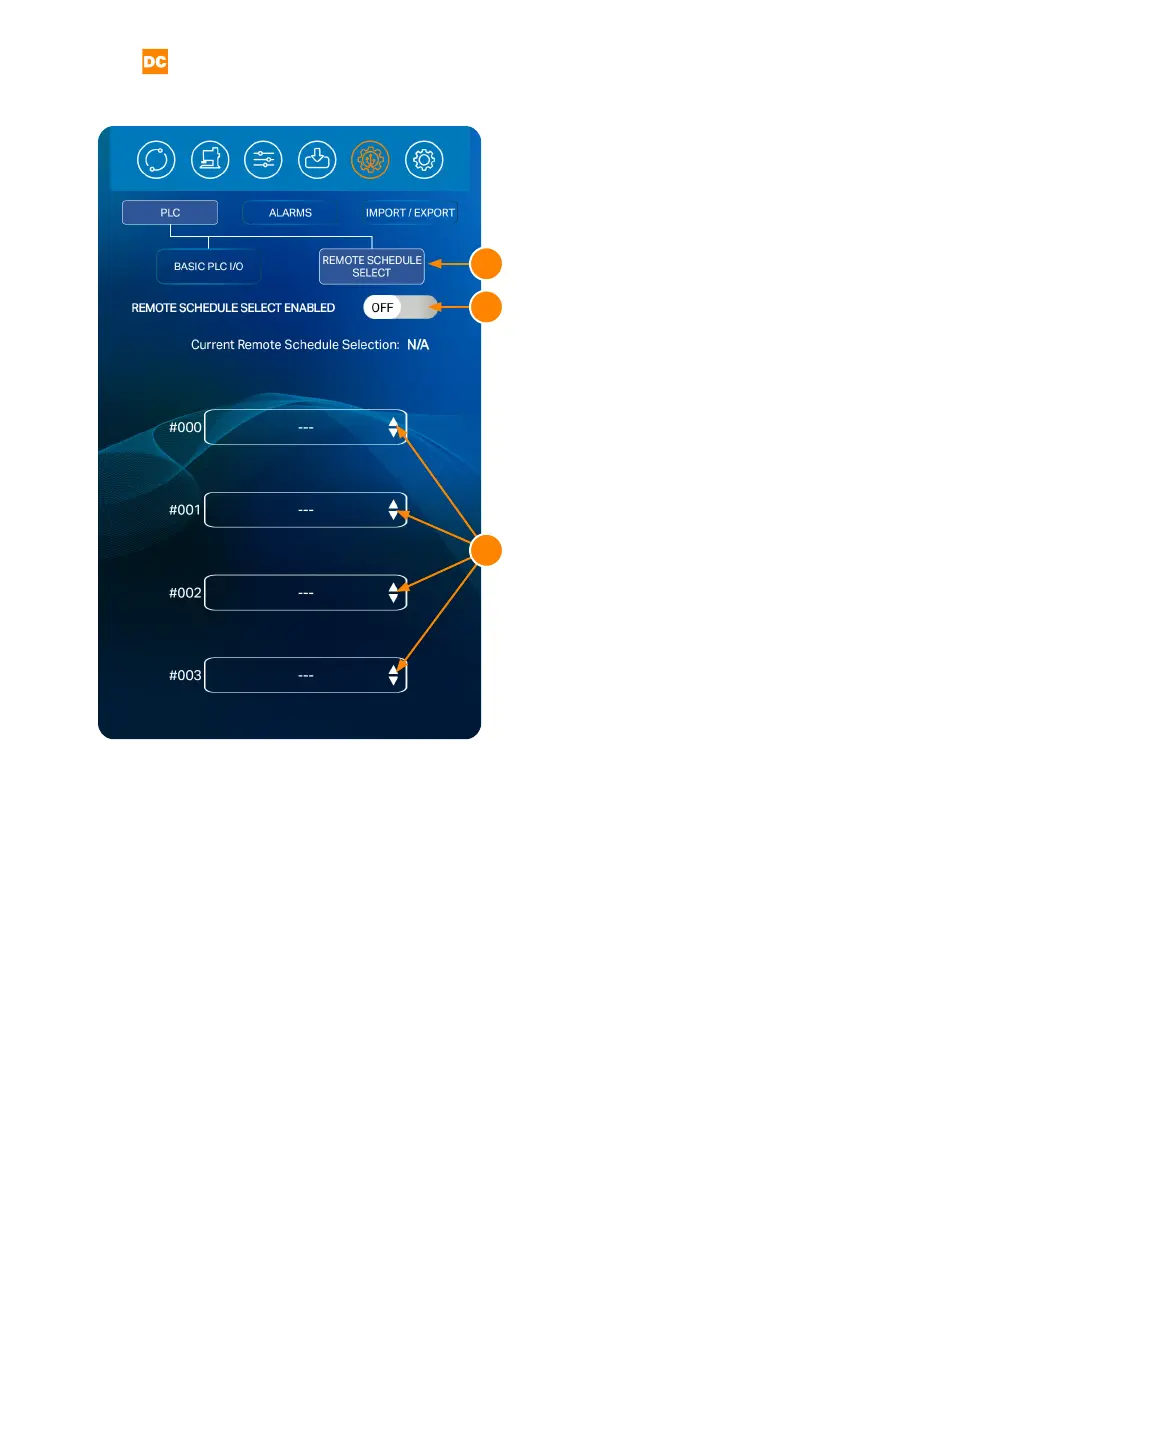
Remote Schedule Select
The Remote Schedule Select feature allows you to pro-
gram up to four pre-saved schedules, recall them, and
switch between them via the built in PLC capabilities. To
do so, press the Remote Schedule Select Button (A), as
seen in Figure 26.1.
Next, toggle the Remote Schedule Select Enabled
Switch (B) to the On position.
Enabling the Remote Schedule Select feature will au-
tomatically change Pin3 and Pin4 on the Basic PLC I/O
tab to use the remote schedule select. If the Remote
Schedule Select button is later disabled, the pins will
return to an unassigned state.
Next, Program each of the four drop-down menus (C) to
the desired pre-saved schedule, as seen in Figure 261.
To select pre-saved schedules:
• Click on the drop-down menus and select
the desired saved schedule. You can choose
four dierent schedules that are selectable
through the two PLC input pins on the 8DIN PLC
connector on the back panel:
• Schedule 0 - Pin3 High(0) and Pin4
High(0)
• Schedule 1 - Pin3 High(0) and Pin4
Low(1)
• Schedule 2 - Pin3 Low(1) and Pin4
High(0)
• Schedule 3 - Pin3 Low(1) and Pin4
Low(1)
• The selected schedules will be passed in using
a bit mapping. Keep in mind that the inputs are
reverse logic, so a low will actually be a “1” and
a high will be a “0”.
To disable the remote schedule, toggle the Remote
Schedule Select Enabled Switch to the O position.
Figure 26.1. Select the Communications Screen icon
in the Navigation Bar to access the Pico’s automation
features. The Communications Screen has three sub
sections: The PLC tab, the Alarms tab, and the Import/
Export tab.
A
B
C