Chapter 6: Advanced Chassis Setup
6-13
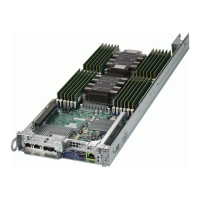
Installing the Serverboard
1. Review the documentation that came with your serverboard. Become familiar
with component placement, requirements, precautions, and cable connections.
2. Open the chassis cover.
3. As required by your serverboard, install standoffs in any areas that do not
have a permanent standoff. To do this:
A. Place a hexagonal standoff screw through the bottom the chassis.
B. Secure the screw with the hexagon nut (rounded side up).
4. Lay the serverboard on the chassis aligning the permanent and optional stand-
offs
5. Secure the serverboard to the chassis using the rounded, Phillips head screws.
Do not exceed eight pounds of torque when tightening down the serverboard.
6. Secure the CPUs, heatsinks, and other components to the serverboard as
described in the serverboard documentation.
7. Connect the cables between the serverboard, backplane, chassis, front panel,
and power supply, as needed. Also, the fans may be temporarily removed to
allow access to the backplane ports.
6-8 Power Supply
The system has two 1000 Watt, redundant, hot-plug power supply modules. They
automatically sense the input voltage between 100v to 240v, and operate at that volt-
age. An amber light on the power supply is illuminated when the power is switched
off. An green light indicates that the power supply is operating.
Replacement units can be ordered directly from Supermicro. Replace a failed power
supply module with the same model.
 Loading...