© Copyright Mission Critical Energy Inc, 2019 Version 1-2019
www.superwind.com
To prevent damage to your system during installation, cables
must be connected in the following order:
1. Connect the Temperature Sensor
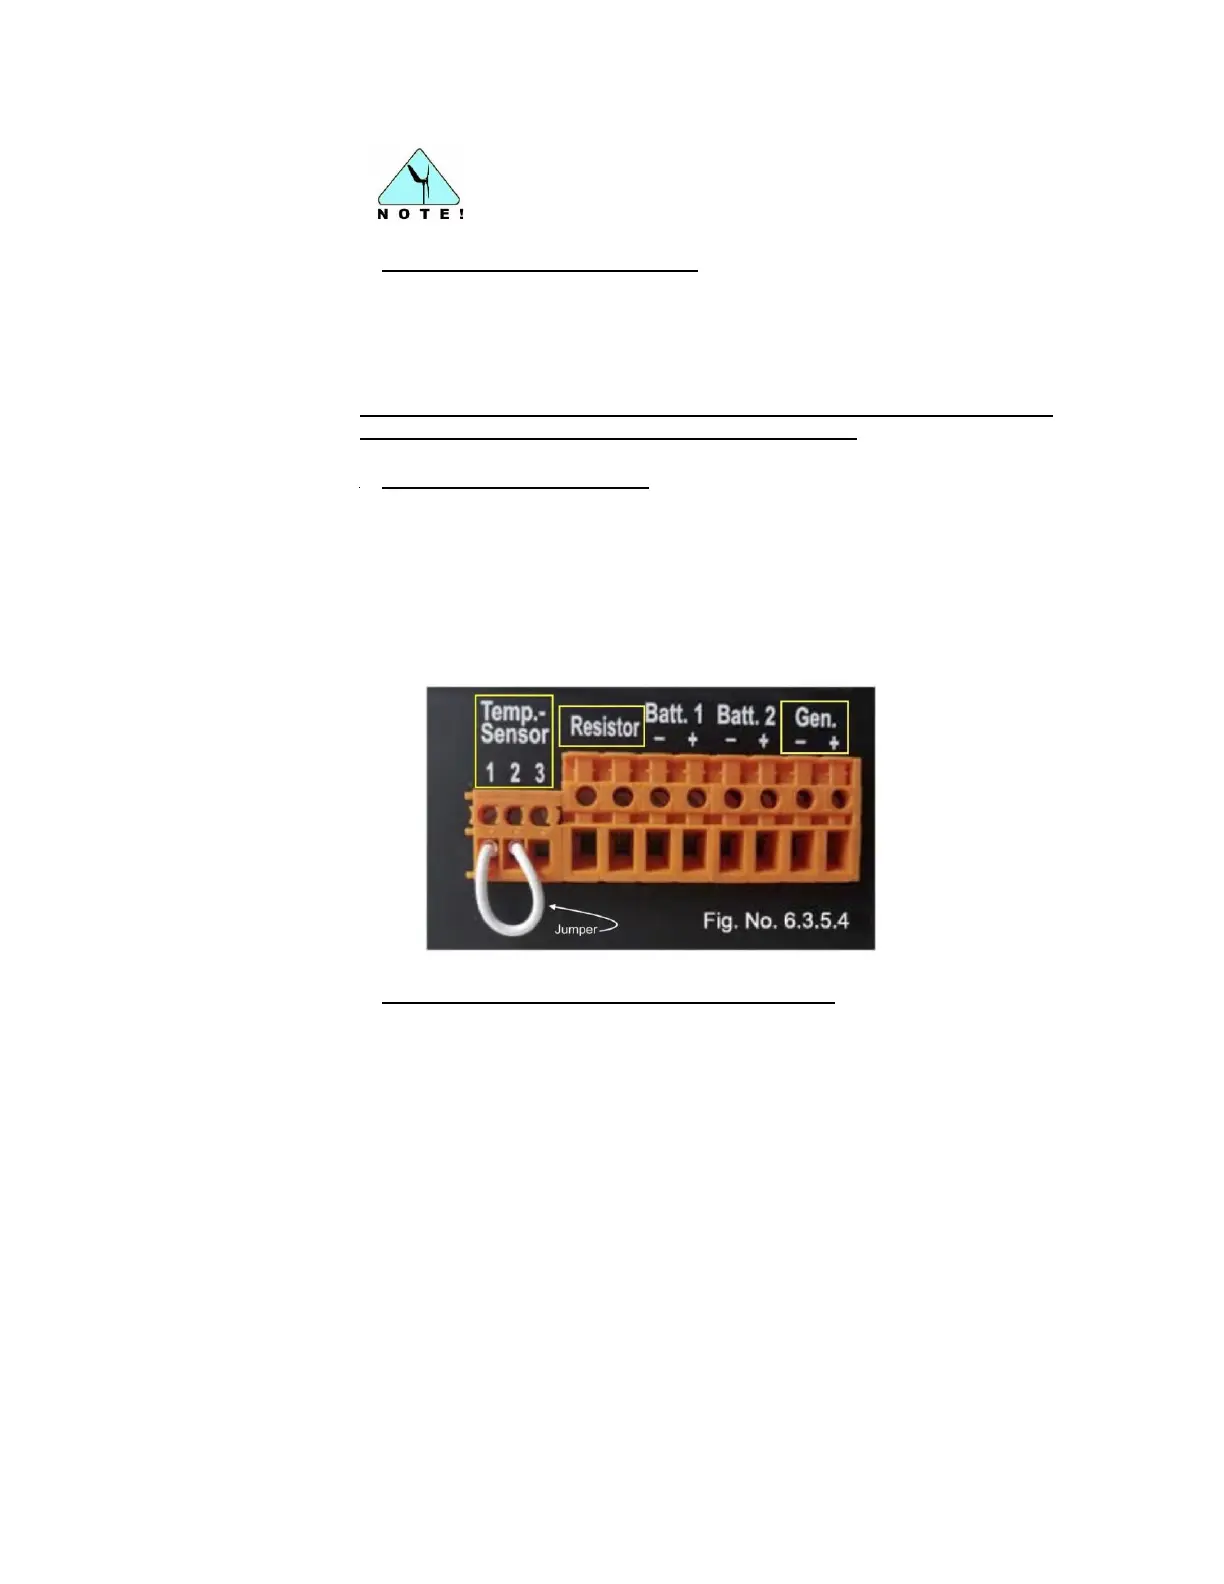
Connect the two cables of the temperature sensor to terminals 1 and 3
Temp.-Sensor. If for any reason the temperature compensation function will
not be used, a jumper must be installed between terminals 1 and 2.
Note: The temperature sensor must be connected or the jumper installed
for the SCR 48 to function properly (Fig. No. 6.3.5.4).
2. Connect the Power Resistor
Connect both of the resistor wires to the terminals labelled Resistor (Fig. No.
6.3.5.4). The wires for the resistor are non-polarity specific, meaning the
connections at the charge regulator are interchangeable. Should the length of
the wires provided with the power resistor be insufficient, replace them with
new wires possessing a minimum cross section of 4 mm² (12 AWG) (refer to
Section 6.3.1).
3. Connect the Superwind 350/48V wind generator
Connect the wind generator to the charge regulator terminals labelled - Gen.
and + Gen. DO NOT reverse the polarity of these wires. Reversing the
polarity of the wires will destroy the charge regulator and void the
warranty. As a precaution, label the wire ends POSITIVE (+) or NEGATIVE (-)
in order to prevent reverse polarity connection errors (Fig. No. 6.3.5.4).
Mark the connecting cables of the Superwind 350/48V as follows:
POSITIVE (+) .......................... RED
NEGATIVE (-) ......................... BLACK
If unsure about the polarity of the cables from the wind generator, you can
identify POSITIVE (+) and NEGATIVE (-) easily using a multi-meter.
Select DC (10 VDC range) on your multi-meter. Connect the multi-meter
positive lead (red) and negative lead (black) to the cables coming from the
wind turbine, then ask an assistant to turn the rotor of the wind turbine slowly