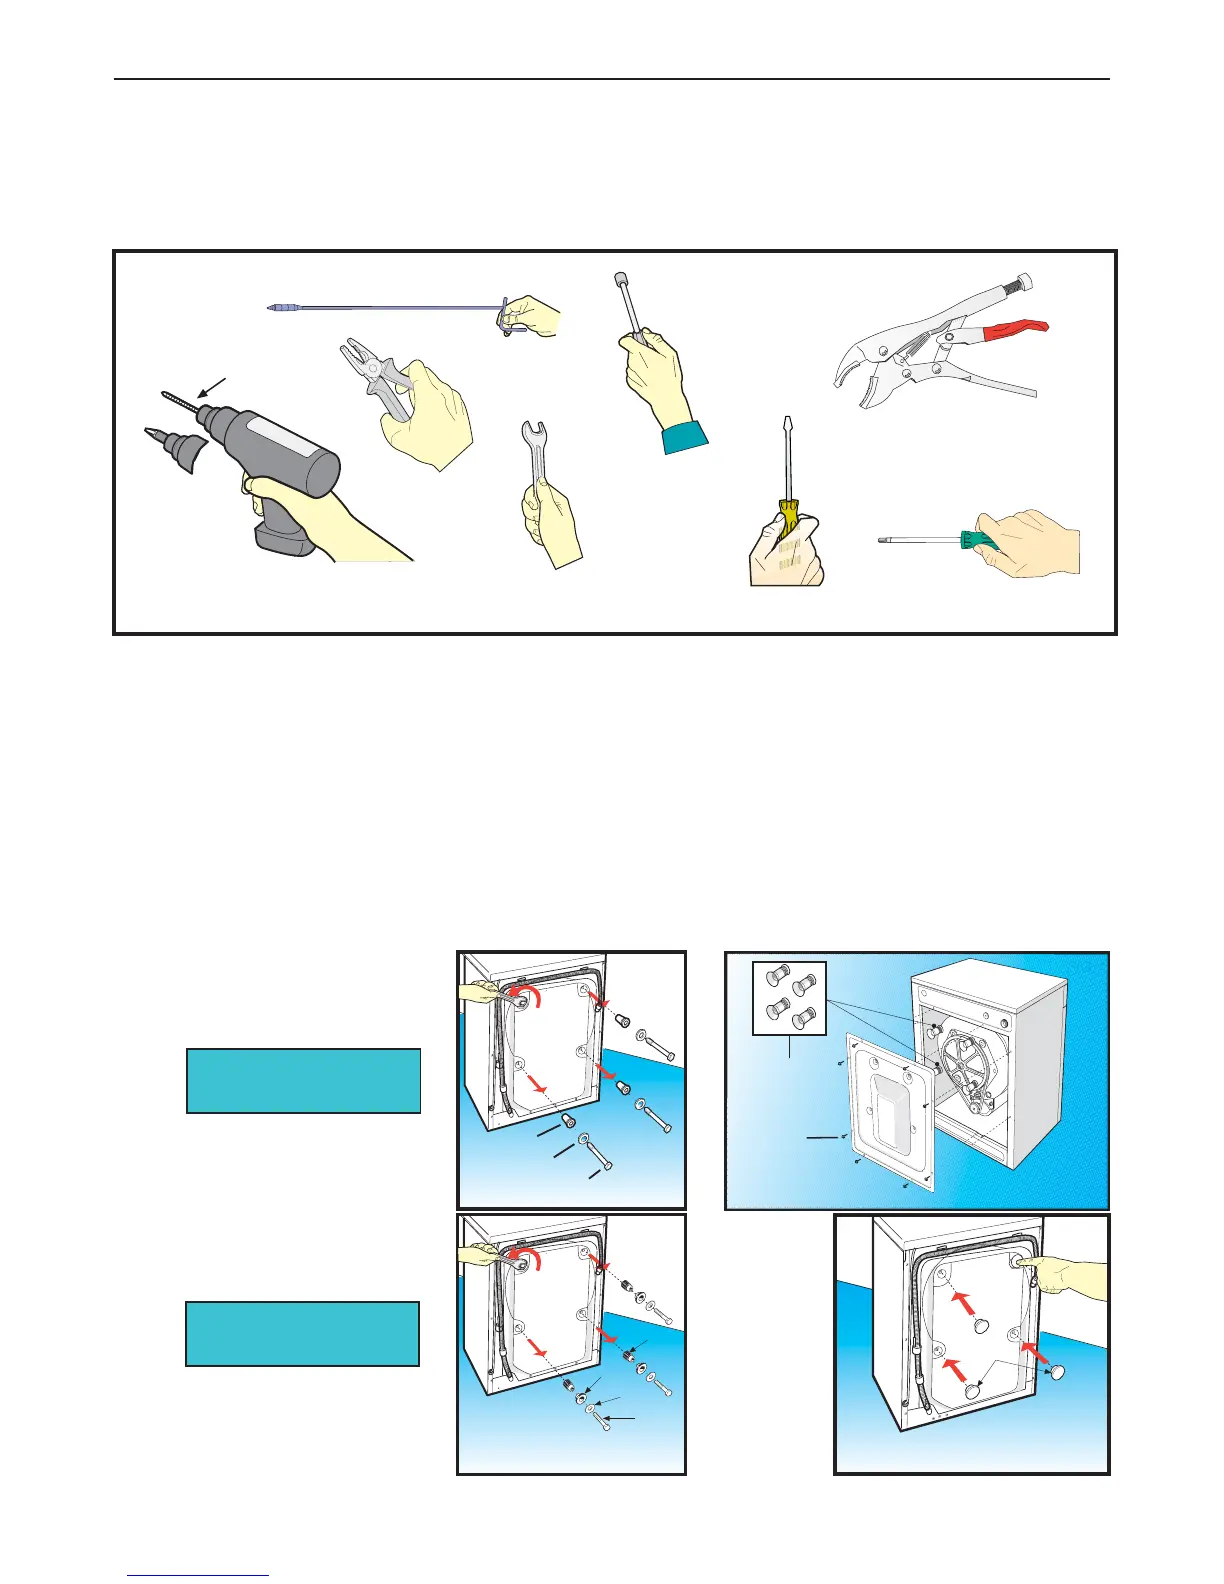
Removing the oscillating unit locking bolts:
(a) Use a 10 mm spanner to remove the 4 hexagonal head fixing bolts (Z010), the respective washers (Z020) and
rubber packing plugs (Z030).
(b) Insert a screwdriver in the holes left and lever out the four spacers (Z040).
(c) Lean the appliance forward to recover the four fallen spacers.
Version with Polypropylene tub:
(a) Use a 10 mm spanner to remove the 4 hexagonal head fixing bolts (Z010), washers (Z020), spacer bushes
(Z019) and packing spacers (Z040).
(b) Close off the four packing bolt holes using the four plugs (Z023) provided in the document envelope.
Important: If the spacers remain trapped inside the appliance, open the rear panel by removing the eight fixing screws
(A080) and recover the spacers.
Store these parts carefully as they will be useful when transporting the machine in the future.
Tools necessary for dismantling the various parts of the appliance:
Battery driven screwdriver/drill
with Ø 4 mm drill bit for metal
10 and 13 mm
open ended spanners
7-10-13 and 17 mm
box spanners
Flat screwdriver
Long crosshead screwdriver
Mole grips
Torx T20 screwdriver
Pliers
Z010
Z020
Z019
Z040
Z023
Ø 4mm
DASVDFFB
VV, LBB 2
IMPORTANT:
The washing machine used as a reference model for the compilation of this manual is the 42 litre electronic machine with
enamelled tub. Any maintenance operations referring to other washing machines have been written in blue.
This Manual must be used together with all the other technical documents appertaining to the product itself (Exploded
views, technical documents and any other technical information provided).
Z010
Z030
Z020
FIG. 1
Z040
A080
For Enamelled and
Stainless Steel tubs
For Polypropylene tubs