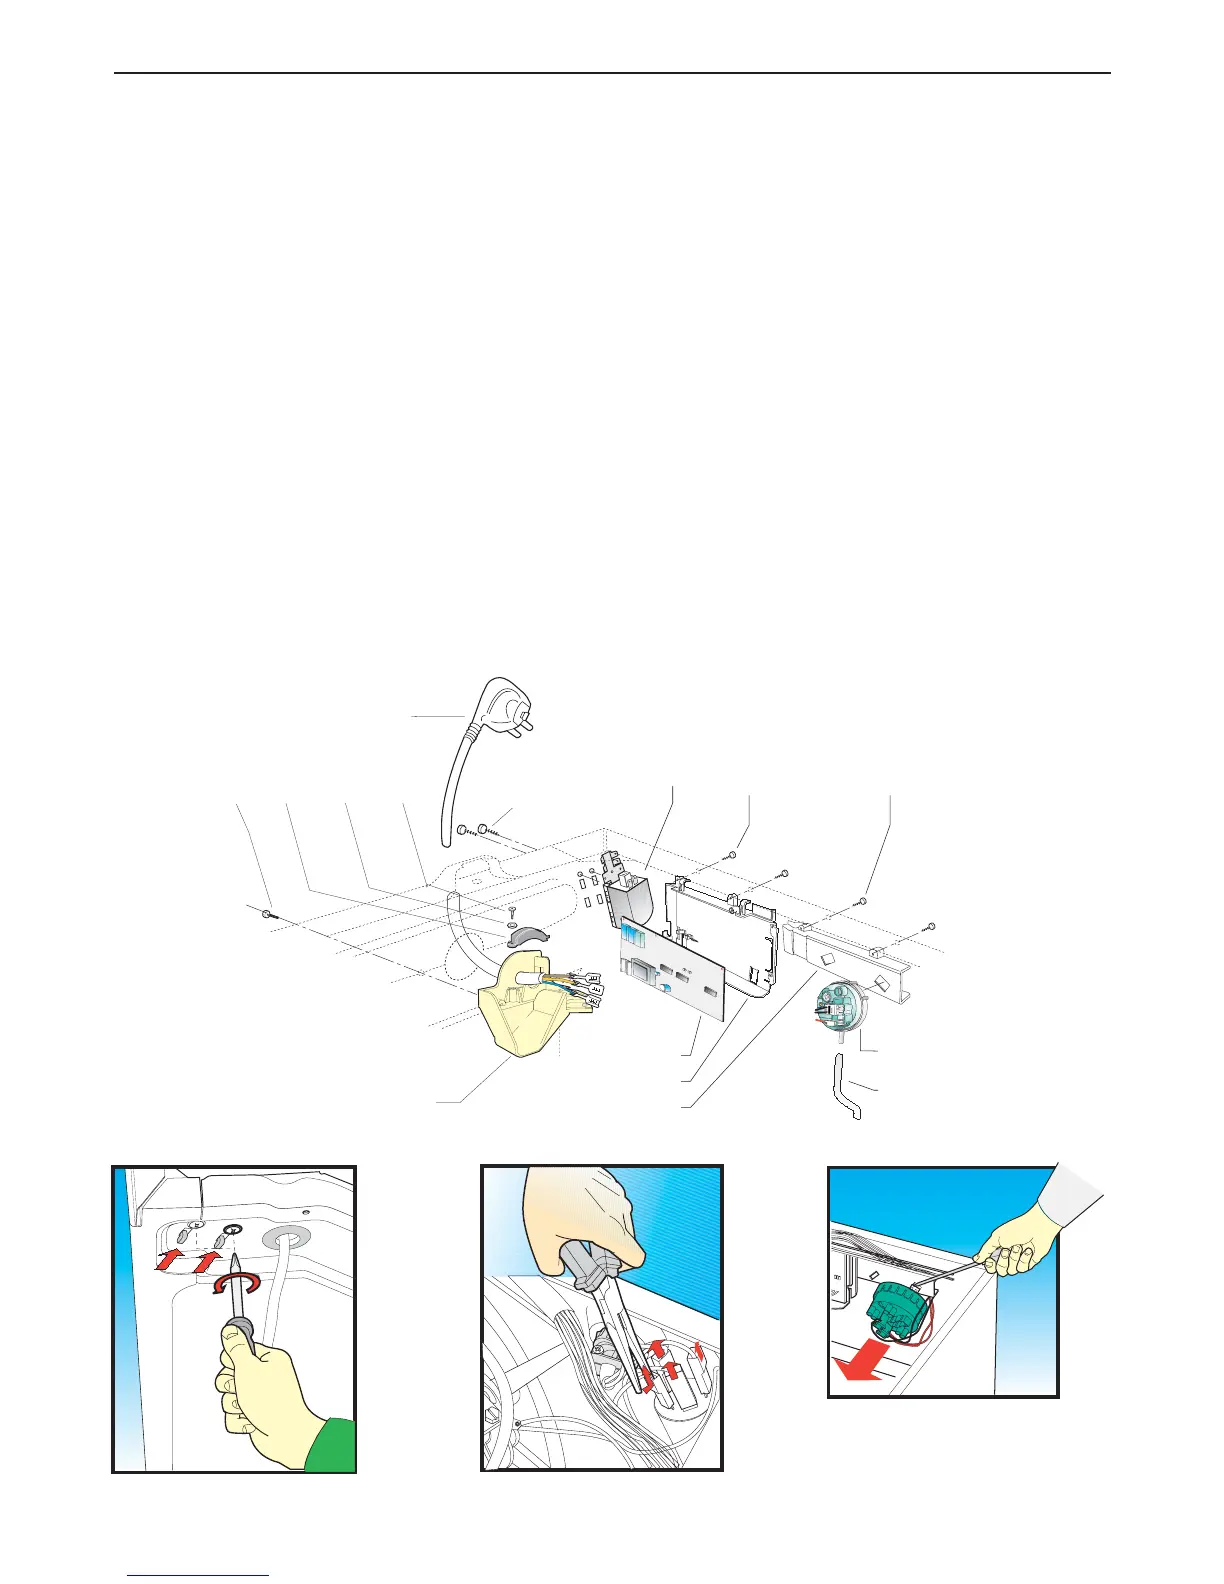
Step 11 Removing and/or replacing:
- the power supply cable (D100)
- the suppressor (D240)
- the cable grommet and pressure switch mounting (D019)
- the pressure switch (D020)
The following operations are common to all four components:
Remove the top cover (Step 1).
(a) To remove the power supply cable (D100), simply disconnect the wires from the suppressor (D060),
noting their positions. Important : The wires must be disconnected using a pair of pliers to pull off the fastons
without any sideways movement. It is also important not to pull the wires as this may compromise the
operation of the faston connectors. Use a cross-head screwdriver to slacken screw (D260) on the cable
grommet (D019), then pull the cable (D100) outwards.
To re-assemble, follow the same procedure in reverse order.
(b) To remove the suppressor (D240), disconnect the power supply cable (D100).
Use a cross-head screwdriver to slacken the two screws (A015) from the outside of the appliance,
then release it. To re-assemble, follow the same procedure in reverse order, taking care to insert the two
radio suppressor lugs in their respective slots in the appliance cabinet.
(c) To remove the cable grommet (D019), remove the power cable, remove fixing screw (D009) and remove
the grommet from the inside of the appliance. To re-assemble, follow the same procedure in reverse order.
(d) To remove the pressure switch (D020), disconnect the wires, noting their positions, then remove the
switch itself from its mounting box (D013) using a flat head tool to lever the locking tabs. Remove the
air pipe (F190).
To re-assemble, follow the same procedure in reverse order.
D060
A015
D009
D019
D260
D150D070
A220
A200
D013
D014
A210
D020
F190
D100