G030
G070
G060
G360
G350
G340
G530
G730
G240
G550
G140
G670
G004
For screwed
tub back plates
Bostik
G560
G570
G005
G019
Step 18 Removing:
- the tub back plate (G550)
- the drum (G530)
- the bearings (G220-G230)
- the seal (G240)
(a) Remove the top cover and rear panel ( Steps 1 and 2 ).
(b) Place a spacer under the motor in order to lift the oscillating unit.
(c) Remove the drive belt (G170) (Step 9).
(d) Remove the electrical wiring and earthing system, together with
the respective screws, noting the positions of the wires.
(e) Remove the adjustable thermostat bulb, the fixed thermostats
and their respective gaskets (Step 16).
(f) Remove the heater element (Step 15).
(g) Use two 13 mm spanners to remove the tub back plate fixing
ring (G730) and gasket (G060).
For 42 litre stainless steel tubs with screw fixing:
Use a 10 mm box spanner unscrew the twelve tub back
plate fixing screws (G004).
For 42 litre polypropylene tubs: Use an 8 mm box spanner to unscrew the
twelve tub back plate fixing screws (G004). Remove the
wash motor (Step 13)
For 47 litre polypropylene tubs: Use an 8 mm box spanner to unscrew the
twenty two tub back plate fixing screws (G004). Remove the
wash motor (Step 13)
For 39 cm washing machines: Use an 8 mm box spanner to unscrew the
twenty three tub back plate fixing screws (G004). Remove
the wash motor (Step 13)
For 33 cm washing machines: Use an 8 mm box spanner to unscrew the
twenty three tub back plate fixing screws (G004). Remove
the wash motor (Step 13)
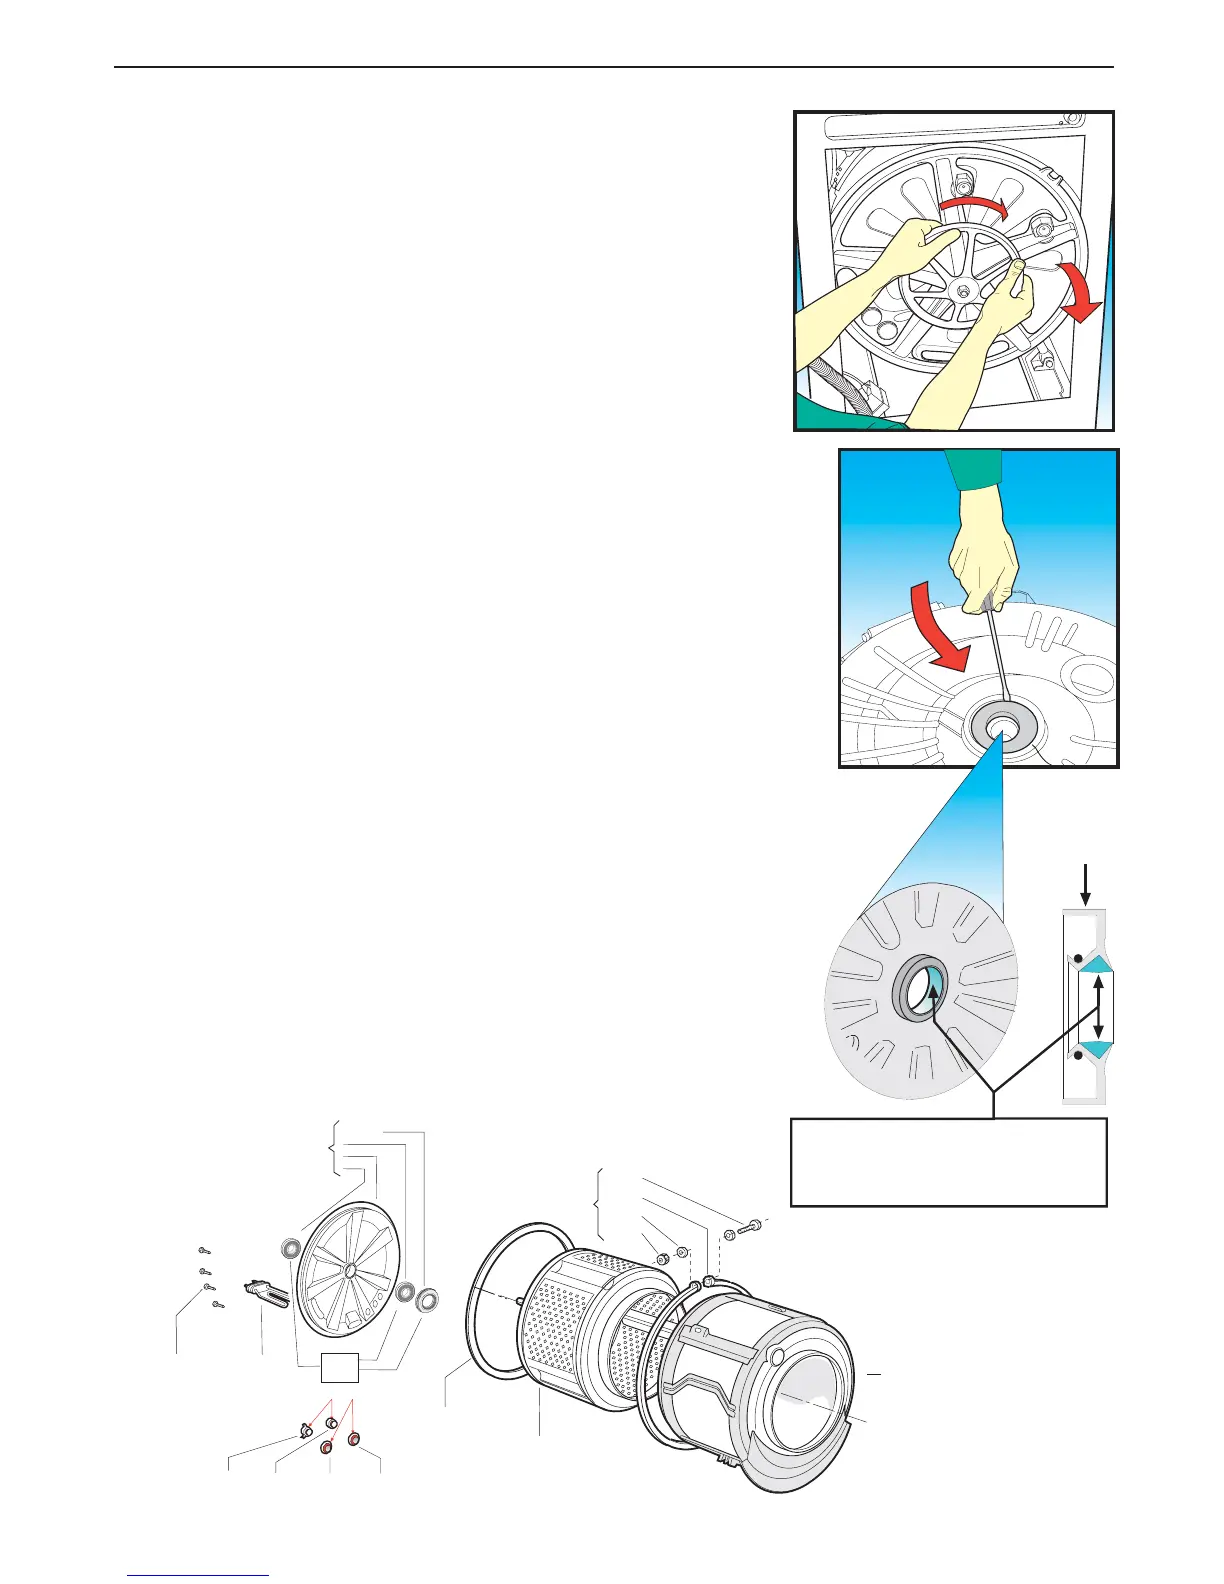
(h) Grasp the pulley and rotate the tub back plate by hand until
the locating slot is freed, then remove it.
(i) Use a 19 mm spanner to remove nut (G210) and cup washer
(G580) from the drum shaft.
(j) The pulley can normally be removed from the drum shaft manually.
However, if this is not possible, use a rubber headed hammer to
gently strike the shaft.
(k) To separate the tub back plate from the drum, hit the shaft
gently using a rubber headed hammer.
(l) If necessary, at this point replace the bearings (G220-G230).
(m) If necessary, replace the seal (G240) on the tub back plate
using a flat screwdriver.
(n) To re-assemble, follow the same procedure in reverse order,
making sure to apply water-repellent grease inside the seal
(G240). It is advisable to use a new gasket between the tub
back plate and the tub itself and to wet the contact surfaces
with a solution of liquid silicone to facilitate positioning the gasket.
In addition, when tightening the back plate fixing ring, use a rubber
hammer to strike around the circumference of the plate to ensure
that the back plate, gasket and tub are assembled together correctly.
Remember to apply a Bostik type heat resistant sealant between the
fixed thermostats and the gaskets and between the gaskets and
the tub back plate.
Seal
ring
section
GREASE
Supplier: KLÜBER
Tupe : AMBLYGON TA 15.2
Supplier code: 547357
Quantity: 3 grams