Step 17 For 33 cm and 39 cm washing machines:
Removing the upper counterweight (G020):
(a) Remove the top cover (Step 1).
(b) Remove the rear cover (Step 2).
(c) Use a crosshead screwdriver to remove the three fixing screws (C150) securing the detergent
dispenser to the control panel.
(d) Use a long crosshead screwdriver to remove the four fixing screws (B290) securing the control panel
(B010) (Step 28).
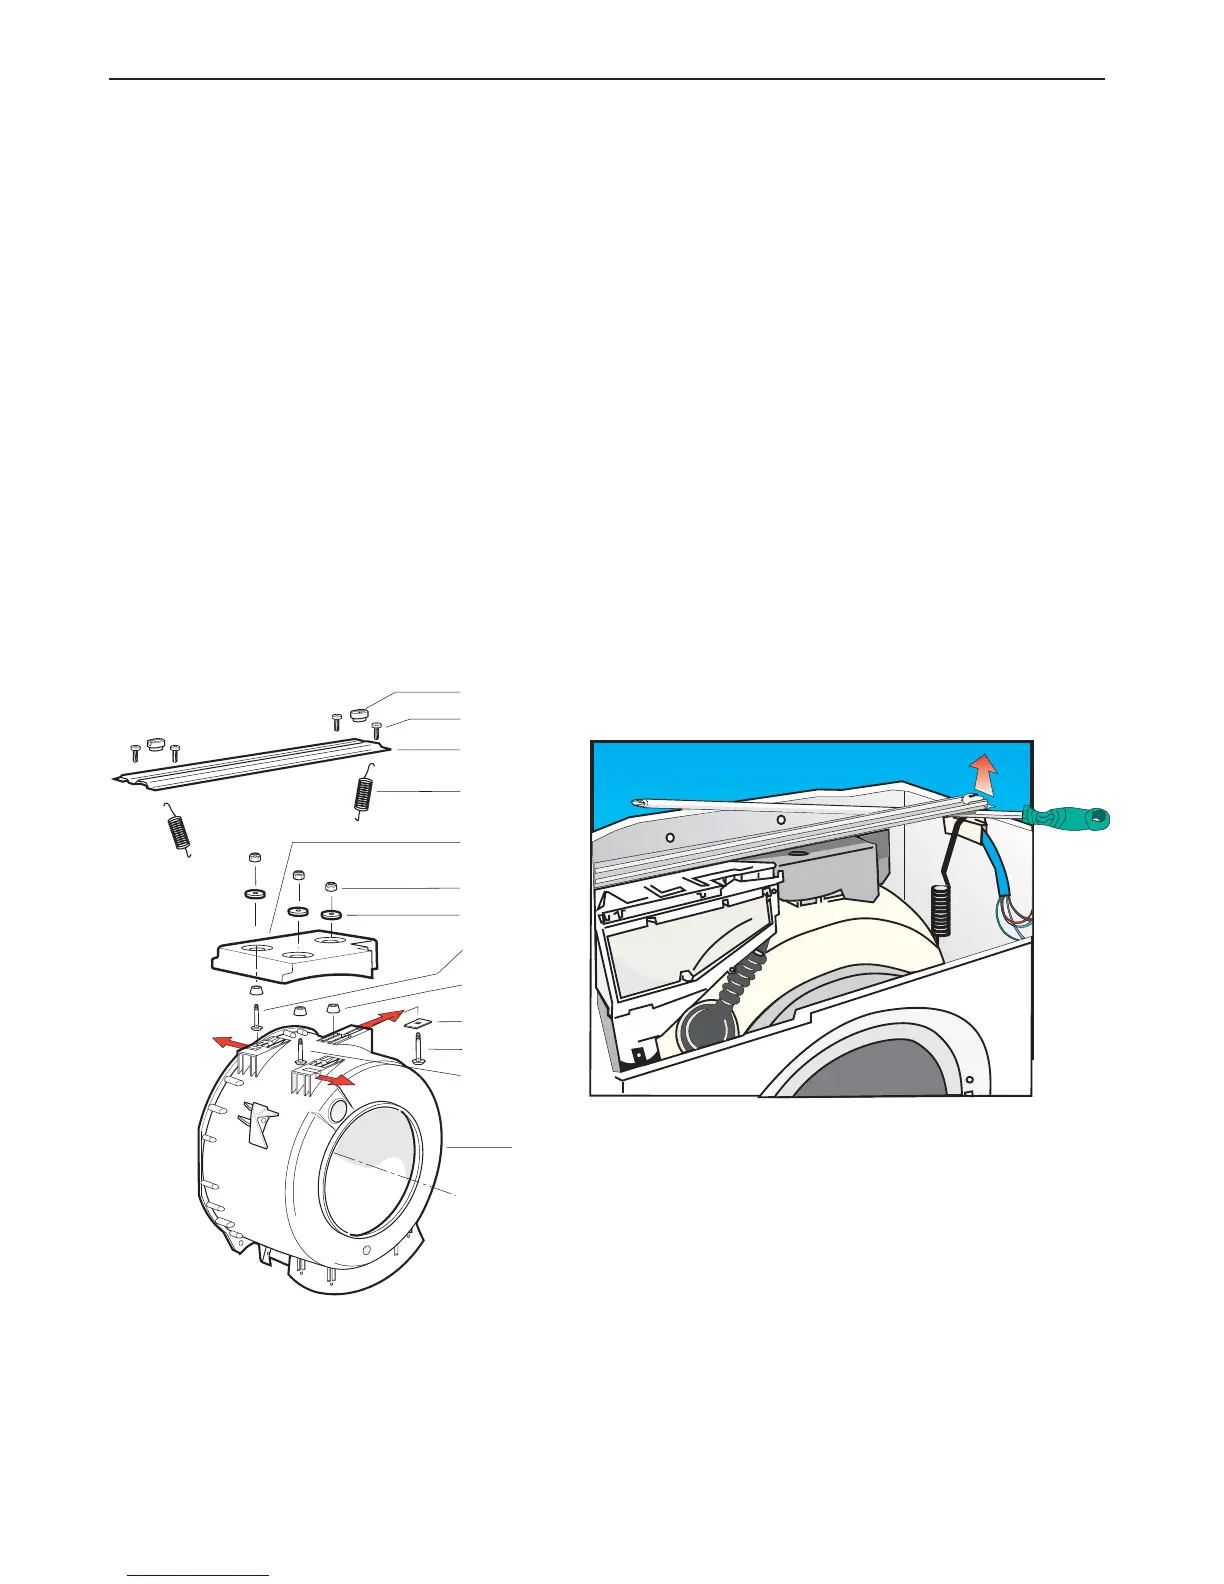
(e) Use a crosshead screwdriver to remove the two fixing screws (G440) securing the spring anchor
cross-member (G010) on the right-hand side of the washing machine.
(f) Raise the spring anchor cross-member (G010) a few centimetres and insert a spacer between it
and the top edge of the cabinet (the long screwdriver can be used for this purpose; see figure).
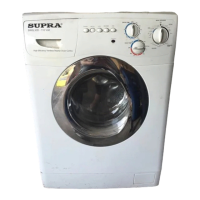
(g) Use a 13 mm box spanner to remove the three nuts (G042) securing the upper counterweight and
the three washers (G043).
(h) In order to remove the upper counterweight (G020), the three fixing bolts (G064-G063-G065)
must be removed first. Lift the counterweight near to bolt (G063) at the front of the tub and remove
the bolt from its housing slot. Use a pair of pliers if necessary.
Leave the bolt assembled with the counterweight support plate (G590) and bush (G066).
(i) Repeat this operation for bolt (G065) at the rear of the tub.
(j) To remove bolt (G064) on the right of the tub, slide the counterweight towards the right-hand side
of the cabinet.
To re-assemble:
Start with bolt (G064) by placing it with its components on the new counterweight. Insert the entire
assembly in the housing slot. For the remainder, follow the dismantling procedure in reverse order.
G030
G440
G010
G020
G042
G066
G043
G430
G200
G064
G590
G065
G063