Synology DiskStation User's Guide
Based on DSM 3.1
121 Chapter 10: Host Websites, Email Server, and Print Server
Manage WebDAV
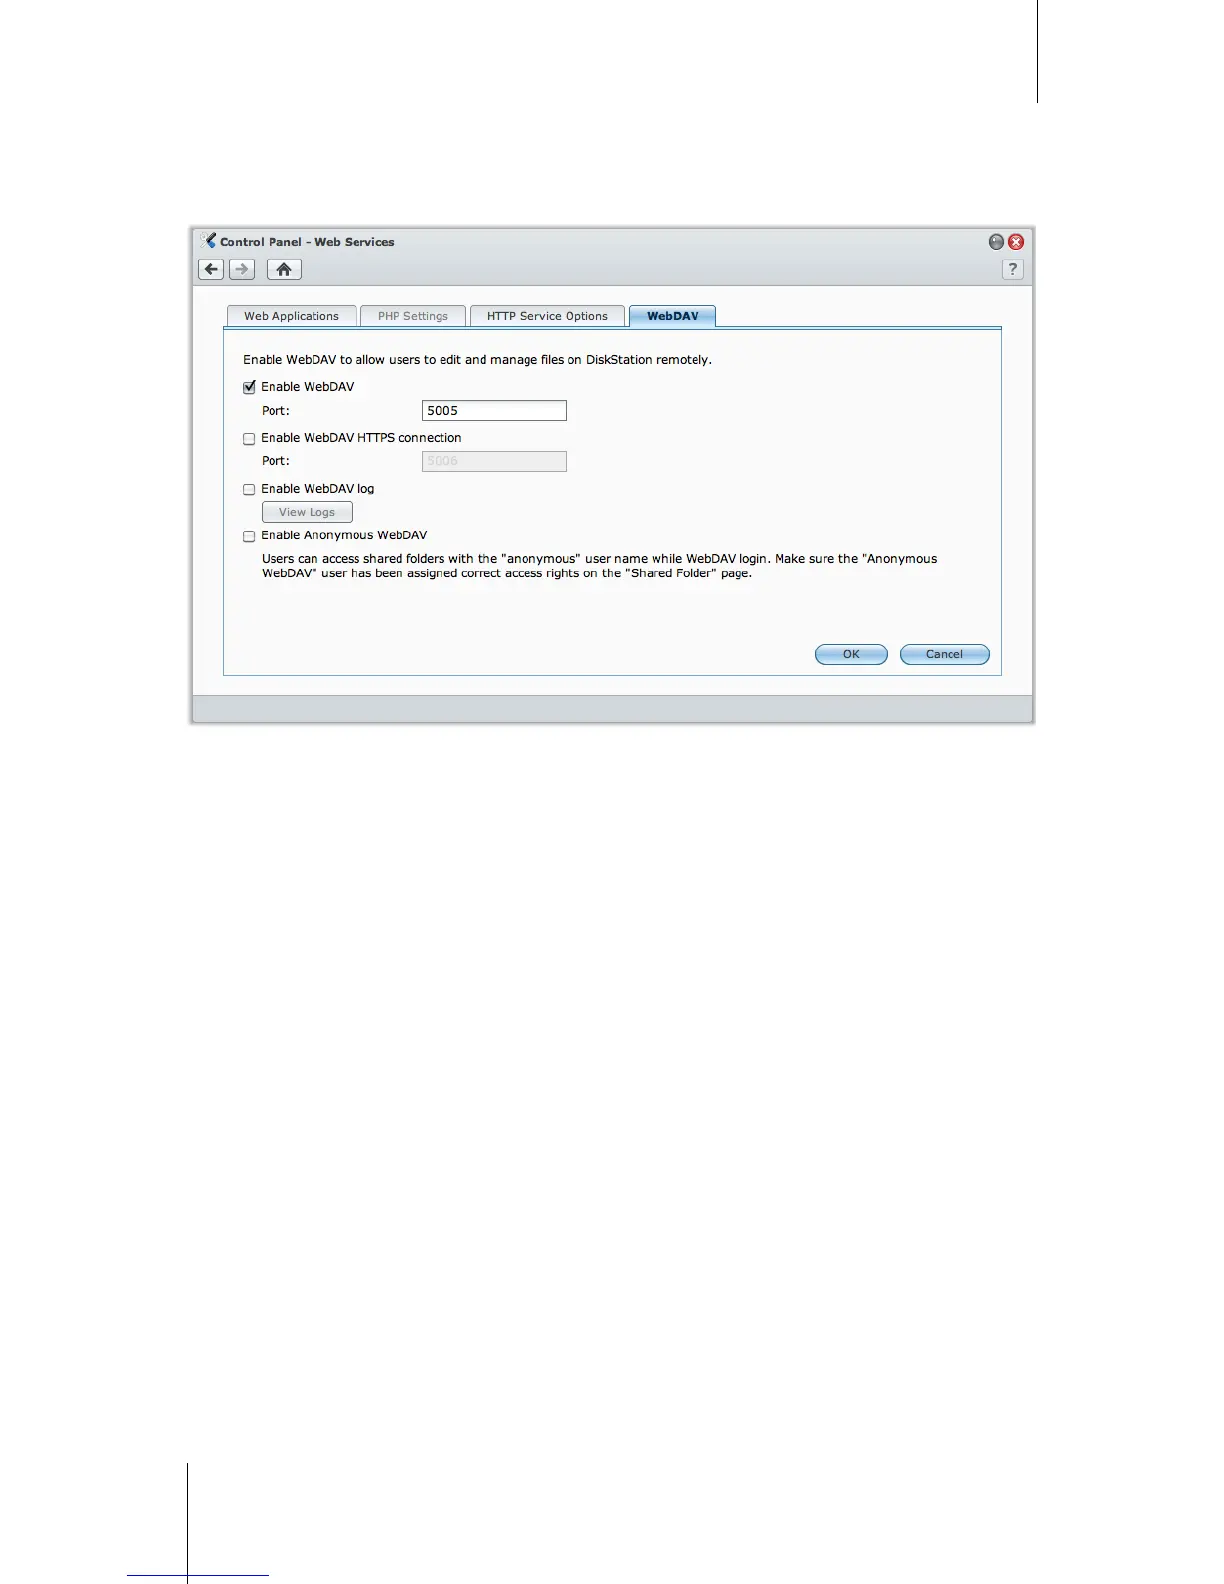
Click the WebDAV tab at Main Menu > Control Panel > Web Services to enable WebDAV. By enabling
WebDAV, you can manage and edit files on DiskStation remotely.
To enable WebDAV:
For HTTP connection:
a Tick the Enable WebDAV checkbox. The default port number for the WebDAV service is 5005.
b Click OK.
For HTTPS connection:
a Tick the Enable WebDAV HTTPS connection checkbox. The default port number for WebDAV HTTPS is
5006.
b Click OK.
Use WebDAV to Manage Files in Different Environments
You can use WebDAV to manage files in different environments. You can set it up as a network drive on your
operating system, or access it via a browser or on a smartphone.
When using WebDAV service, we suggest you use UTF-8-supported WebDAV clients to manage your files. This
can prevent the file names from becoming unreadable characters after uploading.
To use WebDAV on Windows XP/Vista:
1 Right-click on My Computer and select Map Network Drive.
2 Click Connect to a Web site that you can use to store your documents and pictures.
3 Click Next.
4 Click Next.
5 Enter the path for the network drive. The path should include the IP or the DDNS of your DiskStation and the
port number. An example would be http://demo.no-ip.info:5005/.
6 Click Next.
7 Enter your account and password. Click OK.
8 Name this network drive. Click Next.
9 Click Finish to finish the settings.



 To Next Page