Synology DiskStation User's Guide
Based on DSM 3.1
18 Chapter 2: Get Started with Synology DiskStation Manager
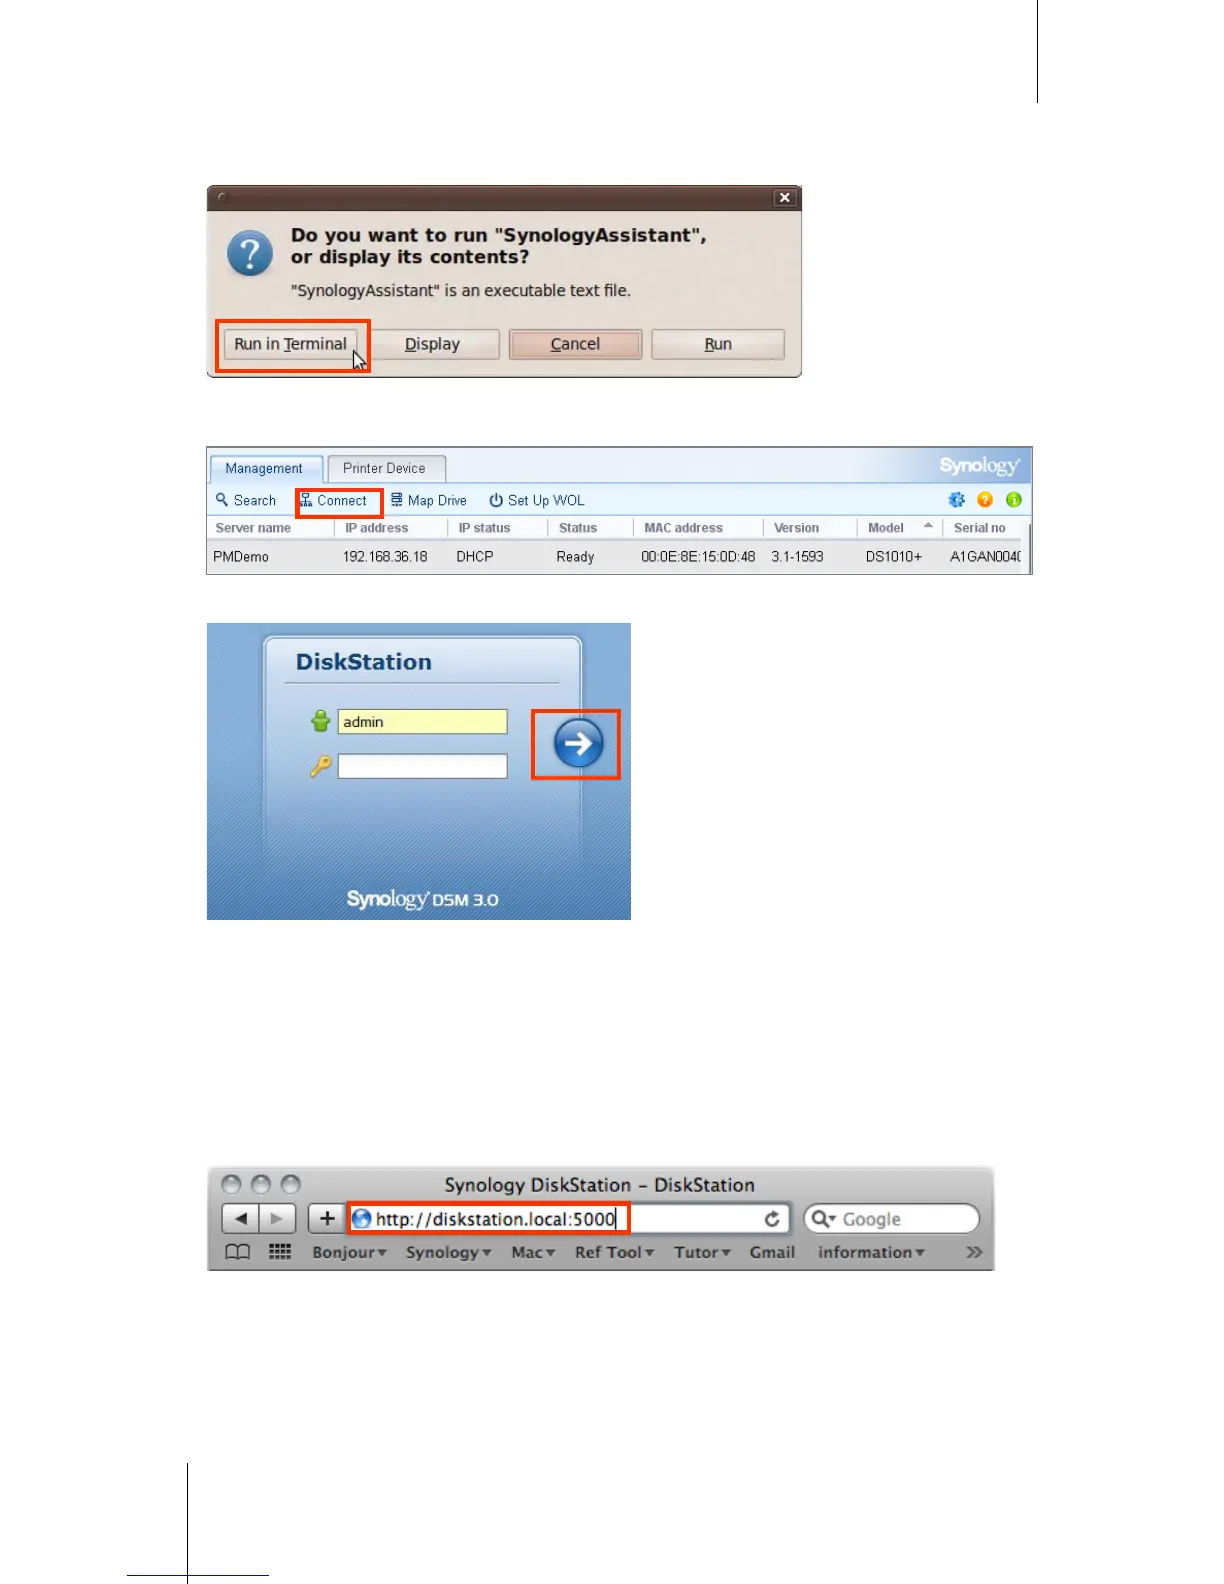
4 Go to the path /usr/local/SynologyAssistant (or [the path you just specified]/SynologyAssistant), double-
click SynologyAssistant, and then select Run in Terminal in the dialog box that appears.
5 Choose the server you want to manage. Click Connect or double-click the selected server to go to DSM's
login screen.
6 Enter your user name and password, and click Login. The default password for admin is empty.
Use a Web Browser
1 Open a web browser window.
2 In the address field, enter any of the following:
http://Synology_Server_IP:5000
http://Synology_Server_Name:5000/ (or http://Synology_Server_Name.local:5000/ on a Mac)
Synology_Server_Name should be replaced with the name you set up for Synology DiskStation during the
setup process. If you choose One-step Setup during the setup process, the Synology_Server_Name will be
DiskStation, CubeStation, USBStation, or RackStation.
3 Press Enter (PC) or Return (Mac) on your keyboard.