Synology DiskStation User's Guide
Based on DSM 3.1
47 Chapter 4: Manage Storage Space
5 Choose either of the following:
Create a new Disk Group: This action will create a new Disk Group from unused hard disks, and then
create a volume on the newly-created Disk Group. Click Next and do the following:
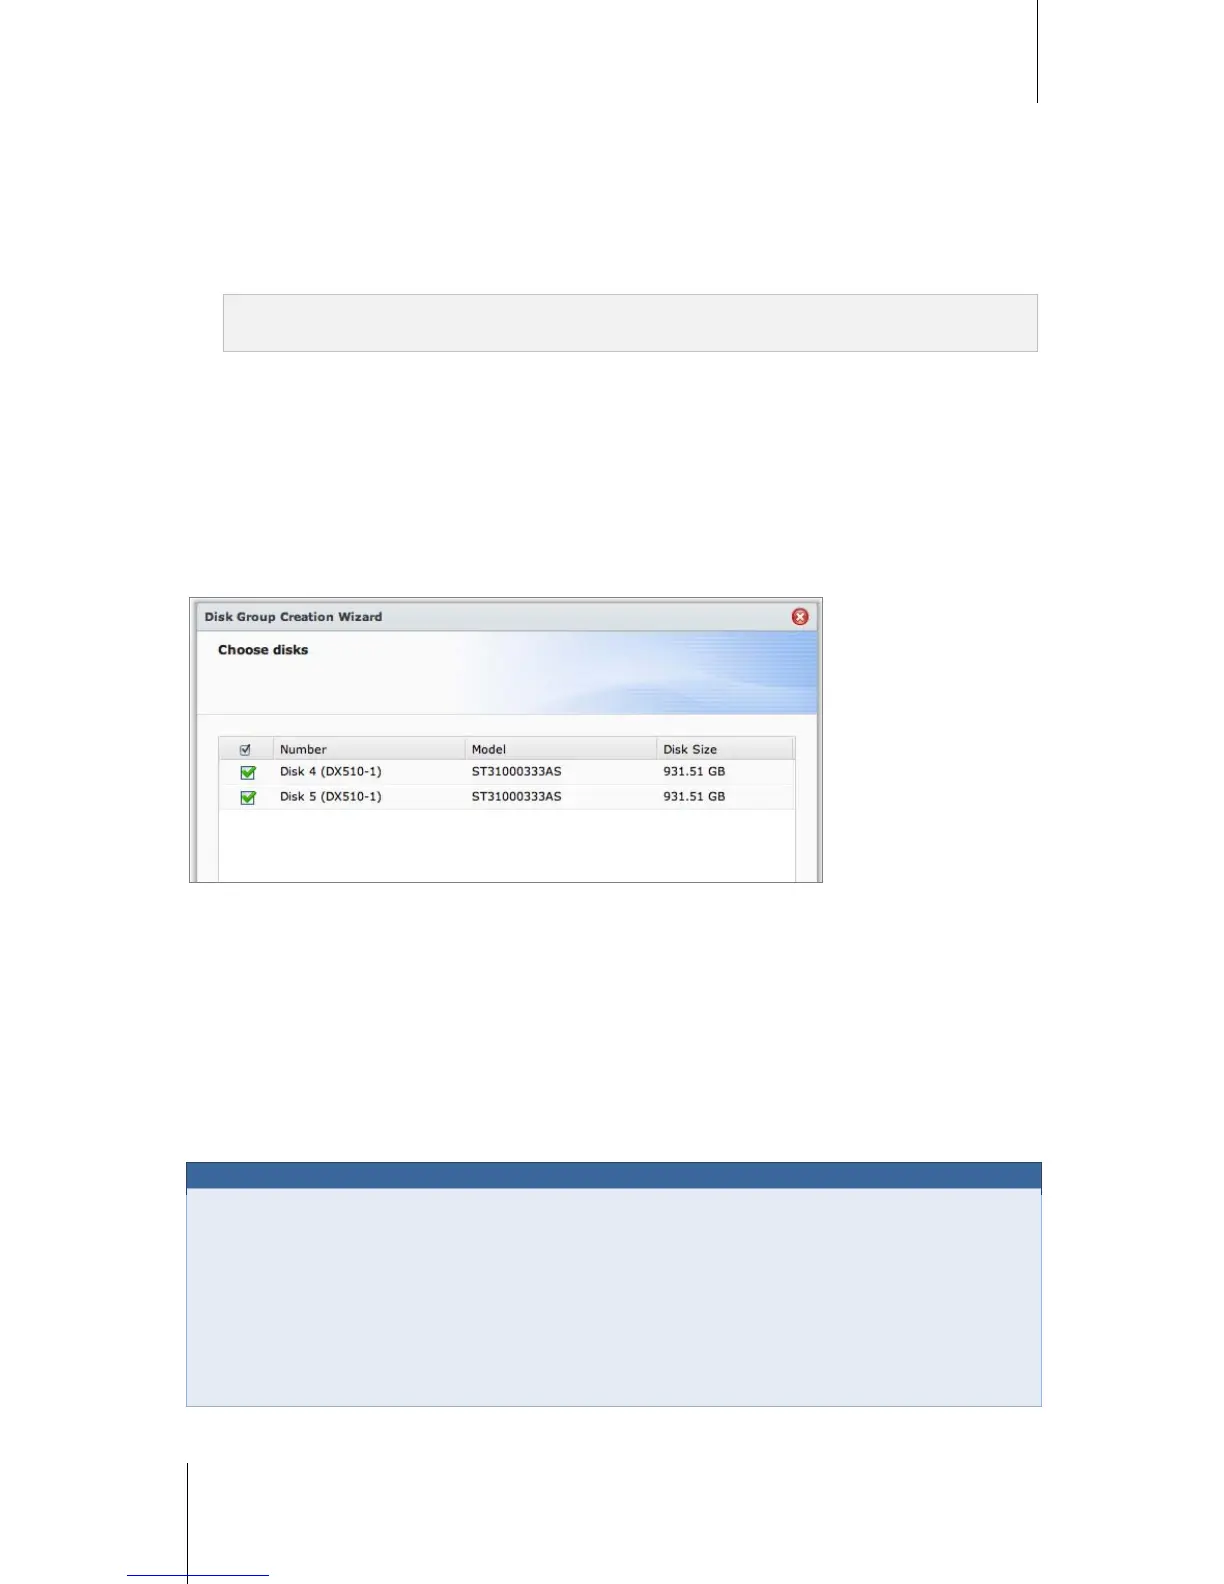
a Choose the hard disks you want to add to the Disk Group, and then click Next.
b Click Yes to confirm, and then choose available RAID type for the new Disk Group. Click Next to continue.
c Choose whether to perform disk check, and then click Next.
Note: The newly-created Disk Group will be displayed under the Disk Group tab. You can also create a Disk
Group by following the instructions of "Create a Disk Group" (shown blow).
Choose an existing Disk Group: This action will create a volume on an existing Disk Group. Choose the
Disk Group from the drop-down menu, and click Next.
6 On the Allocate volume capacity page, enter a number in the Allocate Size (GB) field to specify the volume
capacity, and click Next.
7 Click Apply to start volume creation.
Create a Disk Group
You can also create a Disk Group on your DiskStation, and then create multiple volumes on the created Disk
Group.
To create a Disk Group:
1 Click the Disk Group tab.
2 Choose the hard disks you want to add to the Disk Group, and then click Next.
3 Click Yes to confirm, and then choose available RAID type for the new Disk Group. Click Next to continue.
4 Choose whether to perform disk check, and then click Next.
5 Click Apply to start Disk Group creation.
To create volumes on the created Disk Group:
Follow the instructions of "Create a Volume by Allocating Partial Space on a Disk Group" on Page 46. Choose
Choose an existing Disk Group in step 5, and choose the Disk Group to create a volume on it.
maximum size of a shared folder by doing the following:
1 Create a volume and specify its capacity by following the instructions of "Create a Volume by Allocating
Partial Space on a Disk Group" (shown above).
2 Create a single shared folder on the newly-created volume. (See "Set Up Shared Folders" on Page 79 for
more information.)
3 After the setup is complete, the maximum size of the shared folder will be limited to be the same as the
volume capacity.