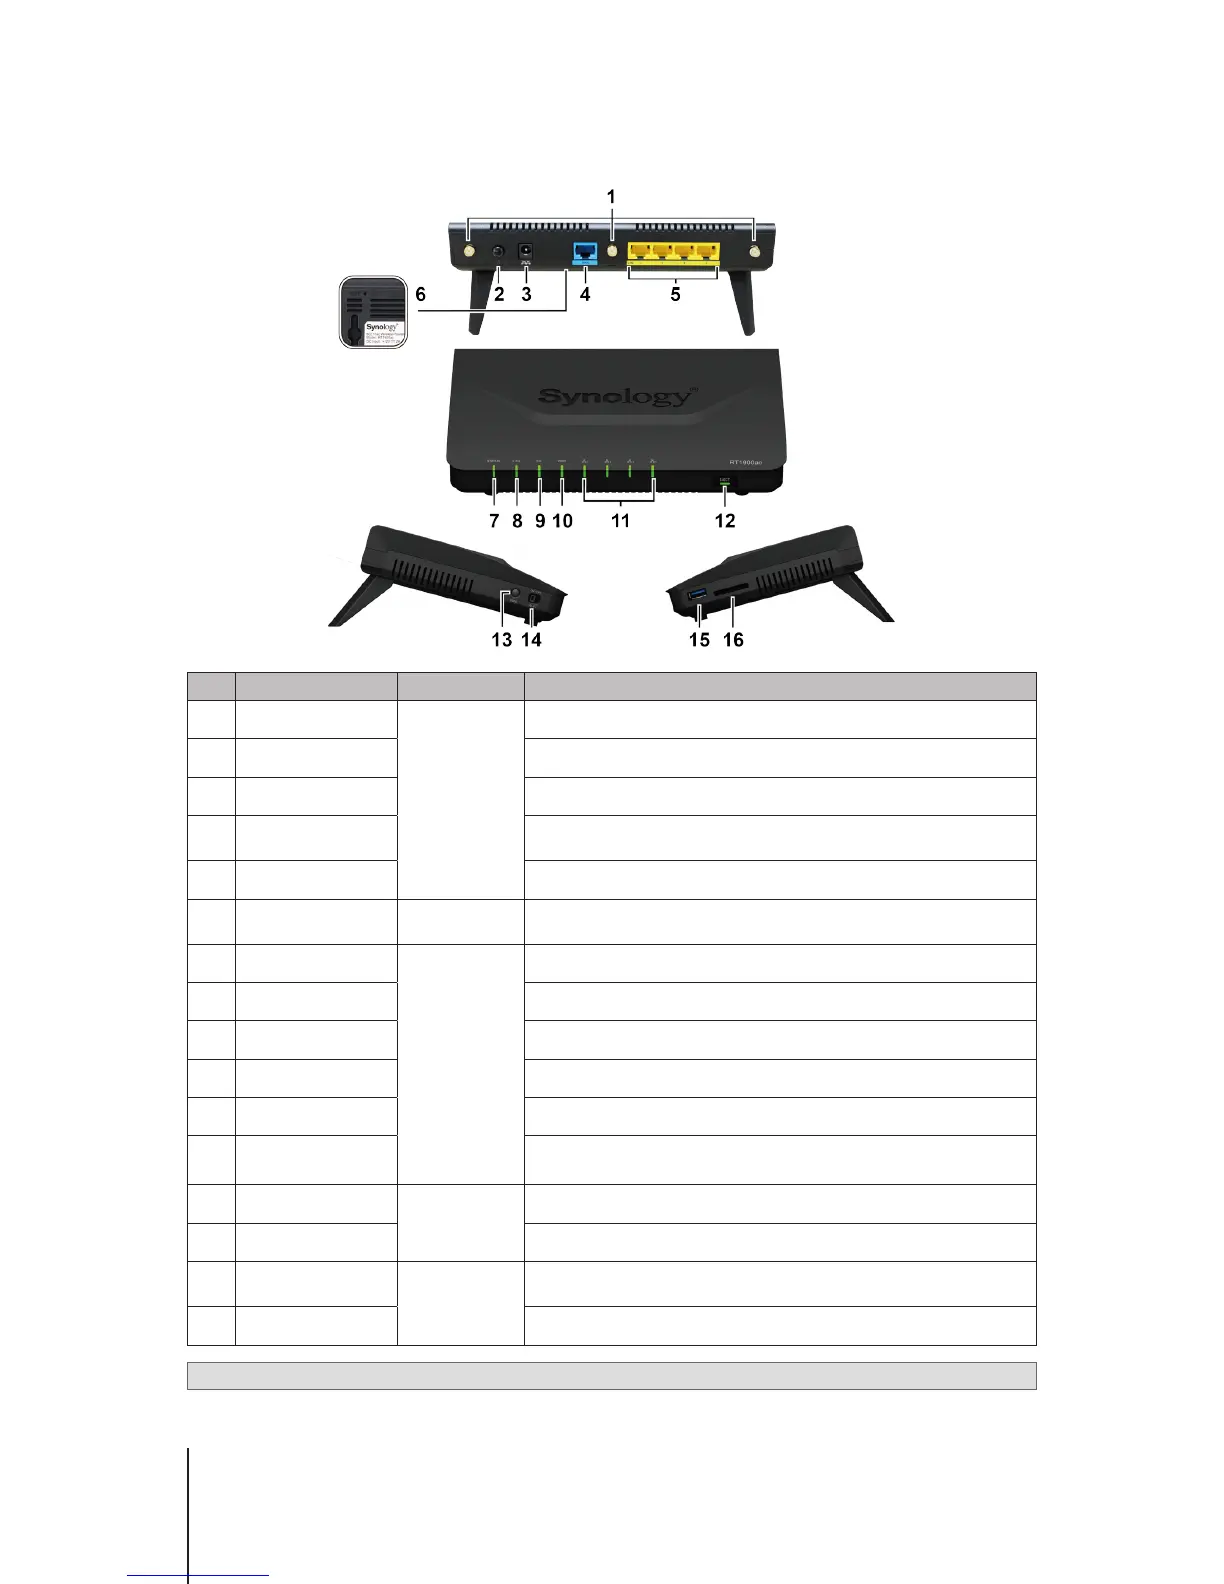
5
Chapter 1: Meet Your Synology Router
Synology Router at a Glance
No. Article Name Location Description
1
Antenna Base
Rear Panel
Install the included antennas here.
2
Power Button Press to power on/off the Synology Router.
3
Power Port Connect the AC power adapter here.
4
WAN Port
Connect a network cable from the ISP modem into this port to establish
WAN connection.
5
LAN Port Connect network cables into these ports to establish LAN connection.
6
RESET Button Bottom Panel
Press and hold for four seconds (Soft Reset) or for ten seconds (Hard
Reset). For more information, see "Reset Synology Router".
7
STATUS Indicator
Front Panel
Displays the status of the system.
8
2.4G Wi-Fi Indicator Displays the status of 2.4G Wi-Fi connection.
9
5G Wi-Fi Indicator Displays the status of 5G Wi-Fi connection.
10
WAN Indicator Displays the status of WAN connection.
11
LAN Indicator Displays the status of LAN connection.
12
Eject Button
1. Press to eject USB/SD external storages.
2. Displays the status of USB/SD external storages.
13
WPS Button
Left Panel
Press to start WPS.
14
Wi-Fi Switch Switch to turn on/off the Wi-Fi network.
15
USB 3.0 Port
Right Panel
Connect an external drive, USB printer, or other types of USB devices
here. For more information, see "Manage External Devices and Privileges".
16
SD Card Slot Insert the SD card here.
Note:
For LED indicator information, please refer to "Appendix B: LED Indicator Table".