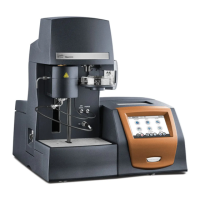
ARES-G2 Getting Started Guide Page 52
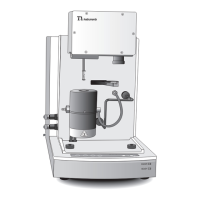
Environmental Control Power Supply
CAUTION: Make sure there is no power going to the power supply unit while making the connec-
tions described here. Turn the power switch to the off position.
MISE EN GARDE: Assurez-vous que le bloc d'alimentation électrique n'est pas alimenté en courant
pendant le réglage des connexions décrites ici. Placez l'interrupteur d'alimentation sur la position
d'arrêt.
To connect the environmental control power supply, follow these steps:
Figure 30 Environmental Control power supply.
1 Place the environmental control power supply on top of the test station (lower) power supply or on top
of a previously installed FCO power supply, within the limit of the cable length. Make sure you have
access to the rear of the power supply and the ARES-G2.
2 Obtain the loose end of one of the accessory cables that have already been connected to the lower power
supply (see step 2
on page 49), and insert it into the accessory port on the environmental control power
supply.
3 Connect the power cable from the Accessory Control connector on the rear of the ARES-G2 to the
connector located on the upper right side of the fan.
4 Obtain the loose end of one of the power cables that are already connected to a switched accessory power
outlet on the lower power supply (step 4
on page 49). Connect this to the power inlet next to the power
switch on the environmental control power supply.
5 Using the grip handles, position the power supplies as desired. (They may be placed on the floor or on
the table top.)
6 Proceed to the next section to connect the ARES-G2 test station to your network. DO NOT switch on
the power supply at this point.
Power
switch
Accessory
power cord to
switched mains
Fan
Power
cable to
ARES-G2
Accessory
to test station
power supply
communication