68
Model C606Operating Procedures
150619
Step 3
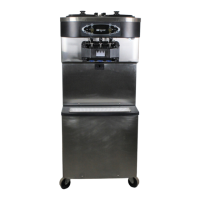
Install the shake cup holder. (See Figure 160.)
Figure 160
Step 4
Select the AUTO symbol
.
Step 5
Fill the hopper with fresh mix and place the mix
hopper cover in position.
Priming - Soft Serve Side
Note: Use only FRESH MIX when priming the
freezer.
Step 1
With a pail beneath the door spout, open the draw
valve. Pour 2-1/2 gallons (9.5 liters) of FRESH mix
into the mix hopper and allow it to flow into the
freezing cylinder. This will force out any remaining
sanitizing solution. When full strength mix is flowing
from the door spout, close the draw valve.
IMPORTANT! Failure to remove all sanitizing
solution may result in damage to the freezing
cylinder.
Step 2
When mix stops bubbling down into the freezing
cylinder, remove the cotter pin from the outlet fitting
of the mix pump. Insert the outlet end of the mix
feed tube into the mix inlet hole in the mix hopper.
Place the inlet end of the mix feed tube into the
outlet fitting of the mix pump. Secure with cotter pin.
Step 3
Select the AUTO symbol
.
Note: This procedure should be done 15 minutes
before product is expected to be served.
Step 4
Fill the hopper with fresh mix and place the mix
hopper cover in position.
Daily Closing Procedures
This procedure must be done at the close of
business.
Shake Side
Important: Fill the mix hopper with mix up to the fill
level indicator on the agitator paddle.
(See Figure 161.)
Figure 161
Both sides of the freezer must be in the AUTO mode
(AUTO symbol
is illuminated) or in the STANDBY
mode (STANDBY symbols
and are
illuminated) before the HEAT cycle may be started.
Note: If the BRUSH CLEAN COUNTER display has
counted down to 1 day, do not add mix.The
machine must be disassembled and brush cleaned
within 24 hours.
Step 1
Remove the hopper cover, shake cup holder, splash
shield and drip pans.
Make sure your hands are clean and sanitized
before performing these next steps.
Note: Select the CALIBRATION symbol
to stop
agitator movement for 10 seconds. Select the
CALIBRATION symbol
again to exit the
calibration mode. The agitator will automatically
restart after 10 seconds.
Step 2
Remove the agitator from the mix hopper and the
restrictor cap from the shake freezer door spout.