7
2.2.2. Precautions for servicing
Note for assembly and disassembly
• When turning the unit over, be sure to close the dust cover or put a cardboard as a base, and place the unit on a soft thick cloth
or cushion, etc, to prevent cracking.
• When removing the DC motor unit and tone arm unit, be sure to attach a soft cloth inside the dust cover beforehand to prevent
cracking.
Note after replacing the main PCB, DC motor unit and pitch PCB
• After replacing the main PCB, perform "PITCH ADJ center position adjustment" and "amountic adjustment".
• After replacing the DC motor unit, perform "amountic adjustment".
• After replacing the pitch PCB, perform "PITCH ADJ center position adjustment".
(For details of each adjustment, see "8 Measurements and Adjustments".)
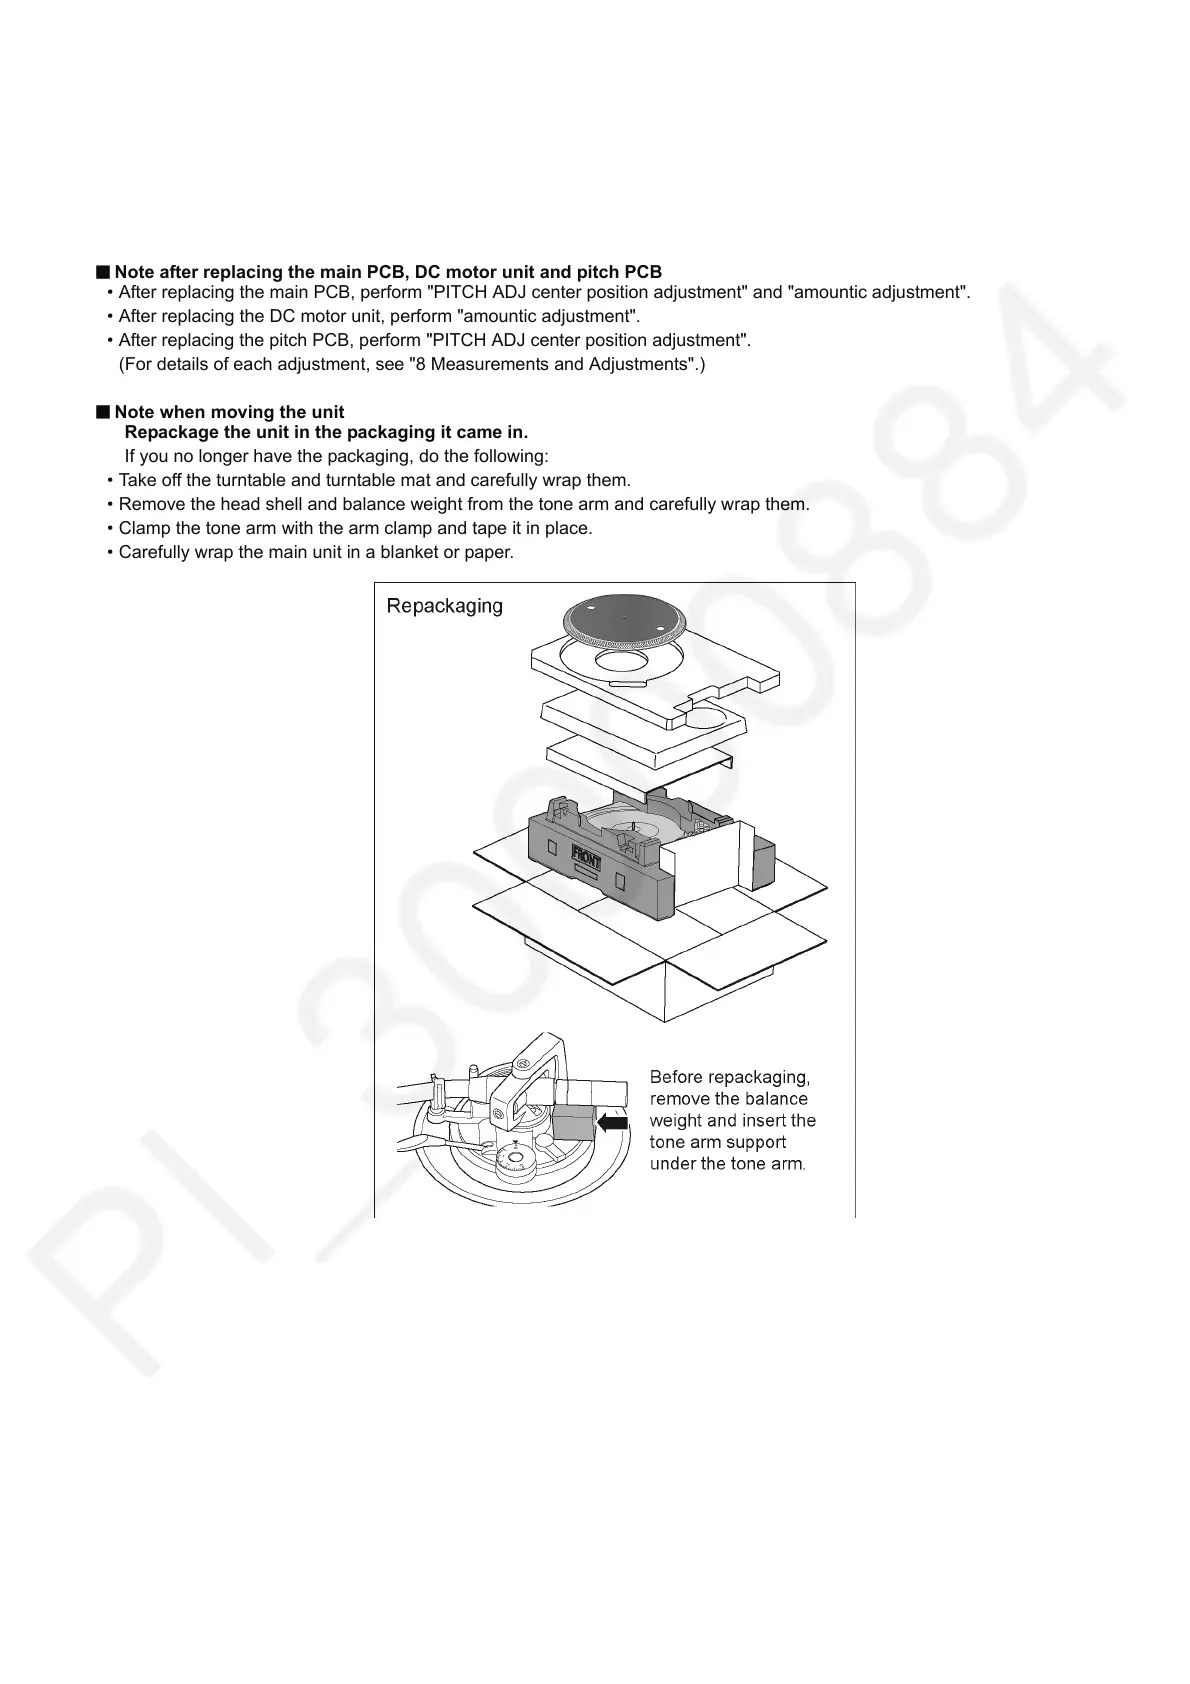
Note when moving the unit
Repackage the unit in the packaging it came in.
If you no longer have the packaging, do the following:
• Take off the turntable and turntable mat and carefully wrap them.
• Remove the head shell and balance weight from the tone arm and carefully wrap them.
• Clamp the tone arm with the arm clamp and tape it in place.
• Carefully wrap the main unit in a blanket or paper.