Section 9 - Diagnostics
VM700A Option 01 (NTSC) & Option 11 (PAL) User Manual
9-13
ĆĆ
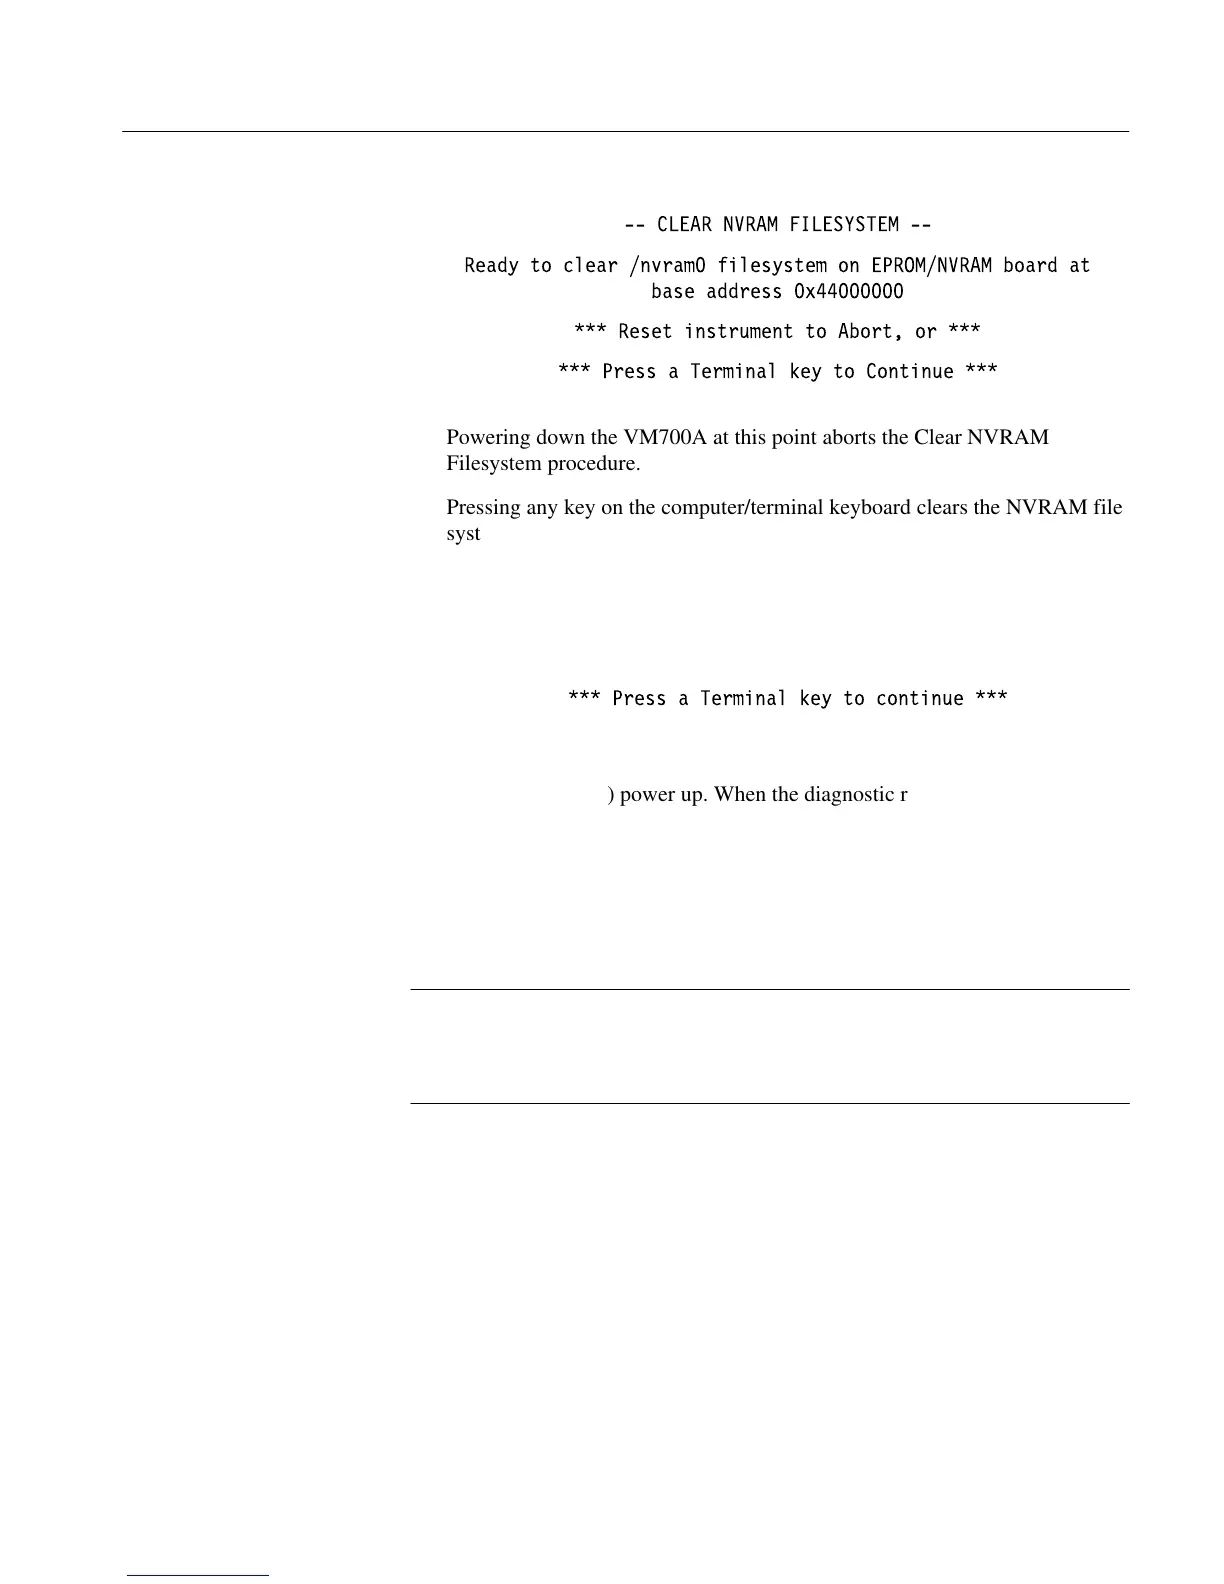
CLEAR NVRAM FILESYSTEM ĆĆ
Ready to clear /nvram0 filesystem on EPROM/NVRAM board at
base address 0x44000000
*** Reset instrument to Abort, or ***
*** Press a Terminal key to Continue ***
Powering down the VM700A at this point aborts the Clear NVRAM
Filesystem procedure.
Pressing any key on the computer/terminal keyboard clears the NVRAM file
system.
1 (CPU board), 2 (Display/FP board), 3 (Main ROM board): these
selections run the specified low-level diagnostics, in a manner similar to the
Interactive mode of user-selectable diagnostics. Upon completion of each
test, the VM700A pauses with the prompt message
*** Press a Terminal key to continue ***
While each low-level diagnostic runs in Debug mode, the terminal display is
nearly identical to the corresponding VM700A display during a normal
(non-Debug mode) power up. When the diagnostic routine completes all its
tests, the terminal displays the Debug mode main menu once more.
H - High-Level Debug mode: powers up the VM700A without running any
diagnostics, and takes you straight to the /nvram0/VM700A Diagnostics
directory. From this point, you can run any diagnostic, or use the soft keys to
get to the Console or Diagnostic Error files.
NOTE. If you want to use the VM700A after running it in High-Level Debug
mode, power the instrument down and start it back up again normally to
guarantee that all internal constants set during the power-up procedure are
correct.
In Debug mode, the low-level diagnostics use the four possible settings of two
jumpers on the A5 CPU board to determine the transmit and receive baud rates
when the instrument is initialized. Table 9-4 specifies the baud rates available
with these jumpers.
Serial Port Setup for
Low-Level Diagnostics,
Debug Mode