Thecus N4100 IP Storage Appliance
5
Chapter 3: Installing & Connecting
This chapter describes installing and connecting hardware on the Thecus N4100.
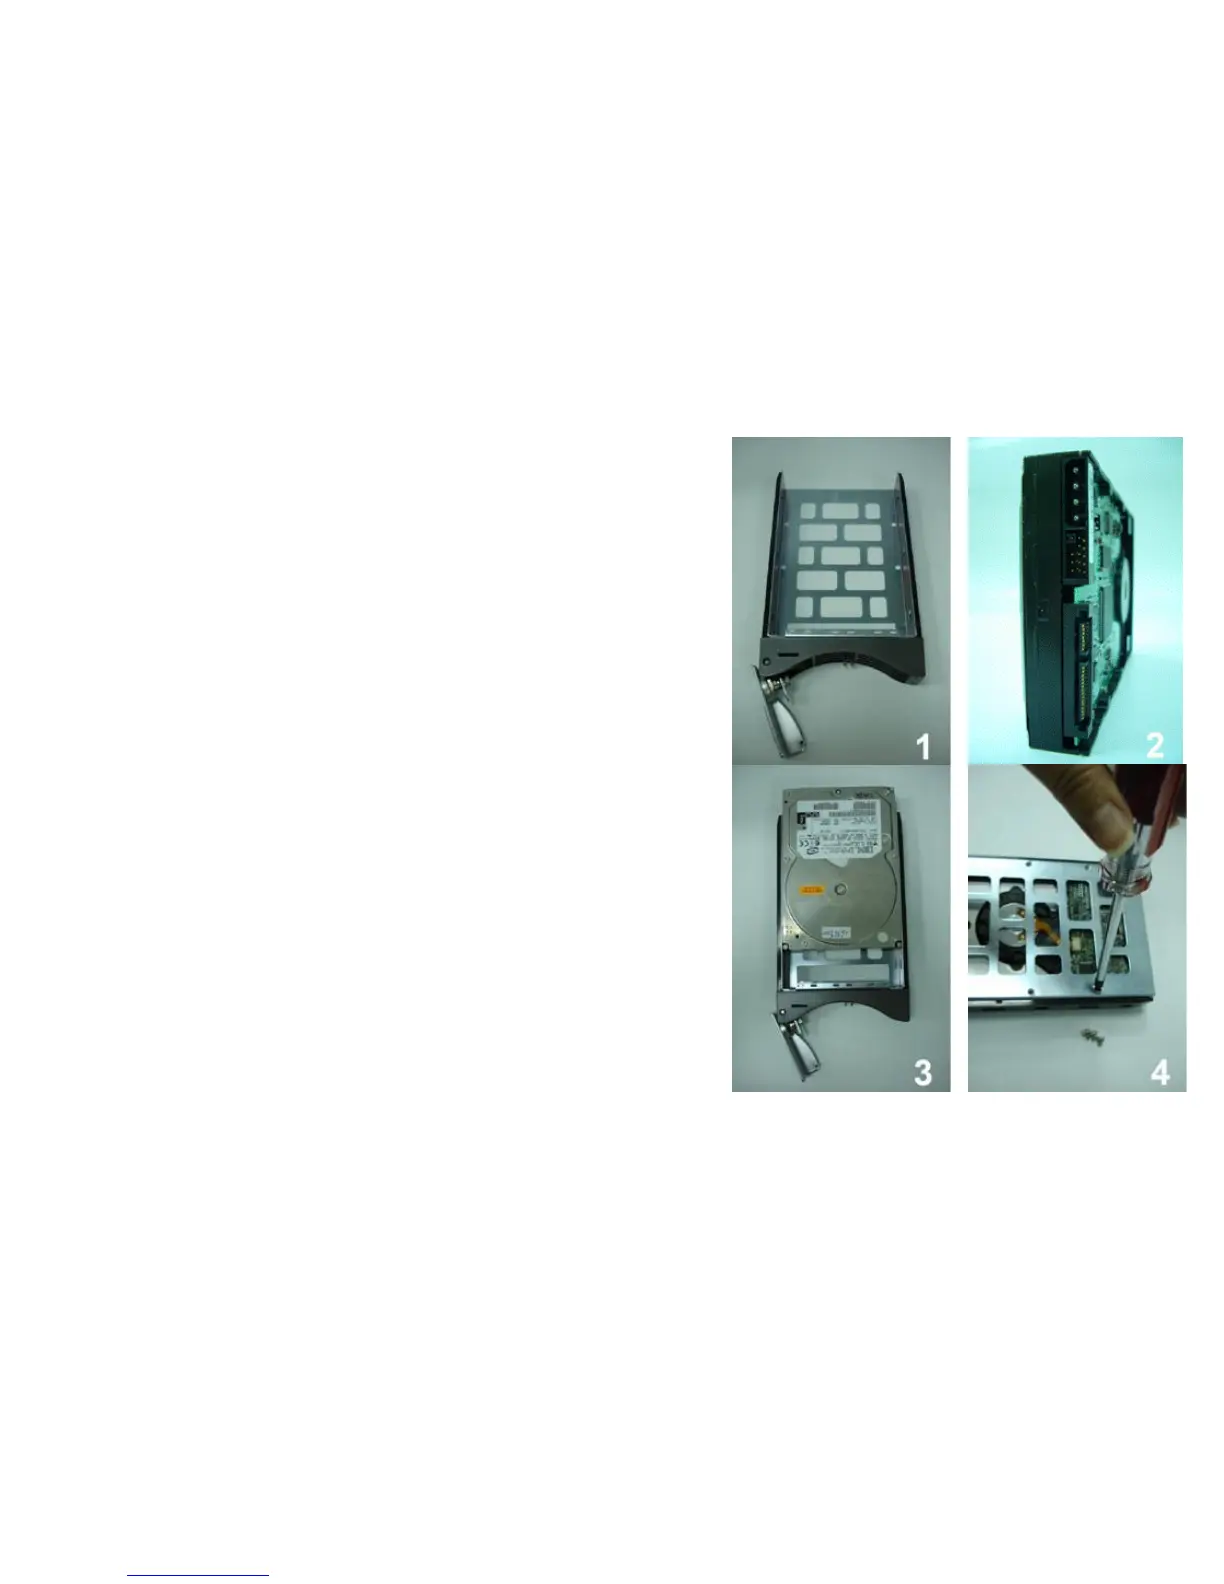
Installing Hard Drives
The Thecus N4100 allows easy installation and changing of hard disk drives for convenient upgrade
or repair. Install hard disk drives (HDD) into their trays as follows:
1. Remove an HDD tray from the Thecus N4100 IP Storage Appliance. (Photo 1)
2. Important! Check and make sure the HDD uses the SATA interface. (Photo 2)
3. Slide the new HDD into the tray and fasten the screws. (Photos 3 and 4)
4. Insert the HDD and tray back into the Thecus N4100 until it snaps into place and lock it with a
key if desired.
5. The LED blinks green when the HDD is accessed. If the Error LED flashes red it signals a
problem.
Note: If your HDD was part of a RAID 1 or 5 array previously, it automatically rebuilds. If you replace
all the drives with higher capacity drives, you need to go to Administrator login and format the drives.